

Elm Bark Processing
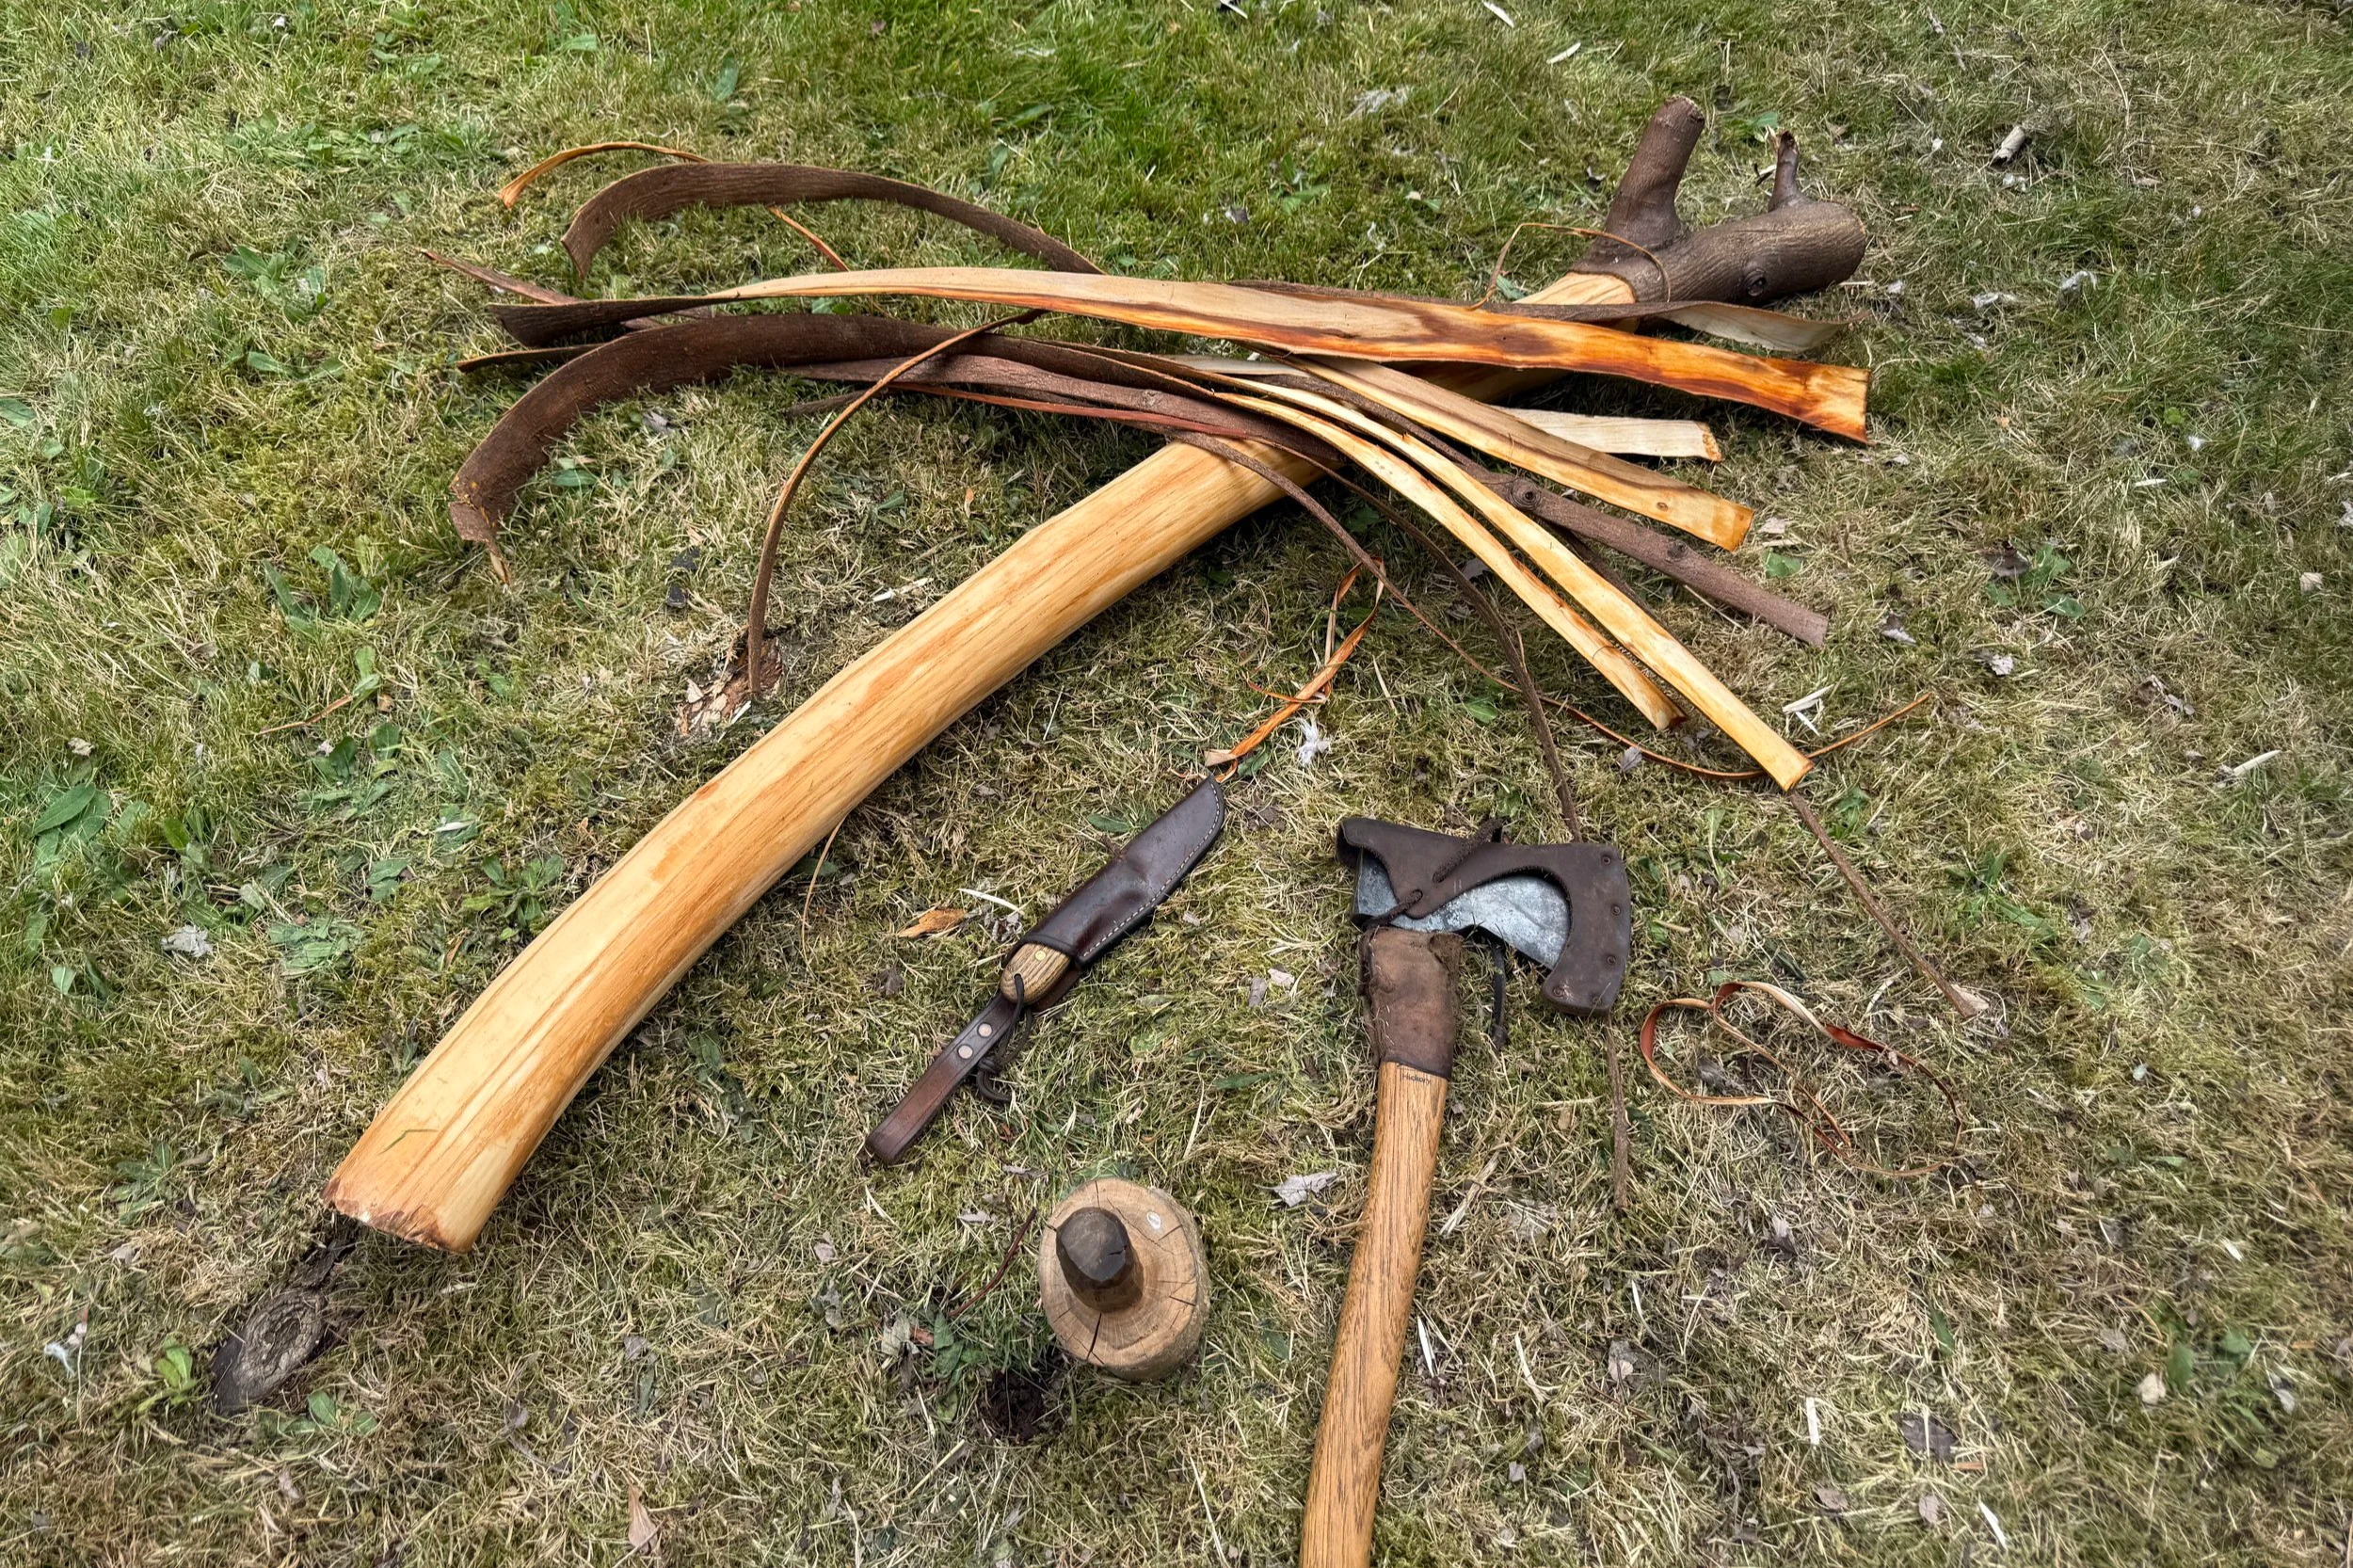
Although it is a much rarer tree than it once was, Elm is still found throughout the UK and if sourced responsibly (this particular branch was destined for an arborists chipper) can provide an excellent resource - particularly for cordage or weaving. When processed, the bark is an incredibly similar material to leather. Some prefer to boil the bark to improve softness but in my experience you can get a very decent product when prepared raw as long as it is fairly fresh. There are many ways to use it once removed from the wood but typically the bark will be taken off in strips.
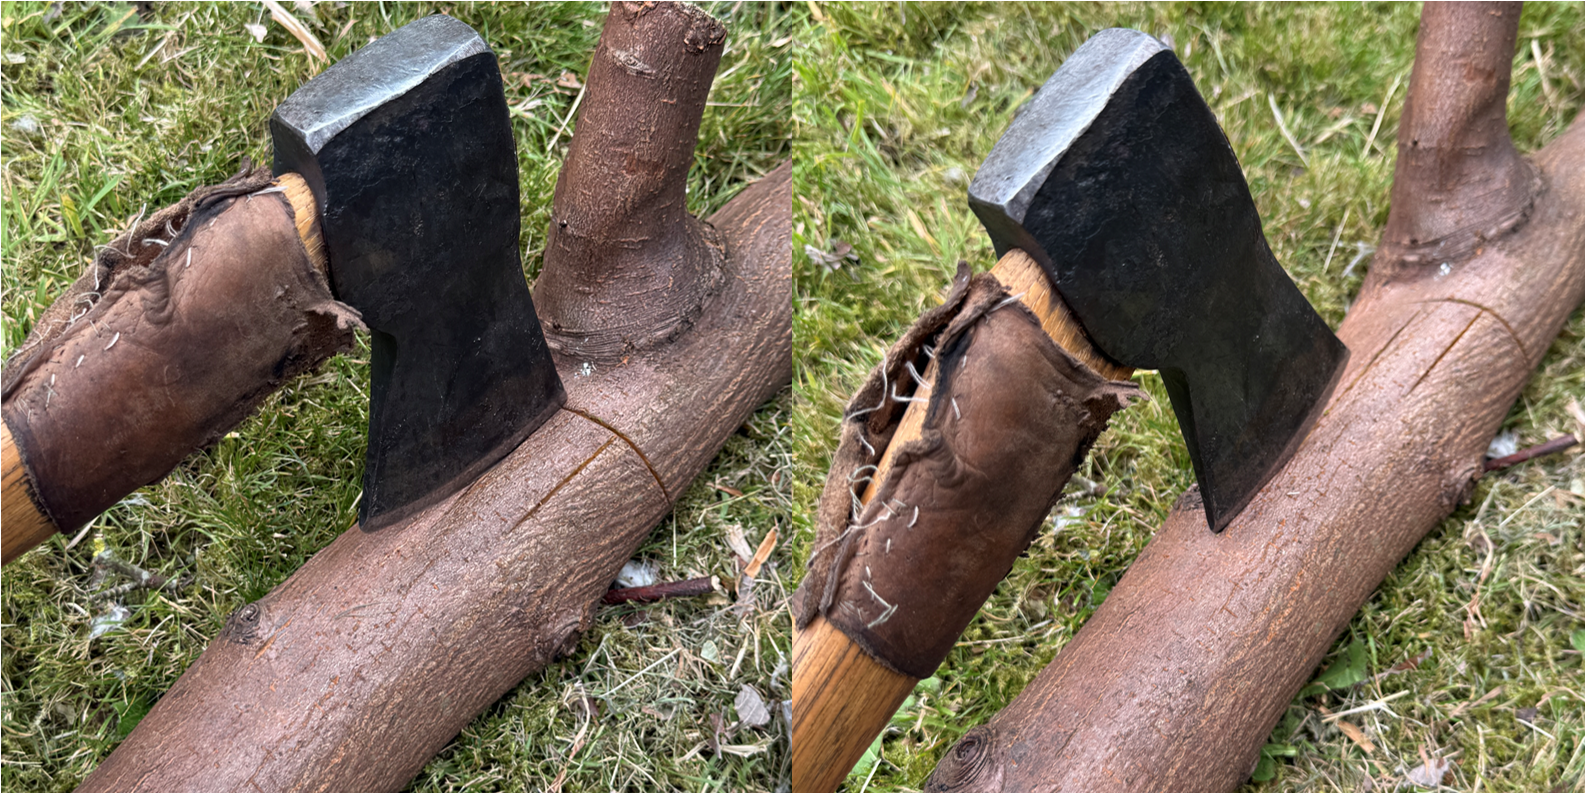
Axe rocking technique to apply a straight cut down the length
Using an axe and small mallet, rock the axe head from toe to heel while striking with the mallet. Depending on the sharpness of the axe and the freshness of the wood (this branch is about a week old and was harvested in summer) it shouldn’t take much force to make a clean cut. Being cautious of the axe slipping towards the body, work down the whole length of the wood by rocking the axe backwards and forwards while tapping. Make sure to overlap cuts, Elm bark is very fibrous so any parts not fully separated will snag and pull away material when it comes to taking the strips off.
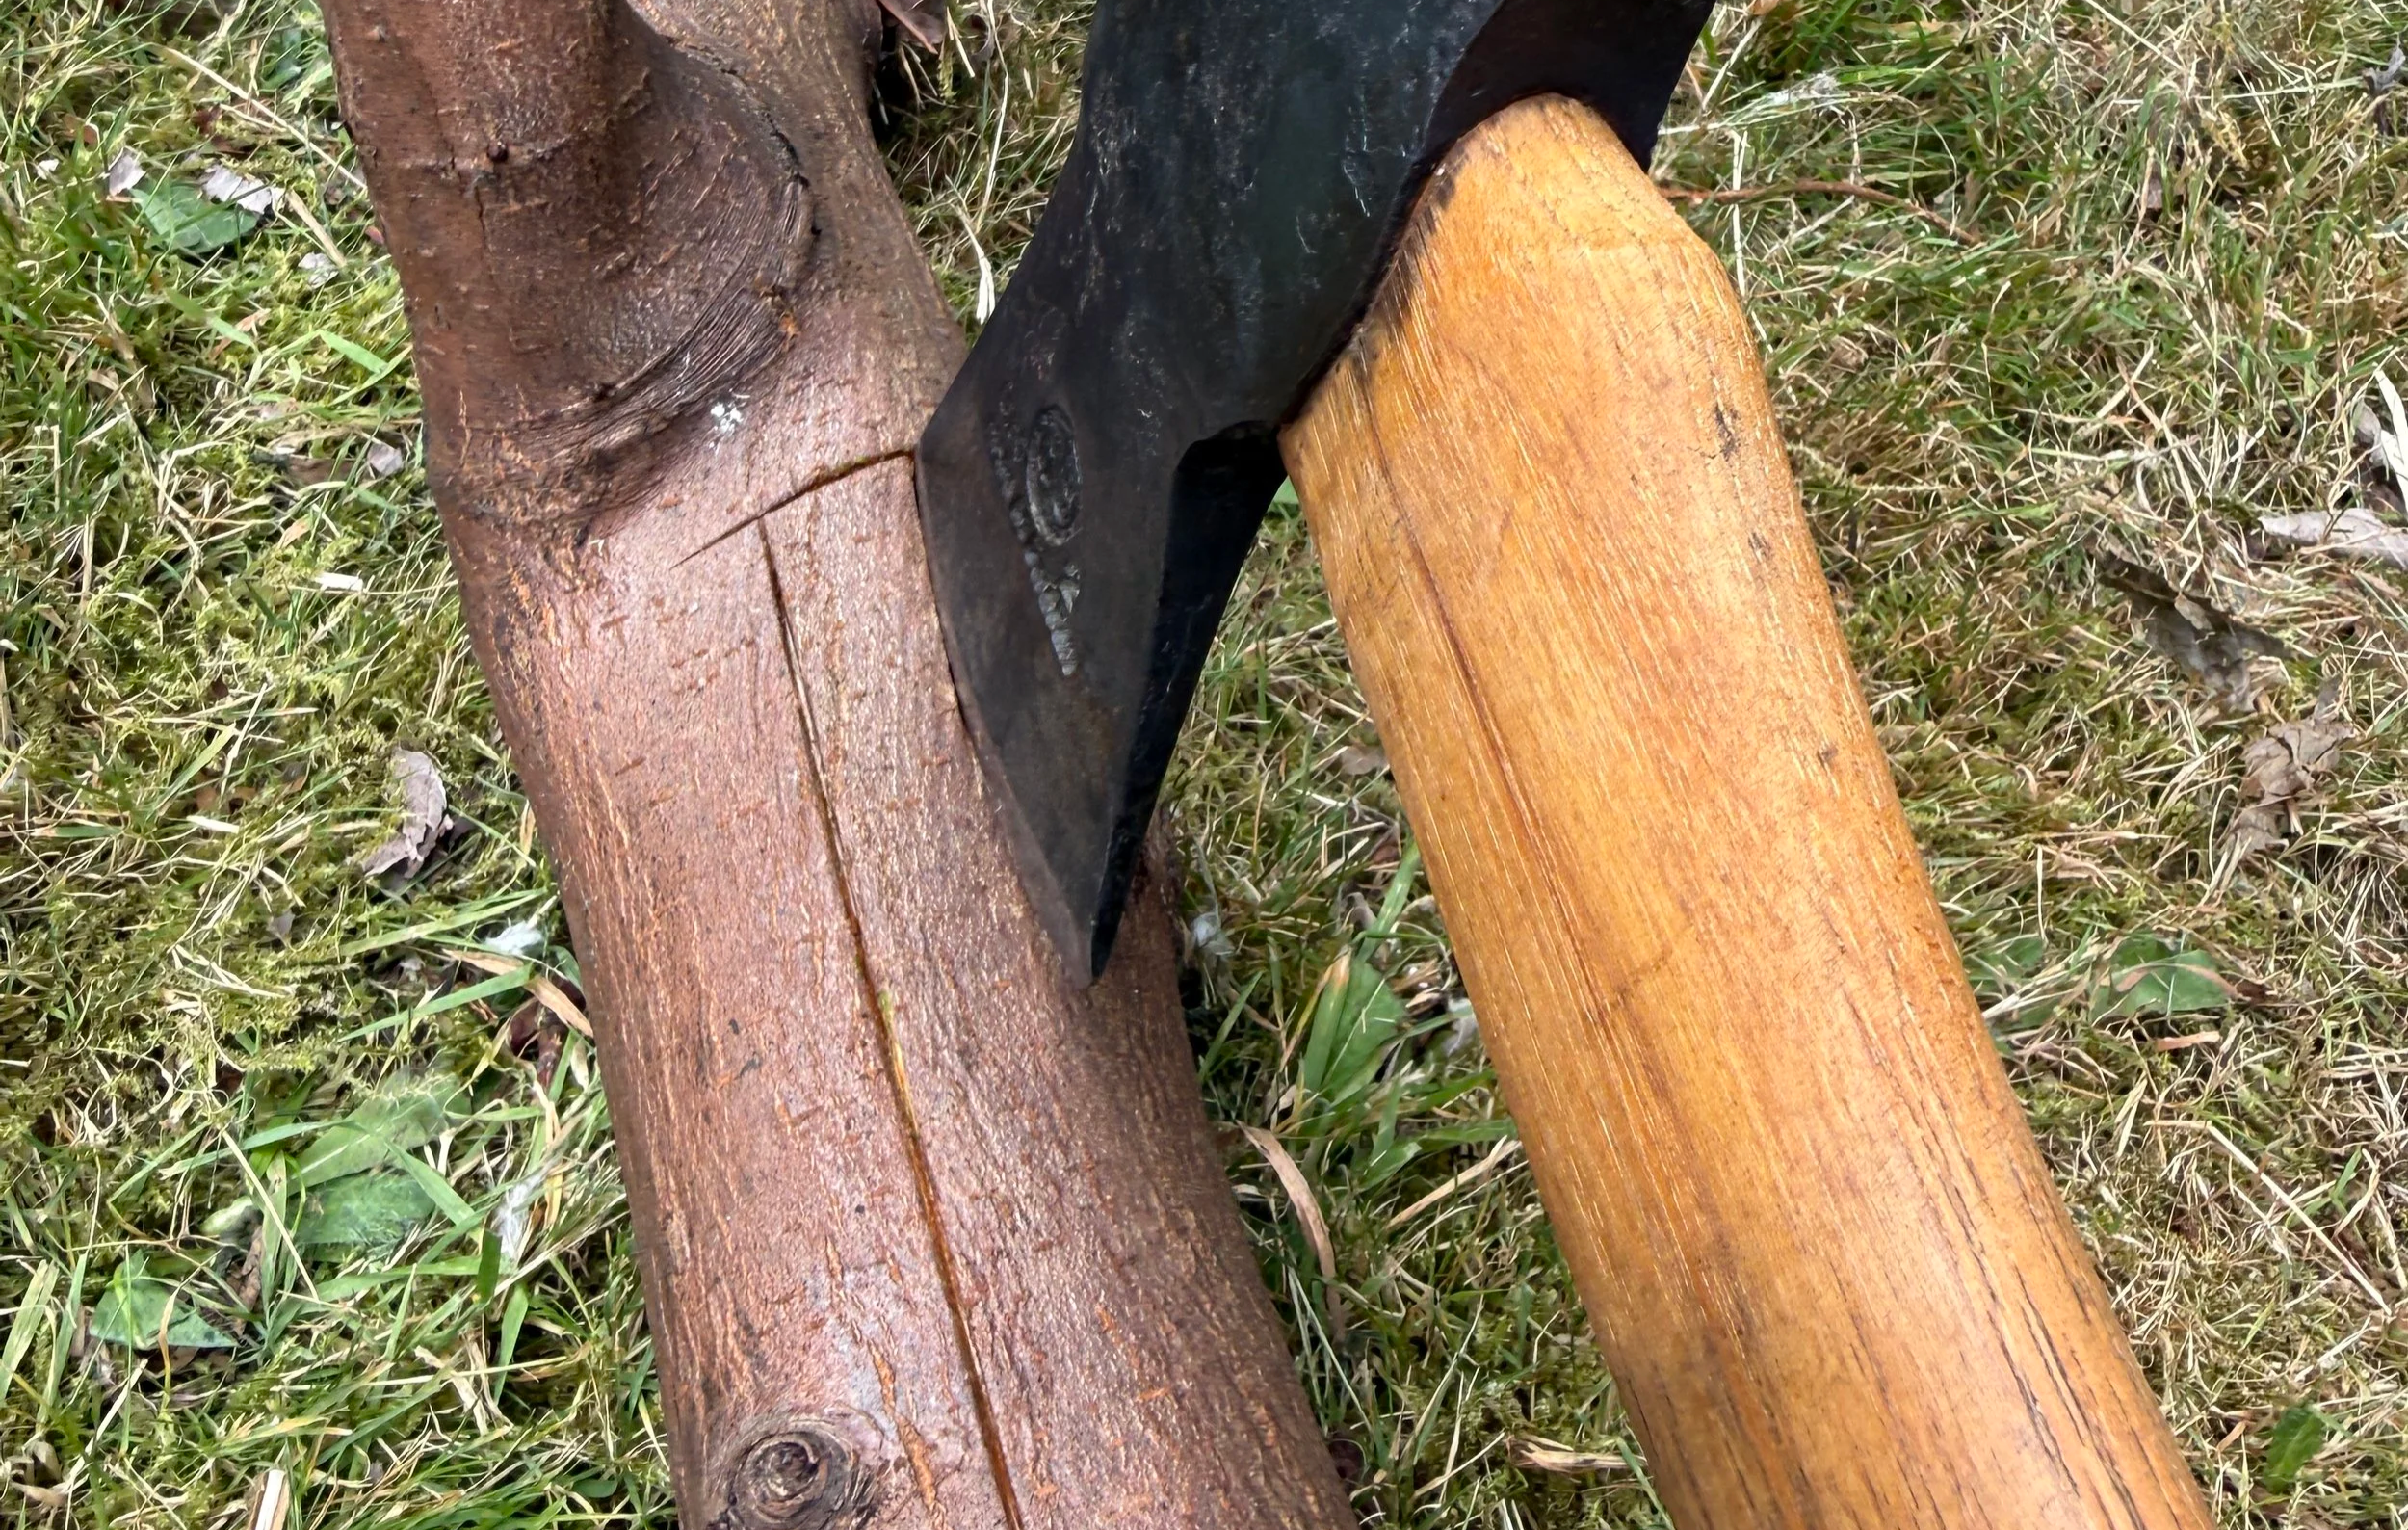
Adding the next parallel cut to form a strip
With the whole length done, repeat with another parallel cut at the desired thickness. I have gone for an inch here as it will become cordage but other projects may warrant thicker or thinner strips. I have also added a stop cut at the top before the branch collar as this section won’t be very useful.
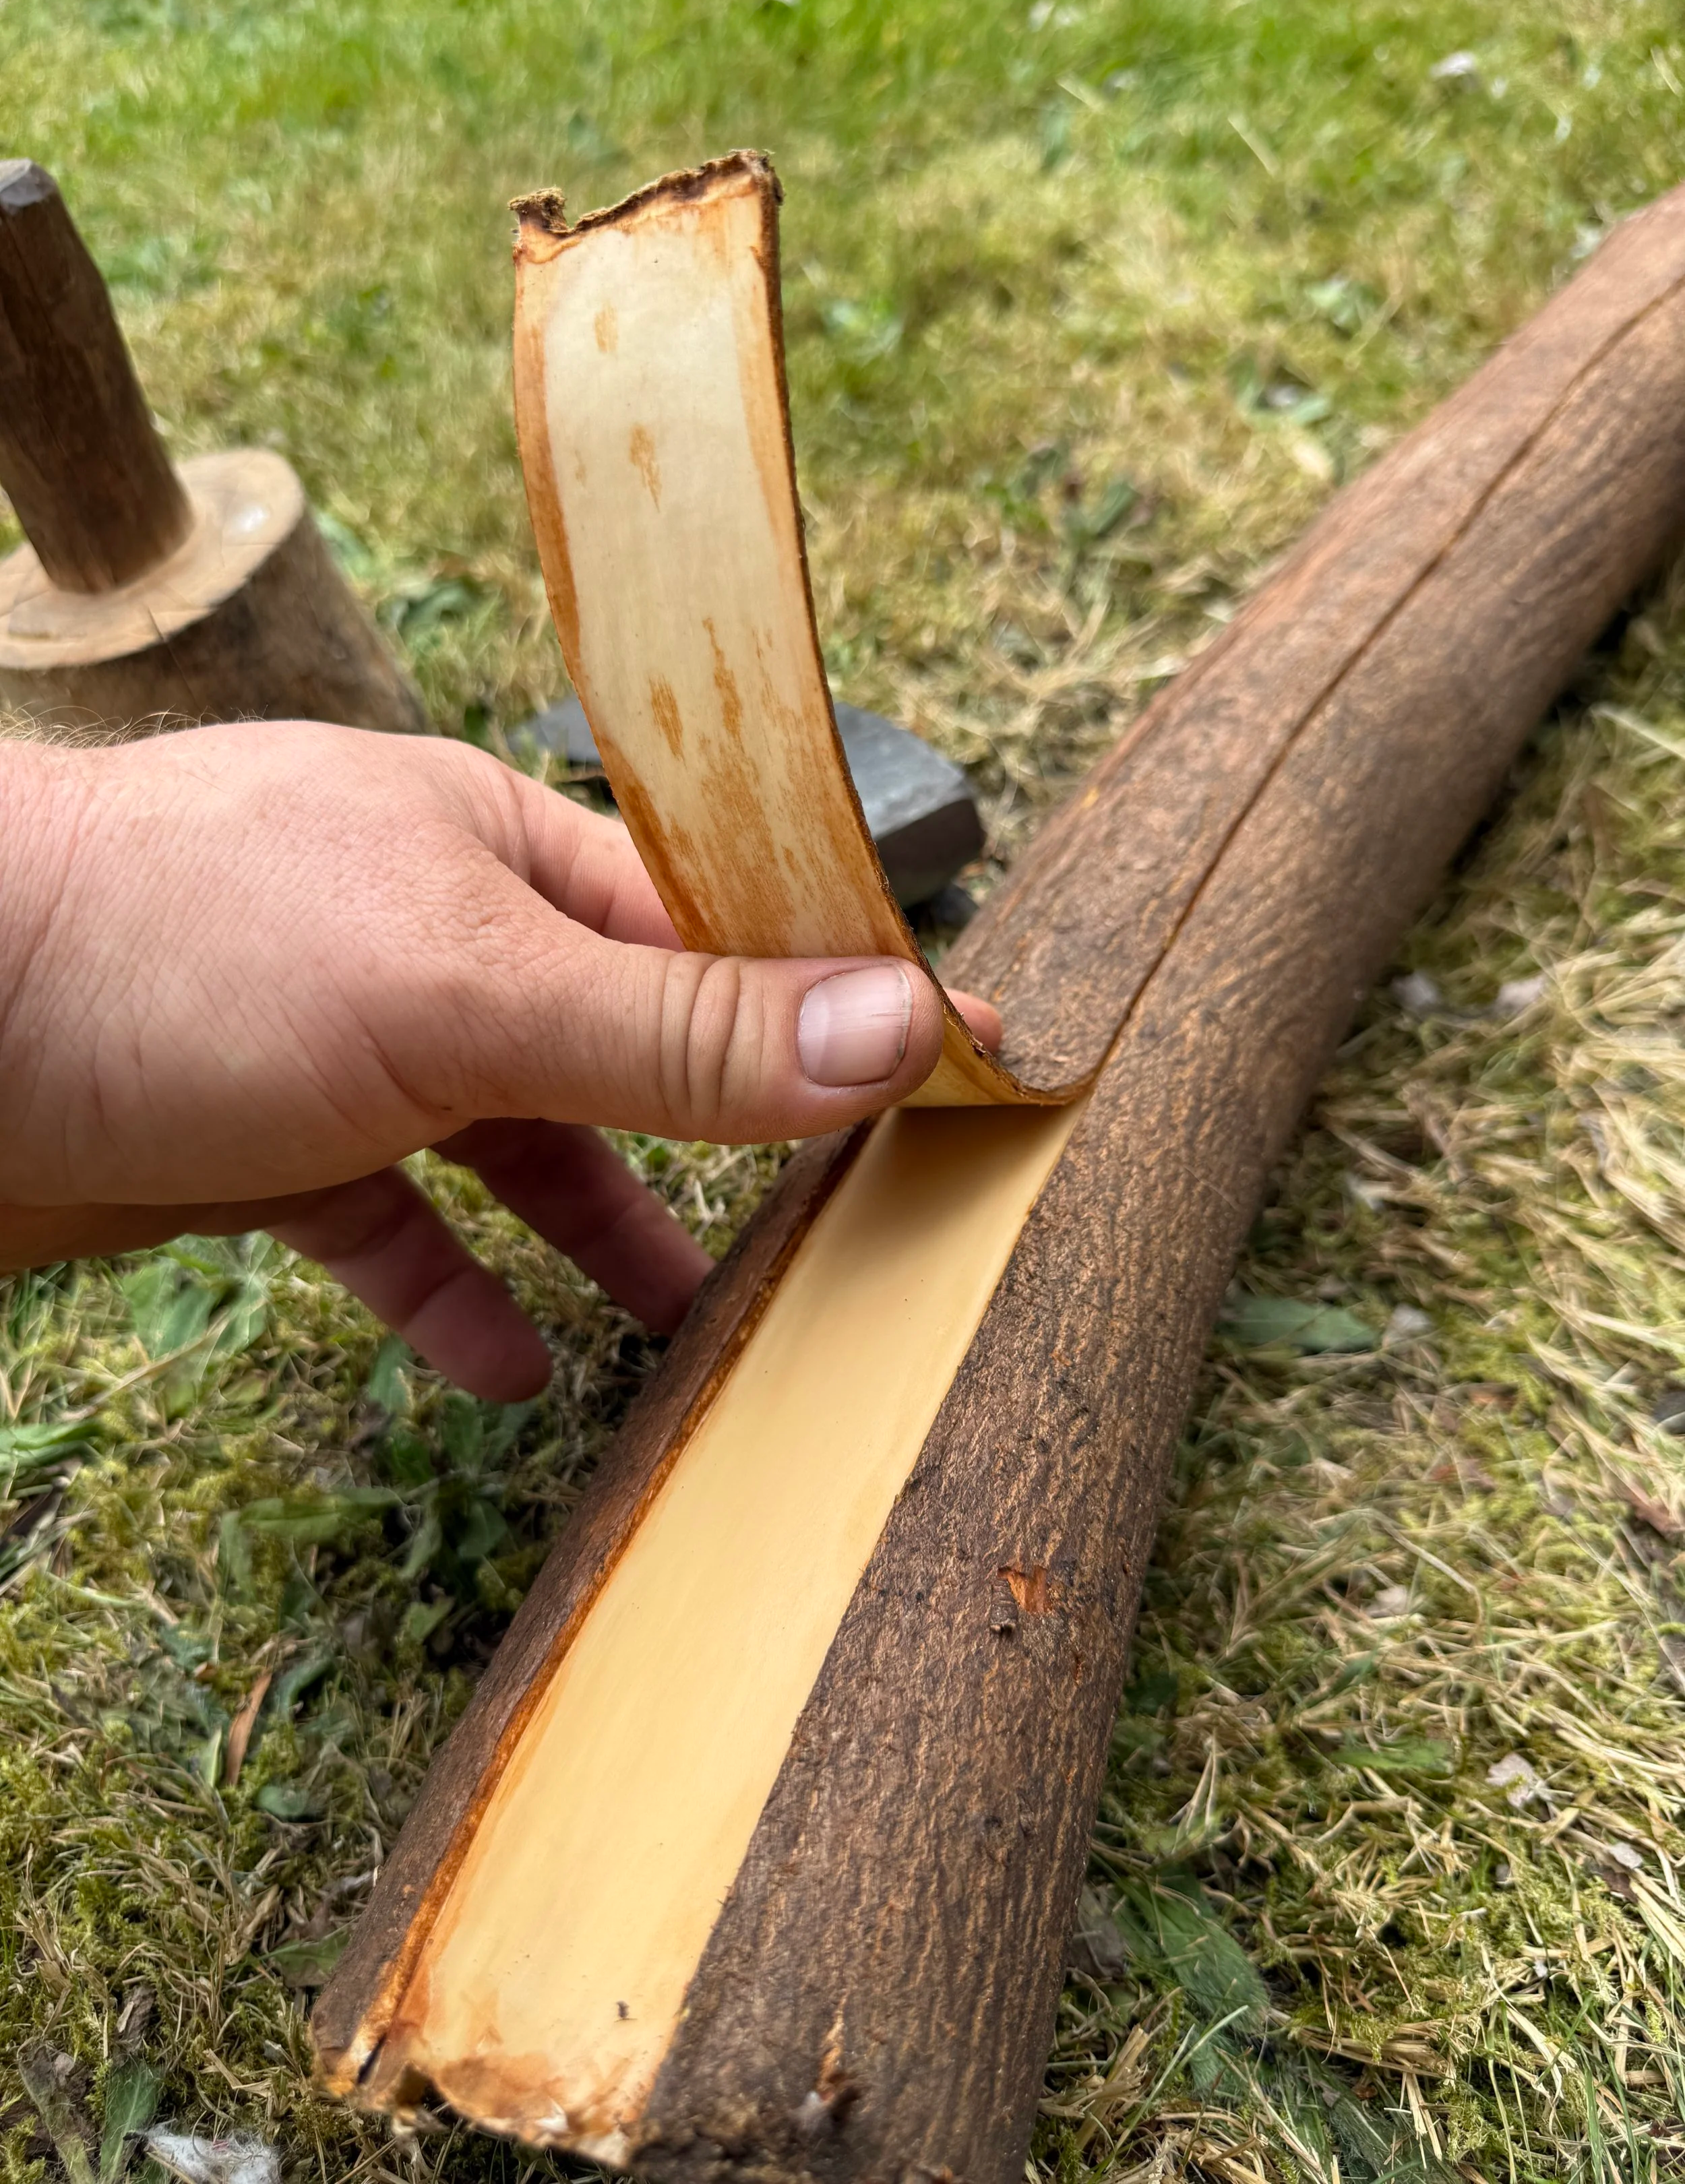
Peeling Elm bark strips from the branch
You can either peel the strips one at a time or make all of your cuts and strip the whole branch at the end. For this guide I will be sharing two different types of use - outer bark on and outer bark off. If you are making cordage, you will need to use the inner bark (bast) layer. This is where some might put the bark through a retting process such as with lime bark, to allow the layers to fully de-laminate. With elm this isn’t completely necessary but that outer layer does still need removing.
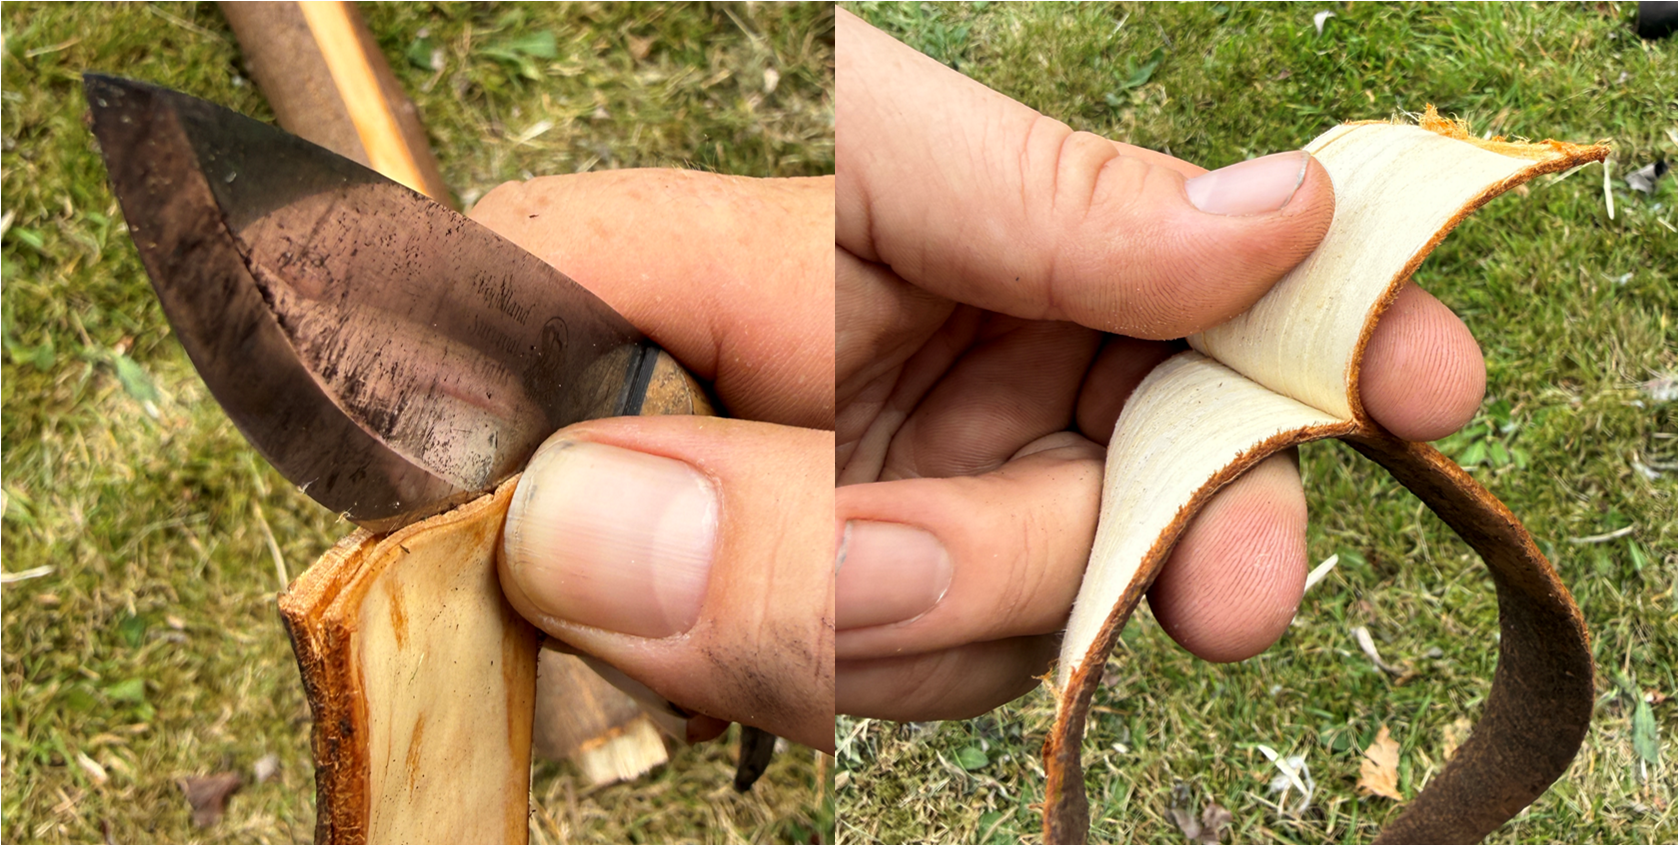
Riving the elm bark strip to separate the inner bark
Riving is the process of splitting something (normally wood) by using a wedge shaped tool to separate the fibres evenly by applying more or less force to each side to retain the split in the centre. This is definitely a skill that benefits from practice but it is entirely possible for less experienced people to try (and is incredibly satisfying). In this instance, we start off the riving by slicing the knife into the middle of an angled fresh cut end. Work the blade carefully in and at a certain point you will be able to switch to using hands to peel them apart. Depending on the condition of the strip, this can be easier or more challenging, especially with the addition of knots and side shoots. You may find that the fibres run away and the split begins incorporating the outer bark layer. An inch before this, slowly slice the knife to the same layer as the split and try to correct the peel. Once you have separated the layers you have a choice - you can either use the inner layer for slightly thicker cordage or if you are wanting much finer grade, you can attempt to rive again. This gives a lovely product but is much harder than the first rive.
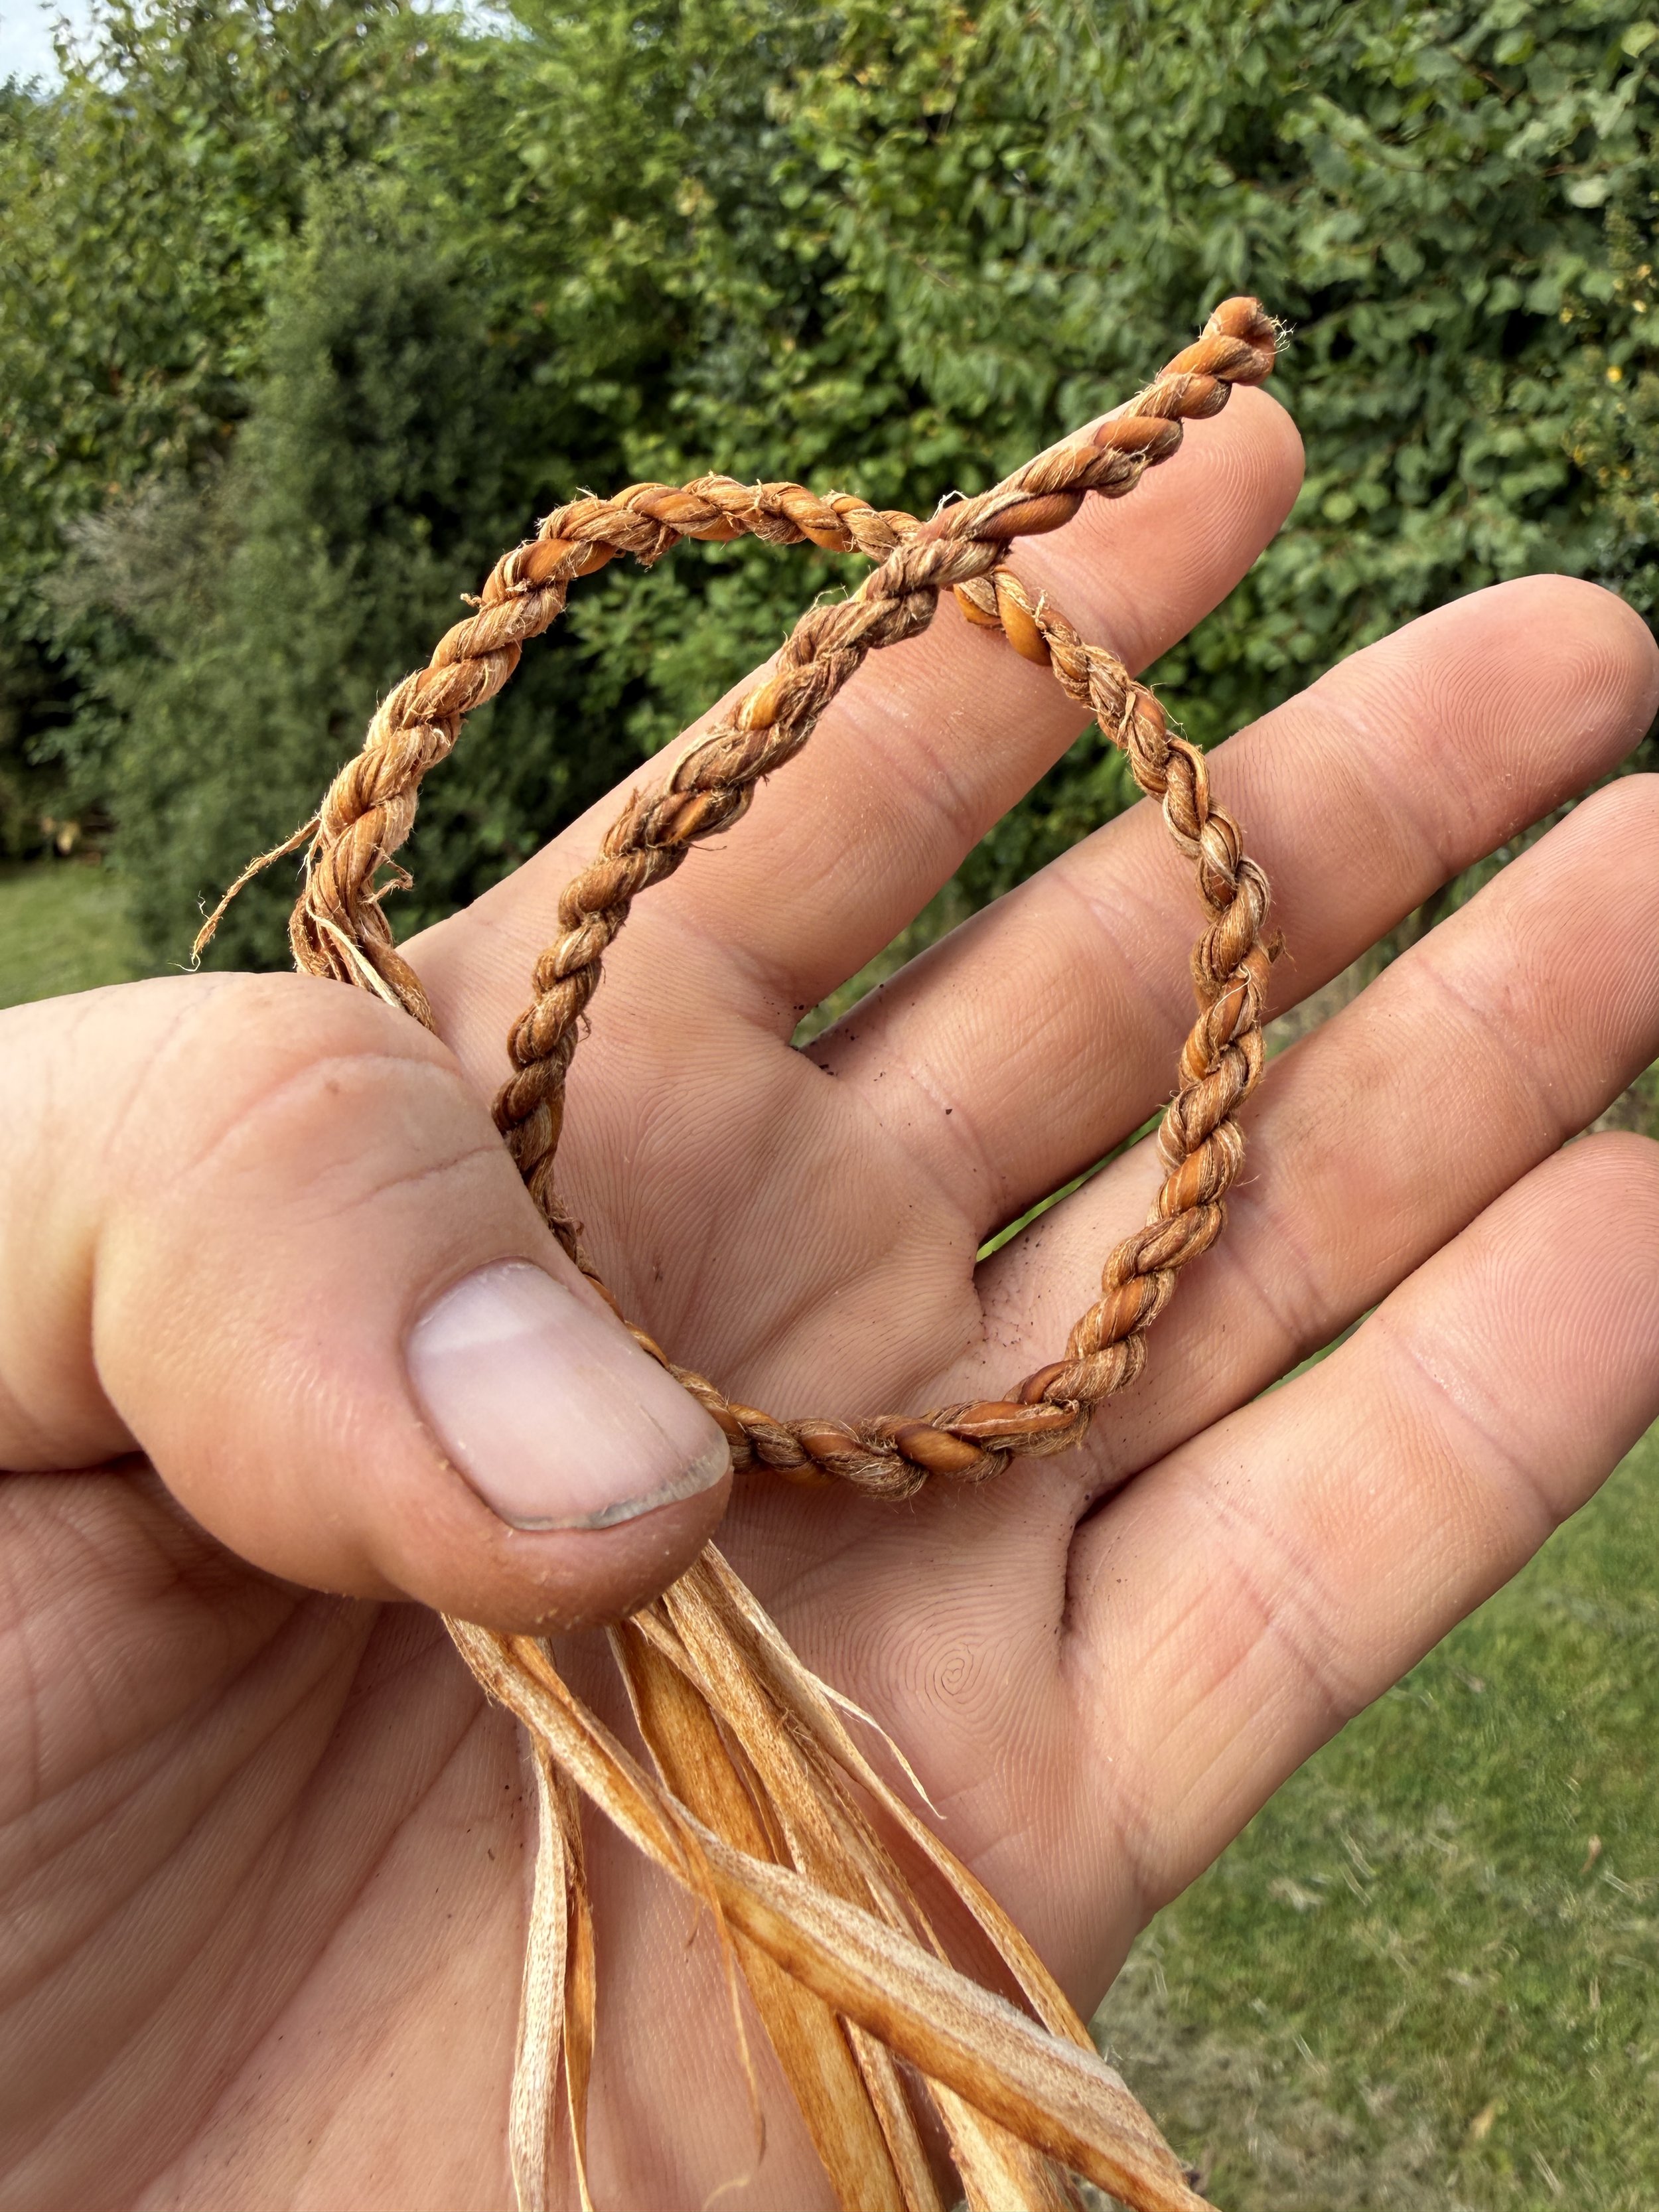
Elm bark cordage
Now you have your inner bark layer, you need to work and tease the fibres into thin ribbons that are able to be rolled into cylindrical tubes which can then be corded as you would with any two-ply cordage. Unlike many natural cordage options it does not need to be dried before use but it will need rehydrating if left for too long. This will create a decent strength cordage with a beautiful colouration that is capable of bow drill use if done to the correct quality.
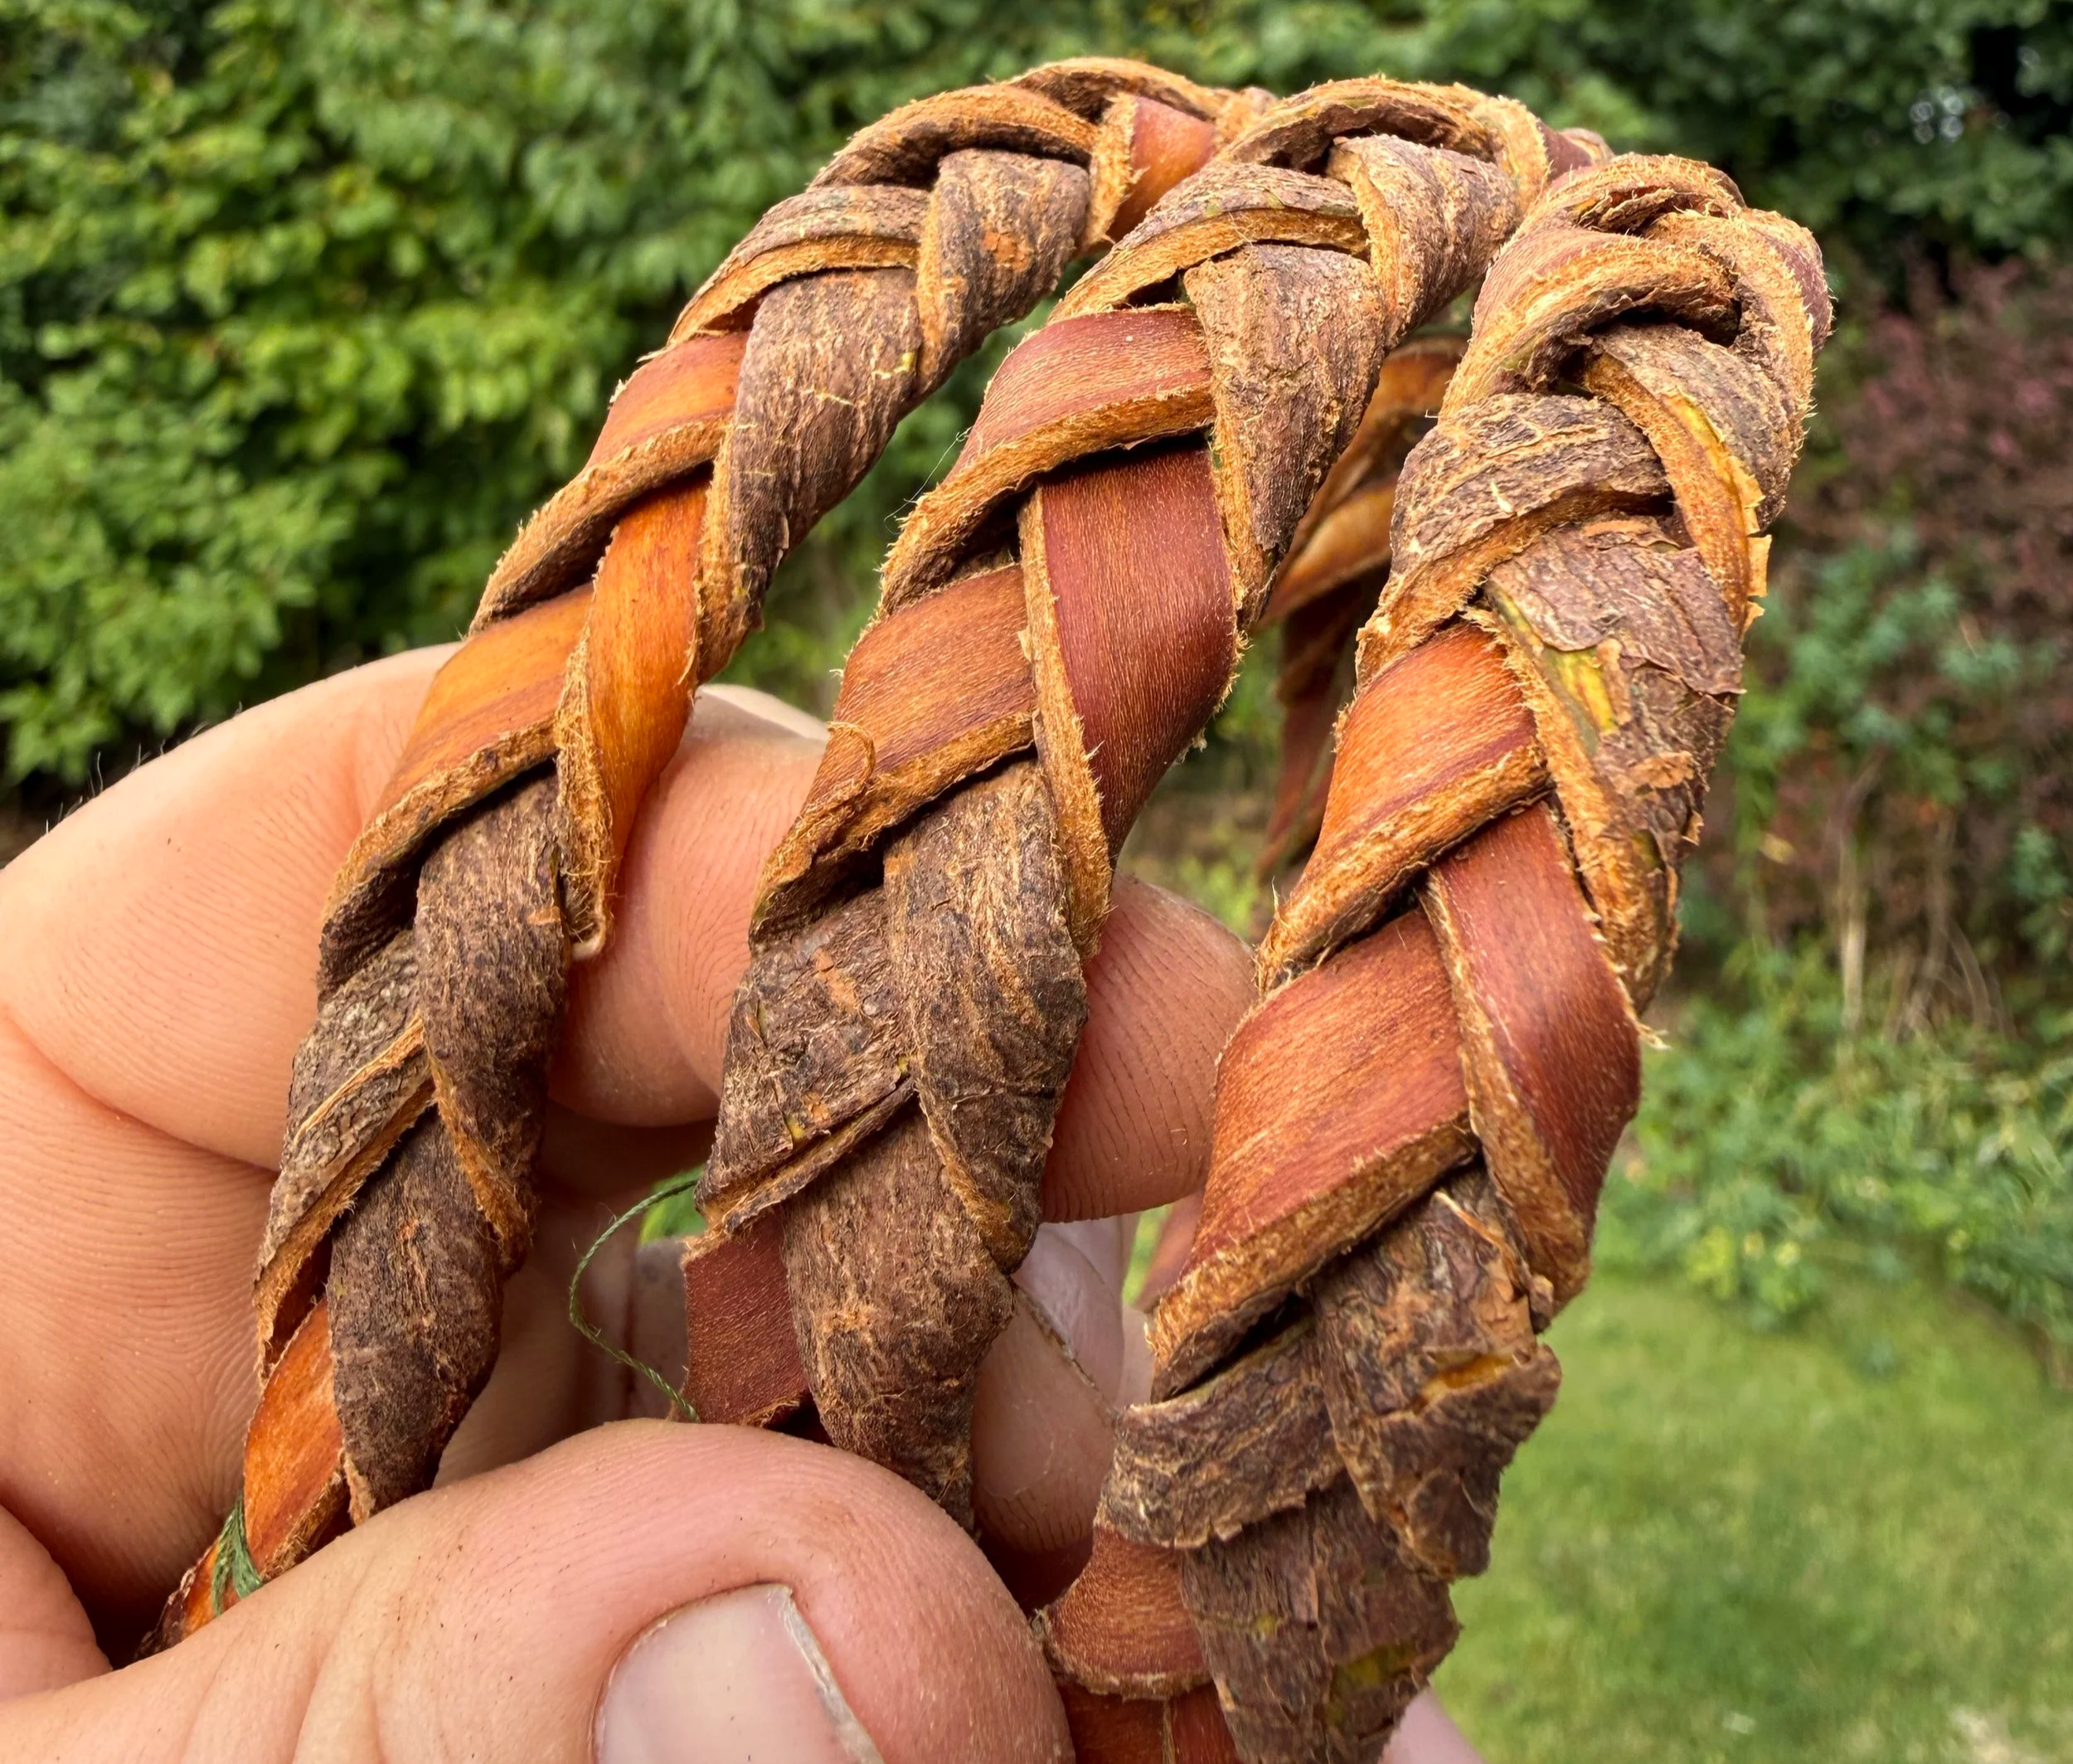
Plaited Elm bark
We will back track slightly now to look at a different use that uses both the inner and outer bark together. As it is so similar to leather in terms of how supple and pliable it is, in addition to weaving all sorts of craft products, plaiting is also very viable with Elm bark. Just be aware that if small children are nearby your creation will always, without fail, be immediately requisitioned into all manner of tasks such as fashion accessory or toy.
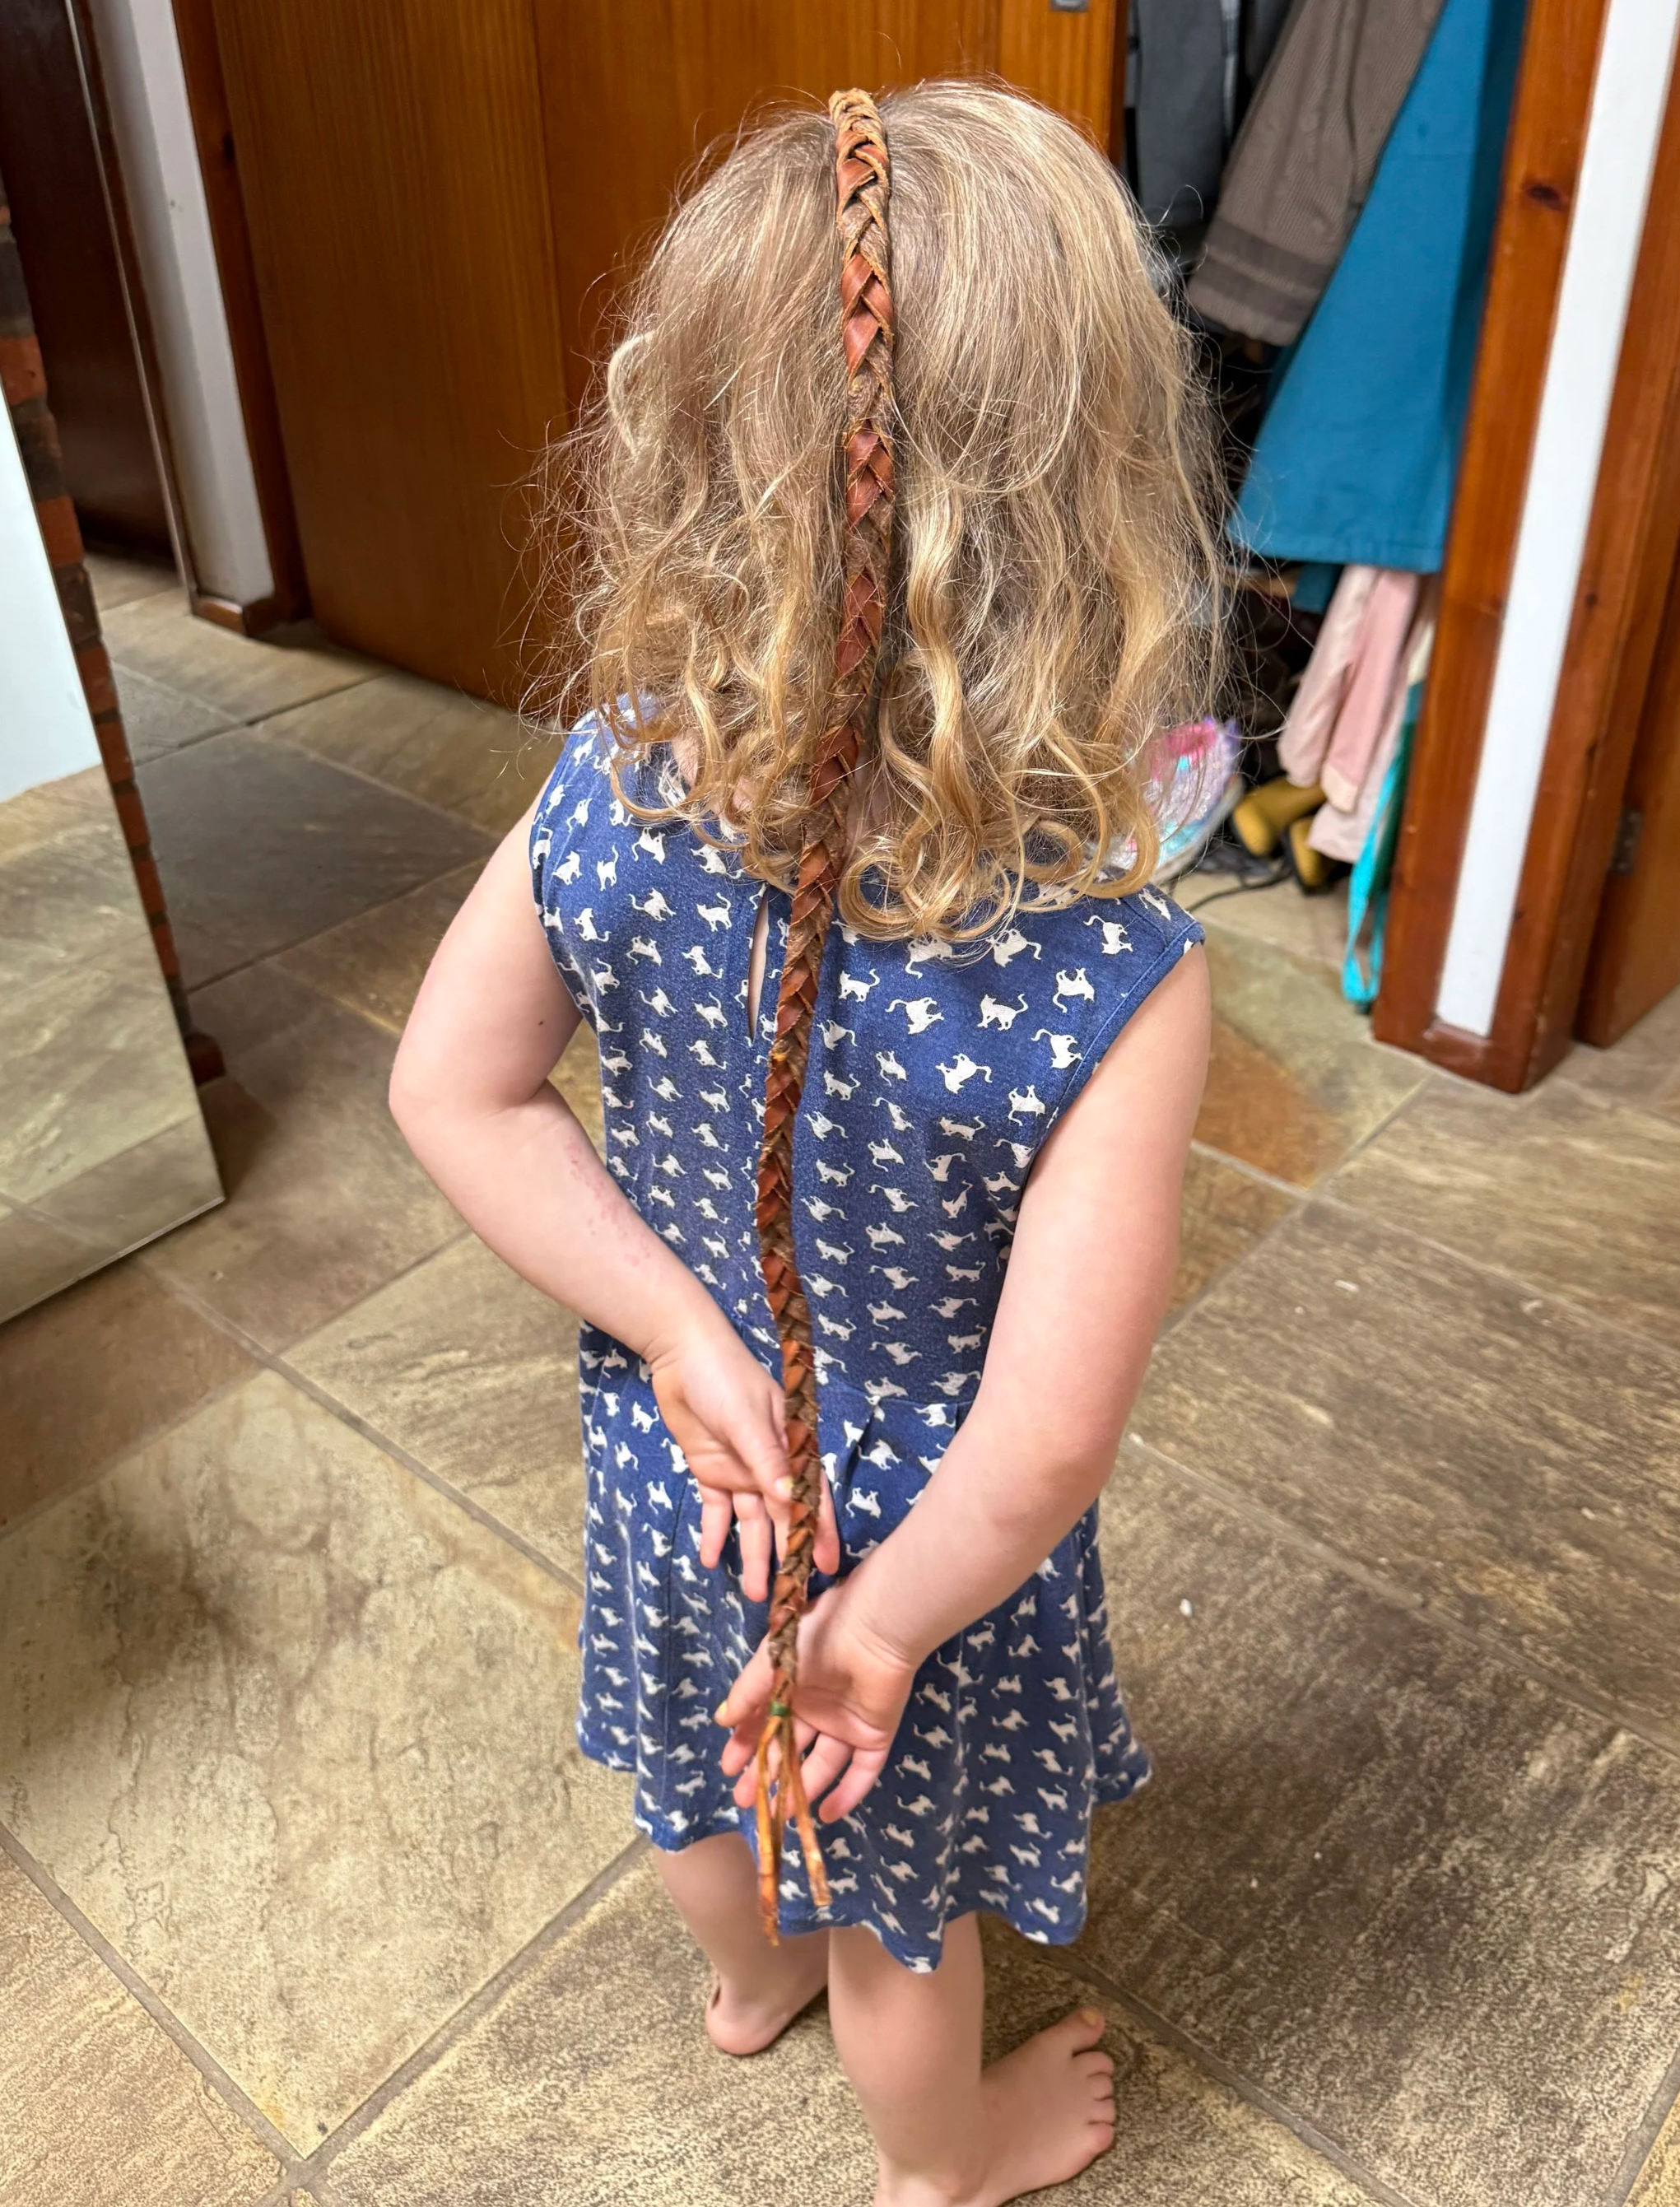
Plaited Elm bark hair extension
To do a simple hat trim or belt (or hair extension), back at the bark stripping stage take three full length strips that are thinner than the inch thickness we removed for cordage. Any size will work but thicker strips will dramatically up the width of the end product. I like to go for between 5mm and 1cm. It can be harder to remove smaller strips so don’t panic if they are a bit uneven - you can use a knife to make them more uniform once removed from the branch.
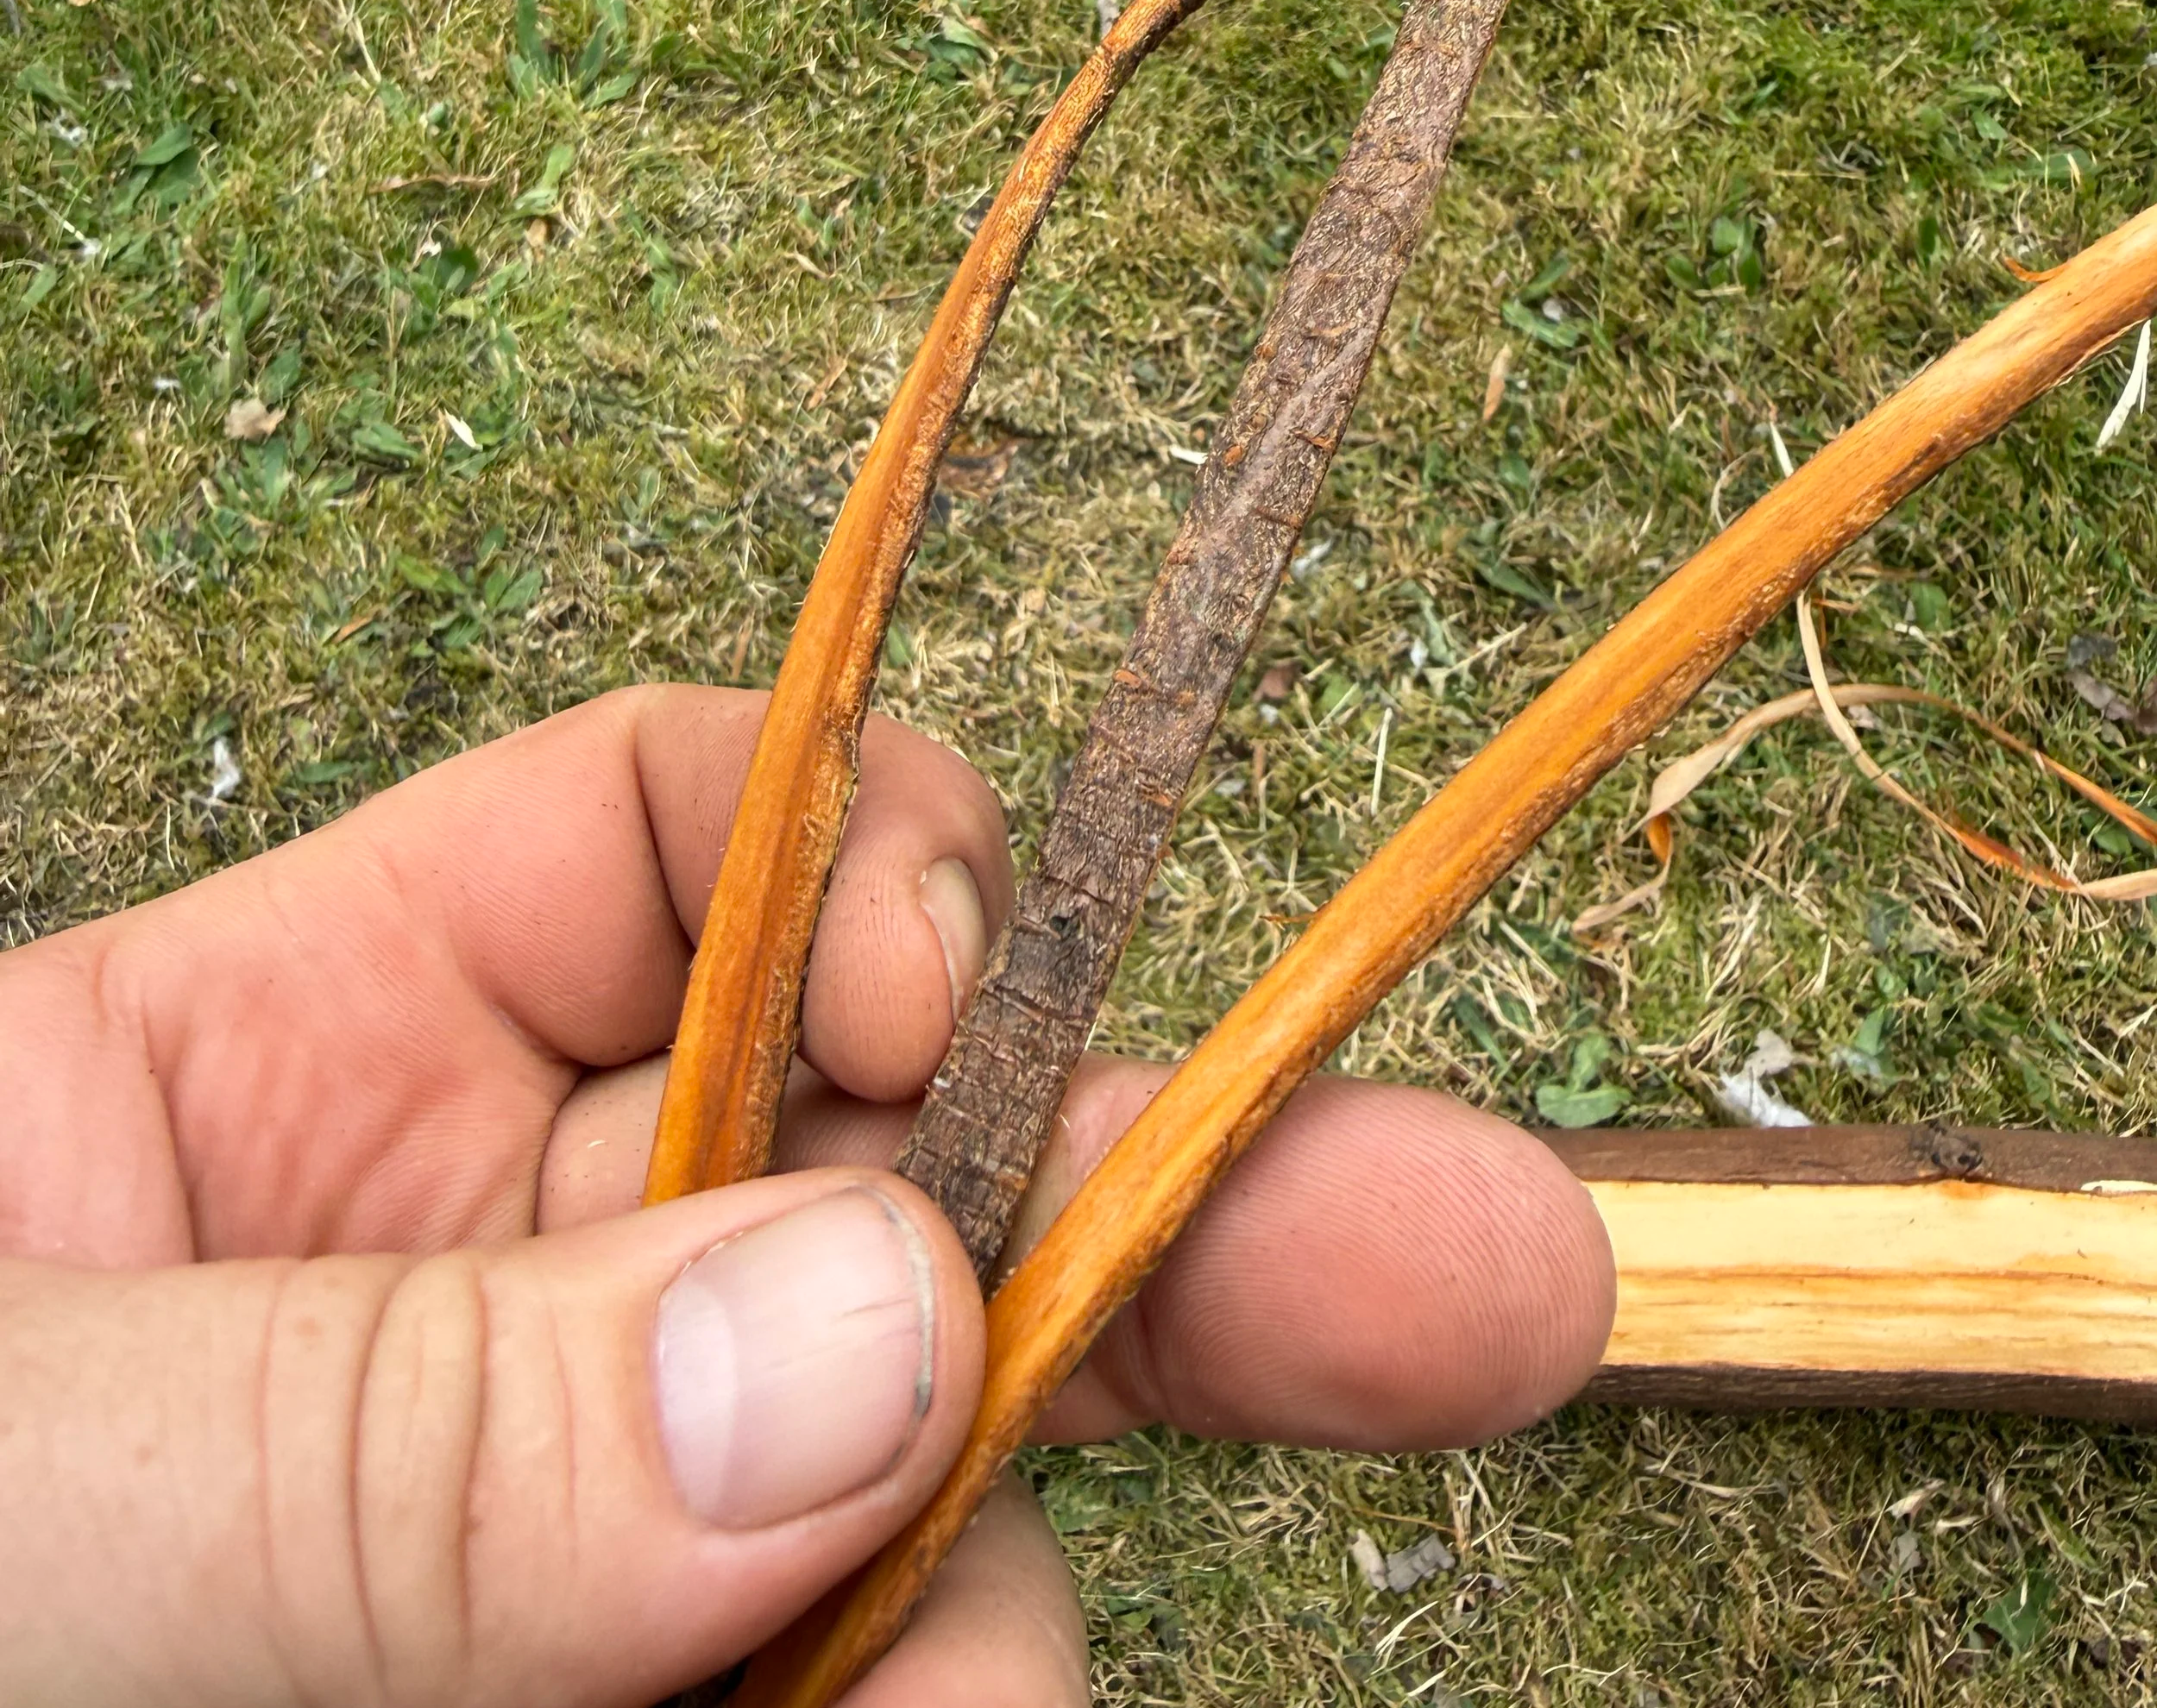
Thin strips of Elm bark for plaiting
With three strips ready to go, put the ends flush together and tie tightly with thread or a thin cordage until secure. Then begin to plait by folding each strip over in turn. If you have never plaited before the pattern goes as follows:
Fold an outer strip into the middle (you will now have two strips on one side and one on the other). Fold the outer of the two into the middle, rinse and repeat.
As long as you always take the outer of the two back into the middle you are plaiting correctly.
When you are running out of length, tie off as you did at the start and you have a finished product.
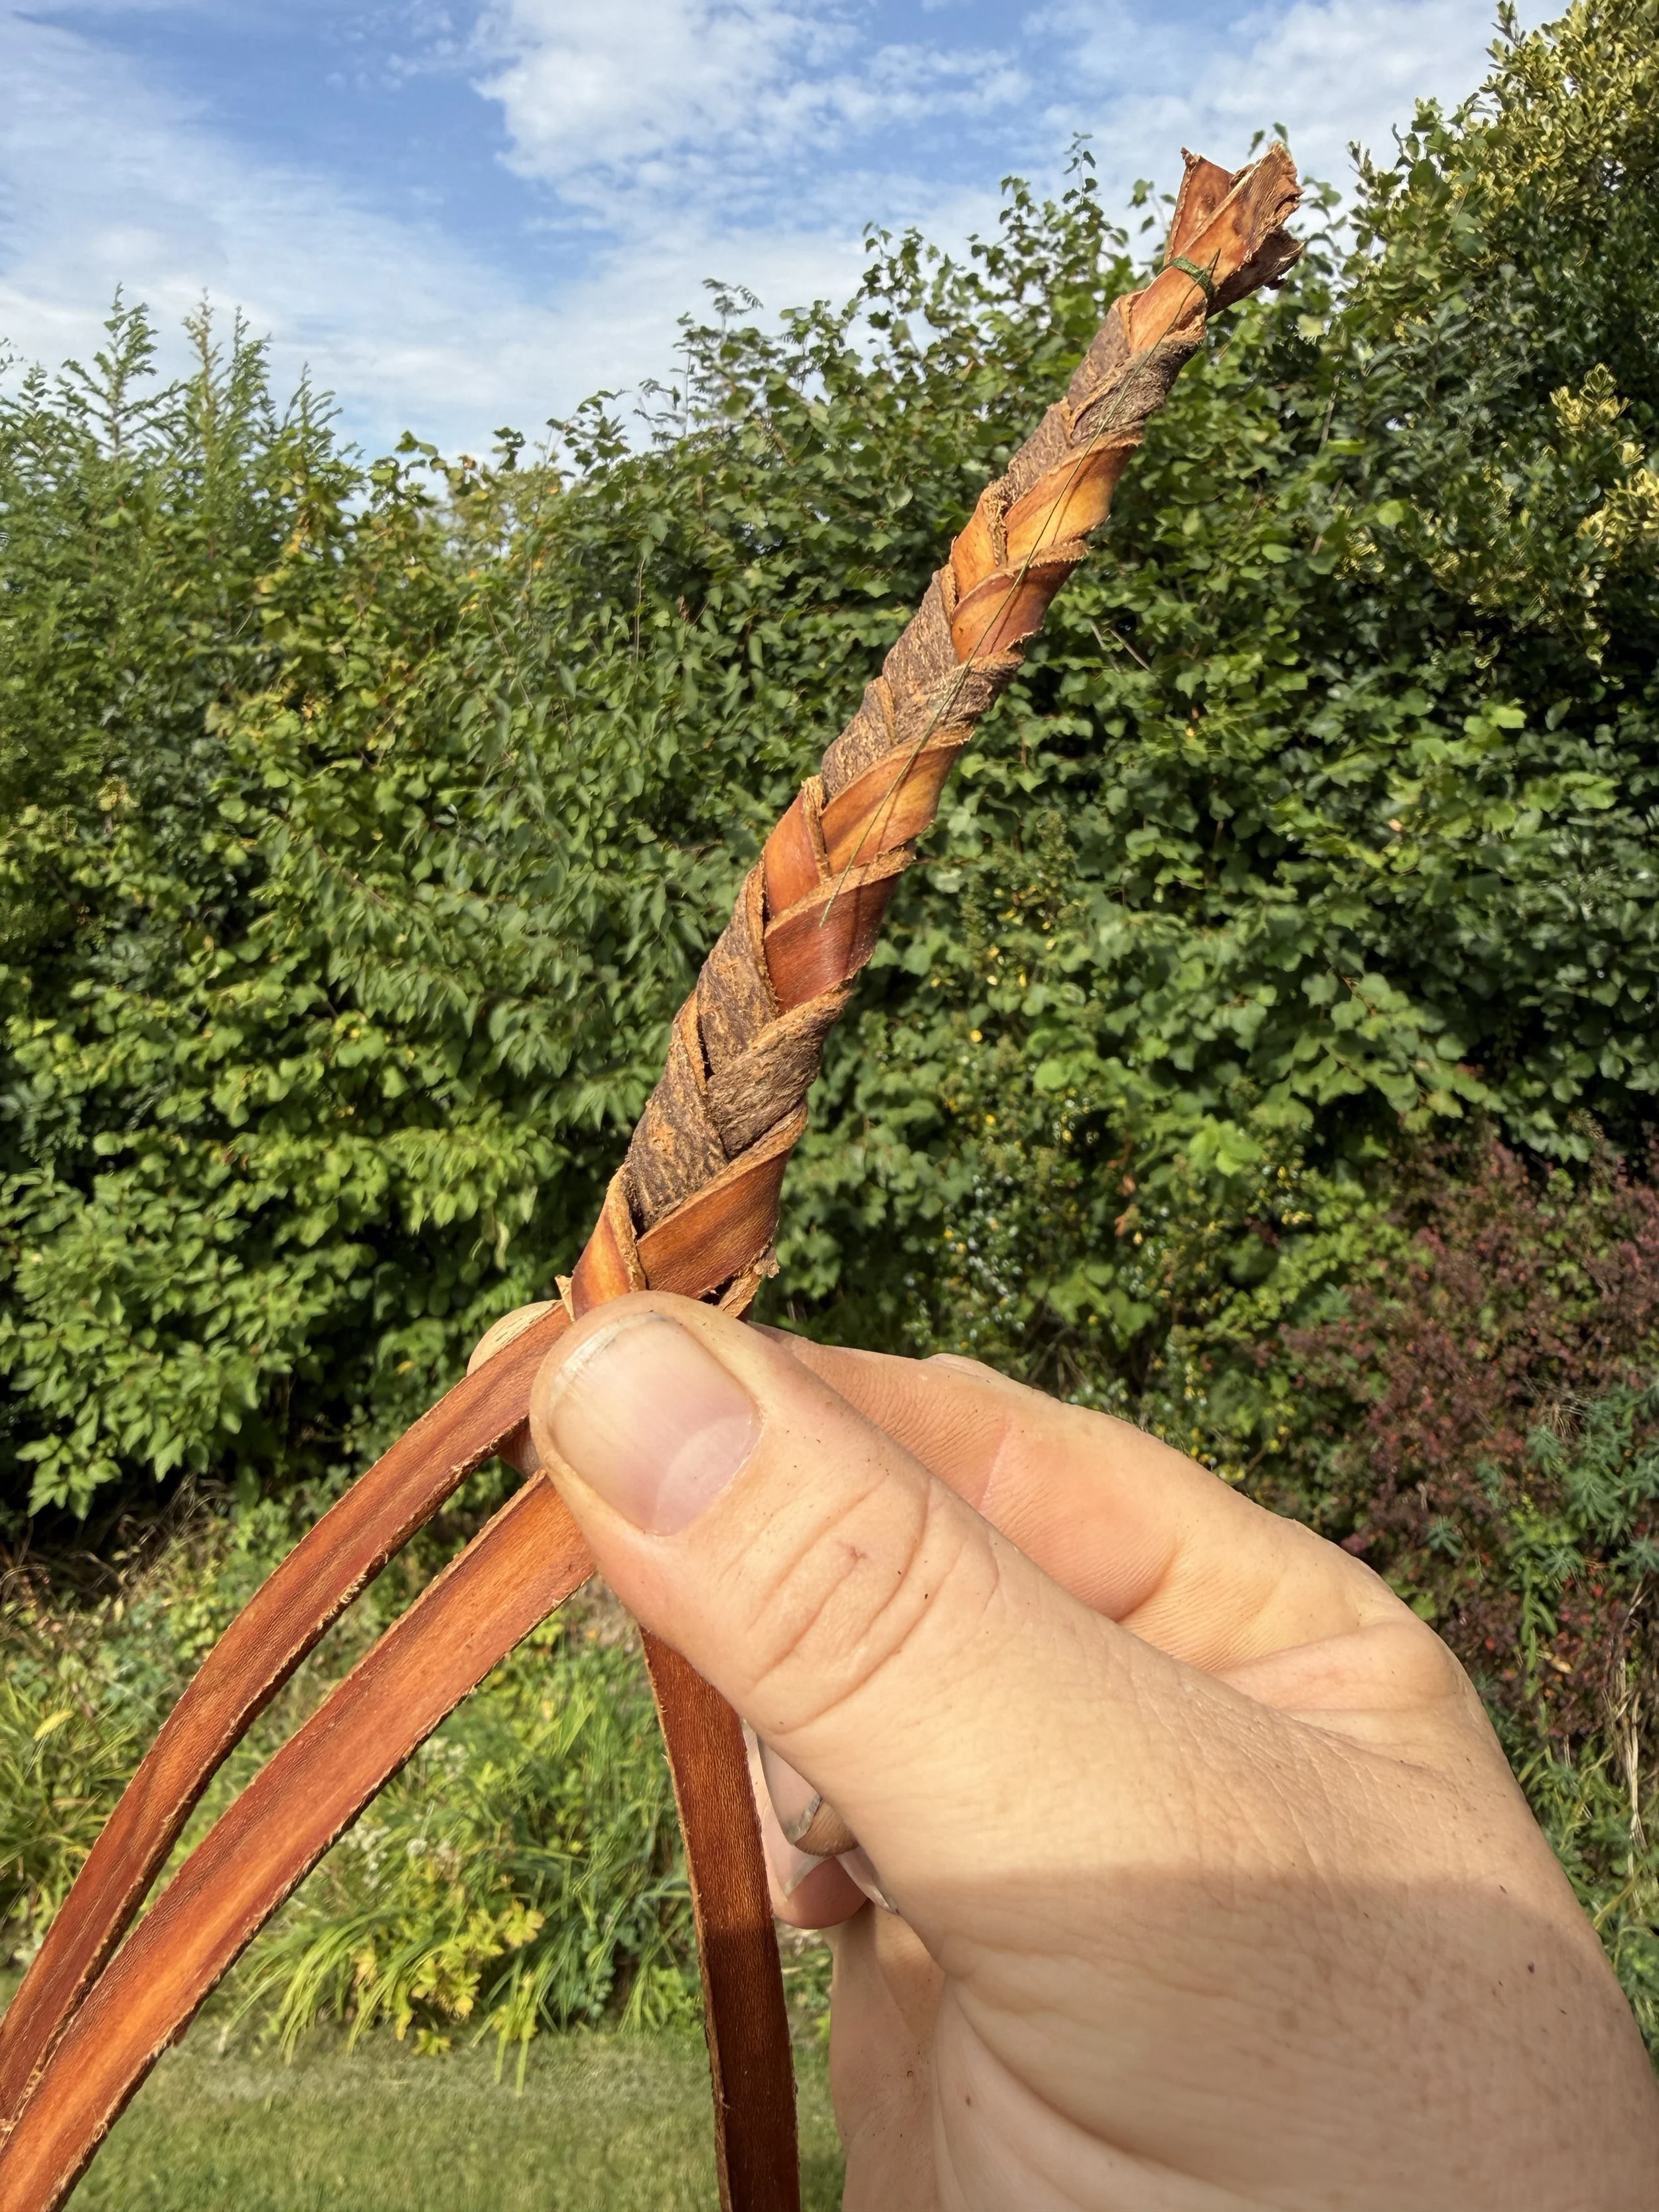
Plaiting with Elm bark.
Elm bark is a remarkable material with so many applications. It is beautiful, strong and versatile capable of both fine use and larger projects such as chair seating. As I mentioned at the start, it is important to source it responsibly due to it being more seldom seen but it is out there. However, please don’t go hacking away at healthy trees just because you want to make a belt - consider contacting landowners who have it on site to find out when it may be getting pruned or having work done.
It is very easy to confuse Elm for hazel if you mainly identify trees using leaf shape. They have very different growth patterns and bark which is a good way to separate the two so I will use the opportunity of an upcoming Tree Knowledge Journal entry to share some tips on how to spot them.
If this has been interesting and you are wanting to learn more practically in Cumbria or the wider Northwest, consider booking a session where we tailor the learning to you and what you want to learn. Click here to see some of the available learning modules or click here to contact us and find out more.