

Cantilever Pot Hanger
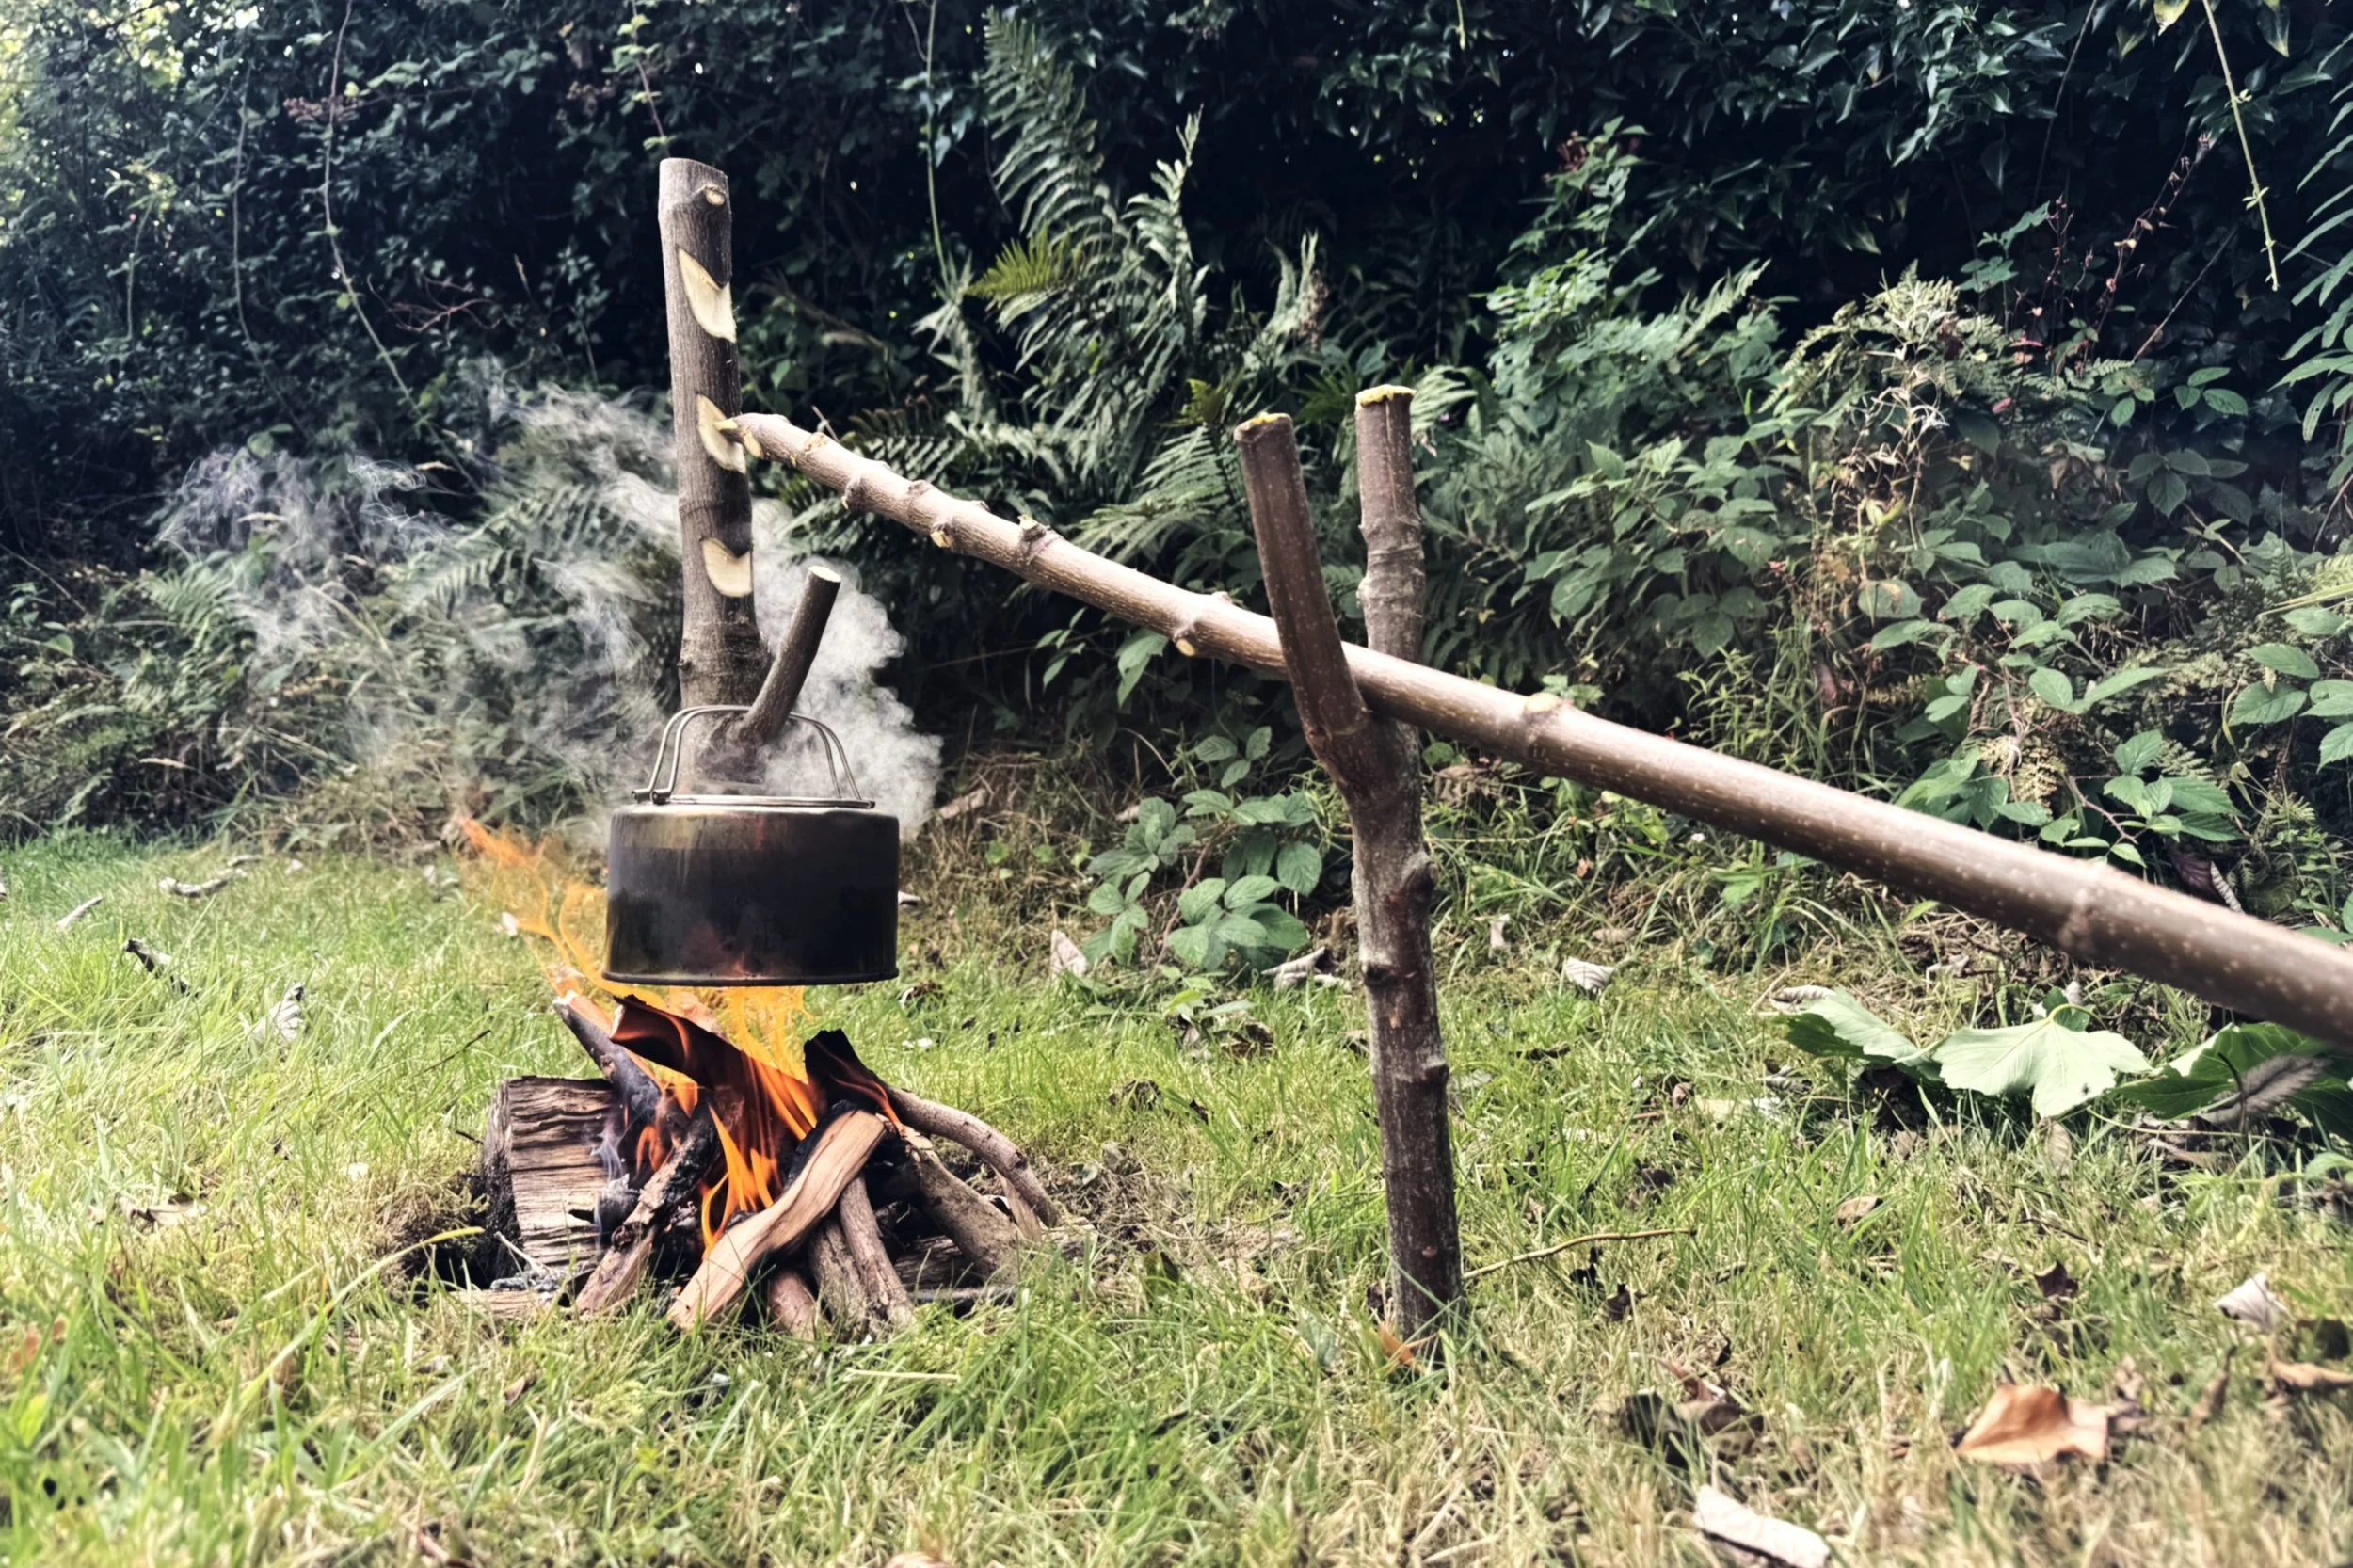
A fundamental part of living in the wilds is having the ability to quickly boil water. Whether this is for purification, making teas or simply just cooking some food, using an adjustable pot hanger instantly changes this experience from balancing a pot precariously with sticks on a smothered fire to a slick, streamlined procedure. As always, putting in an extra ten minutes saves time and energy in the long run, especially if that awkwardly balanced cup of freshly filtered water suddenly capsizes into your carefully prepared fire.
There are many ways to suspend cookware over a fire but the cantilever is in my opinion the quickest in terms of material gathering whilst also providing good functionality and adjustability. In addition, it is relatively low impact as you can very often retrieve all of the components from just one or two small branches or even from recently fallen cast offs.
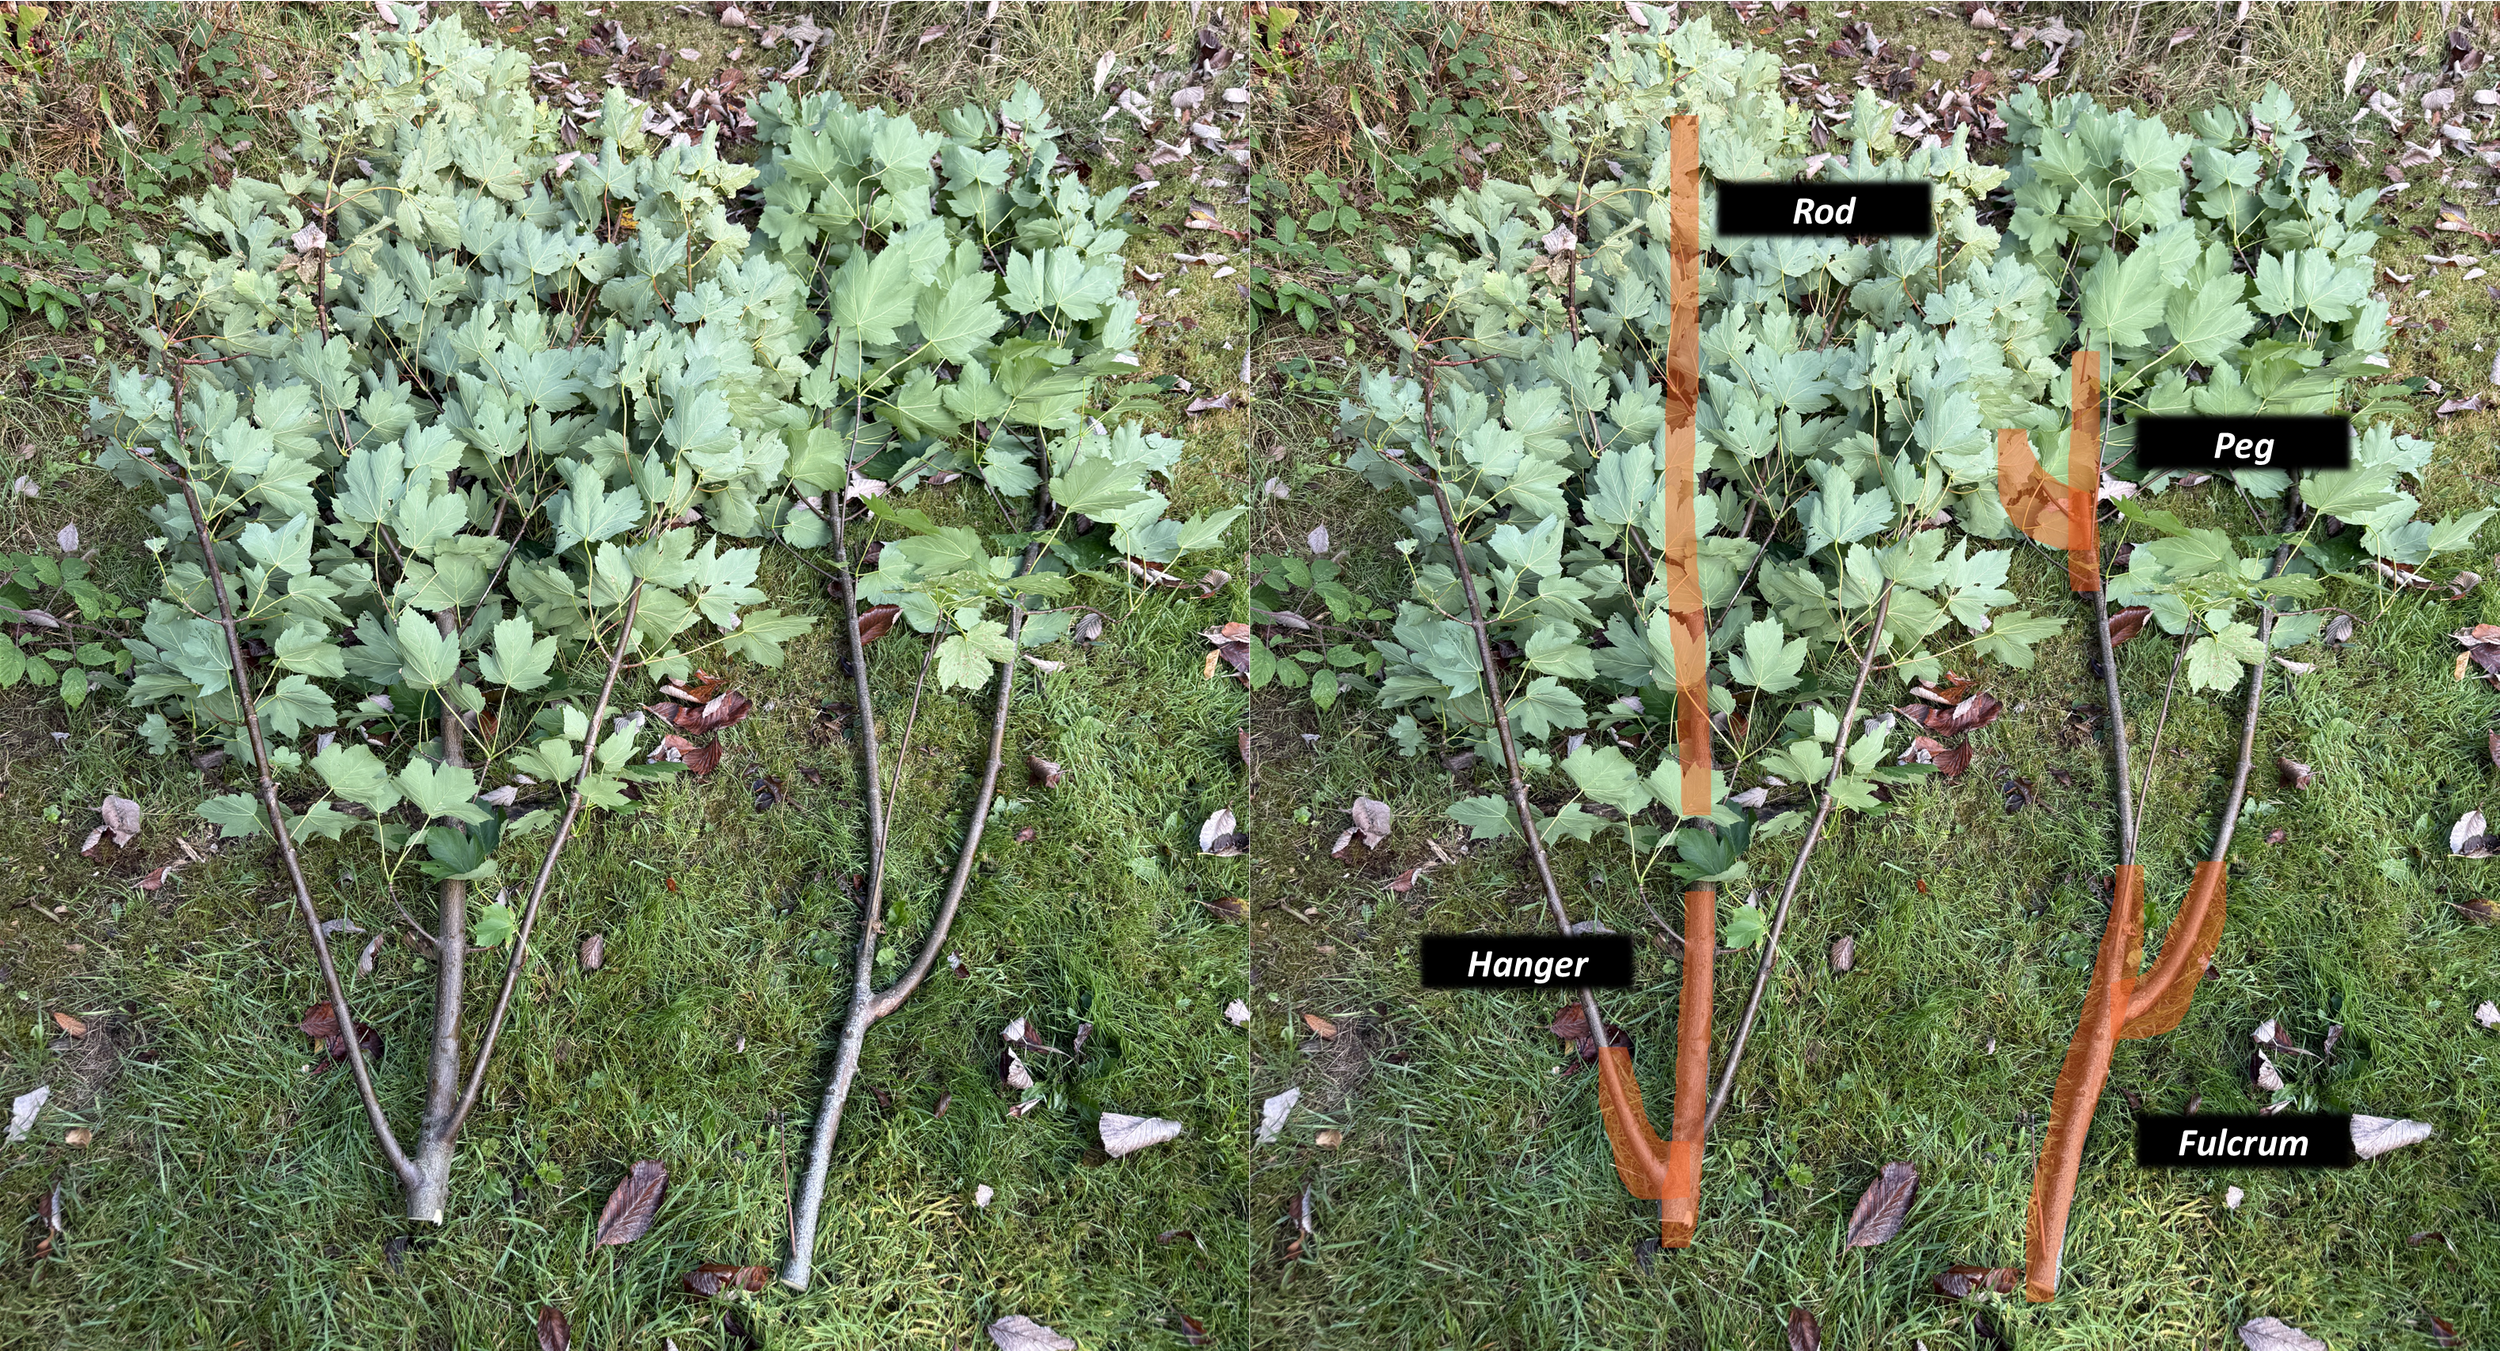
Reading the shape of branches for components
Being able to instantly assess resource candidates for crafting comes with experience. Shape and size is everything. Before even starting this I already knew I would focus in on a sycamore nearby. Many trees are suitable for this - hazel, ash, birch, the list is endless - but sycamore is incredibly plentiful here and will bounce back from two small cuts without issue. The shape of sycamore off-shoot branches also lends itself well to what we are looking for. It isn’t the strongest wood but will be more than enough for an on-the-go hanger with a smaller kettle. If I wanted something a bit more permanent, I might change my species selection but I might also rethink the type of hanger being used.
So we have read the branches and used pruning cuts to remove them, limiting as much damage as possible. We can now prepare each of the four components for use.
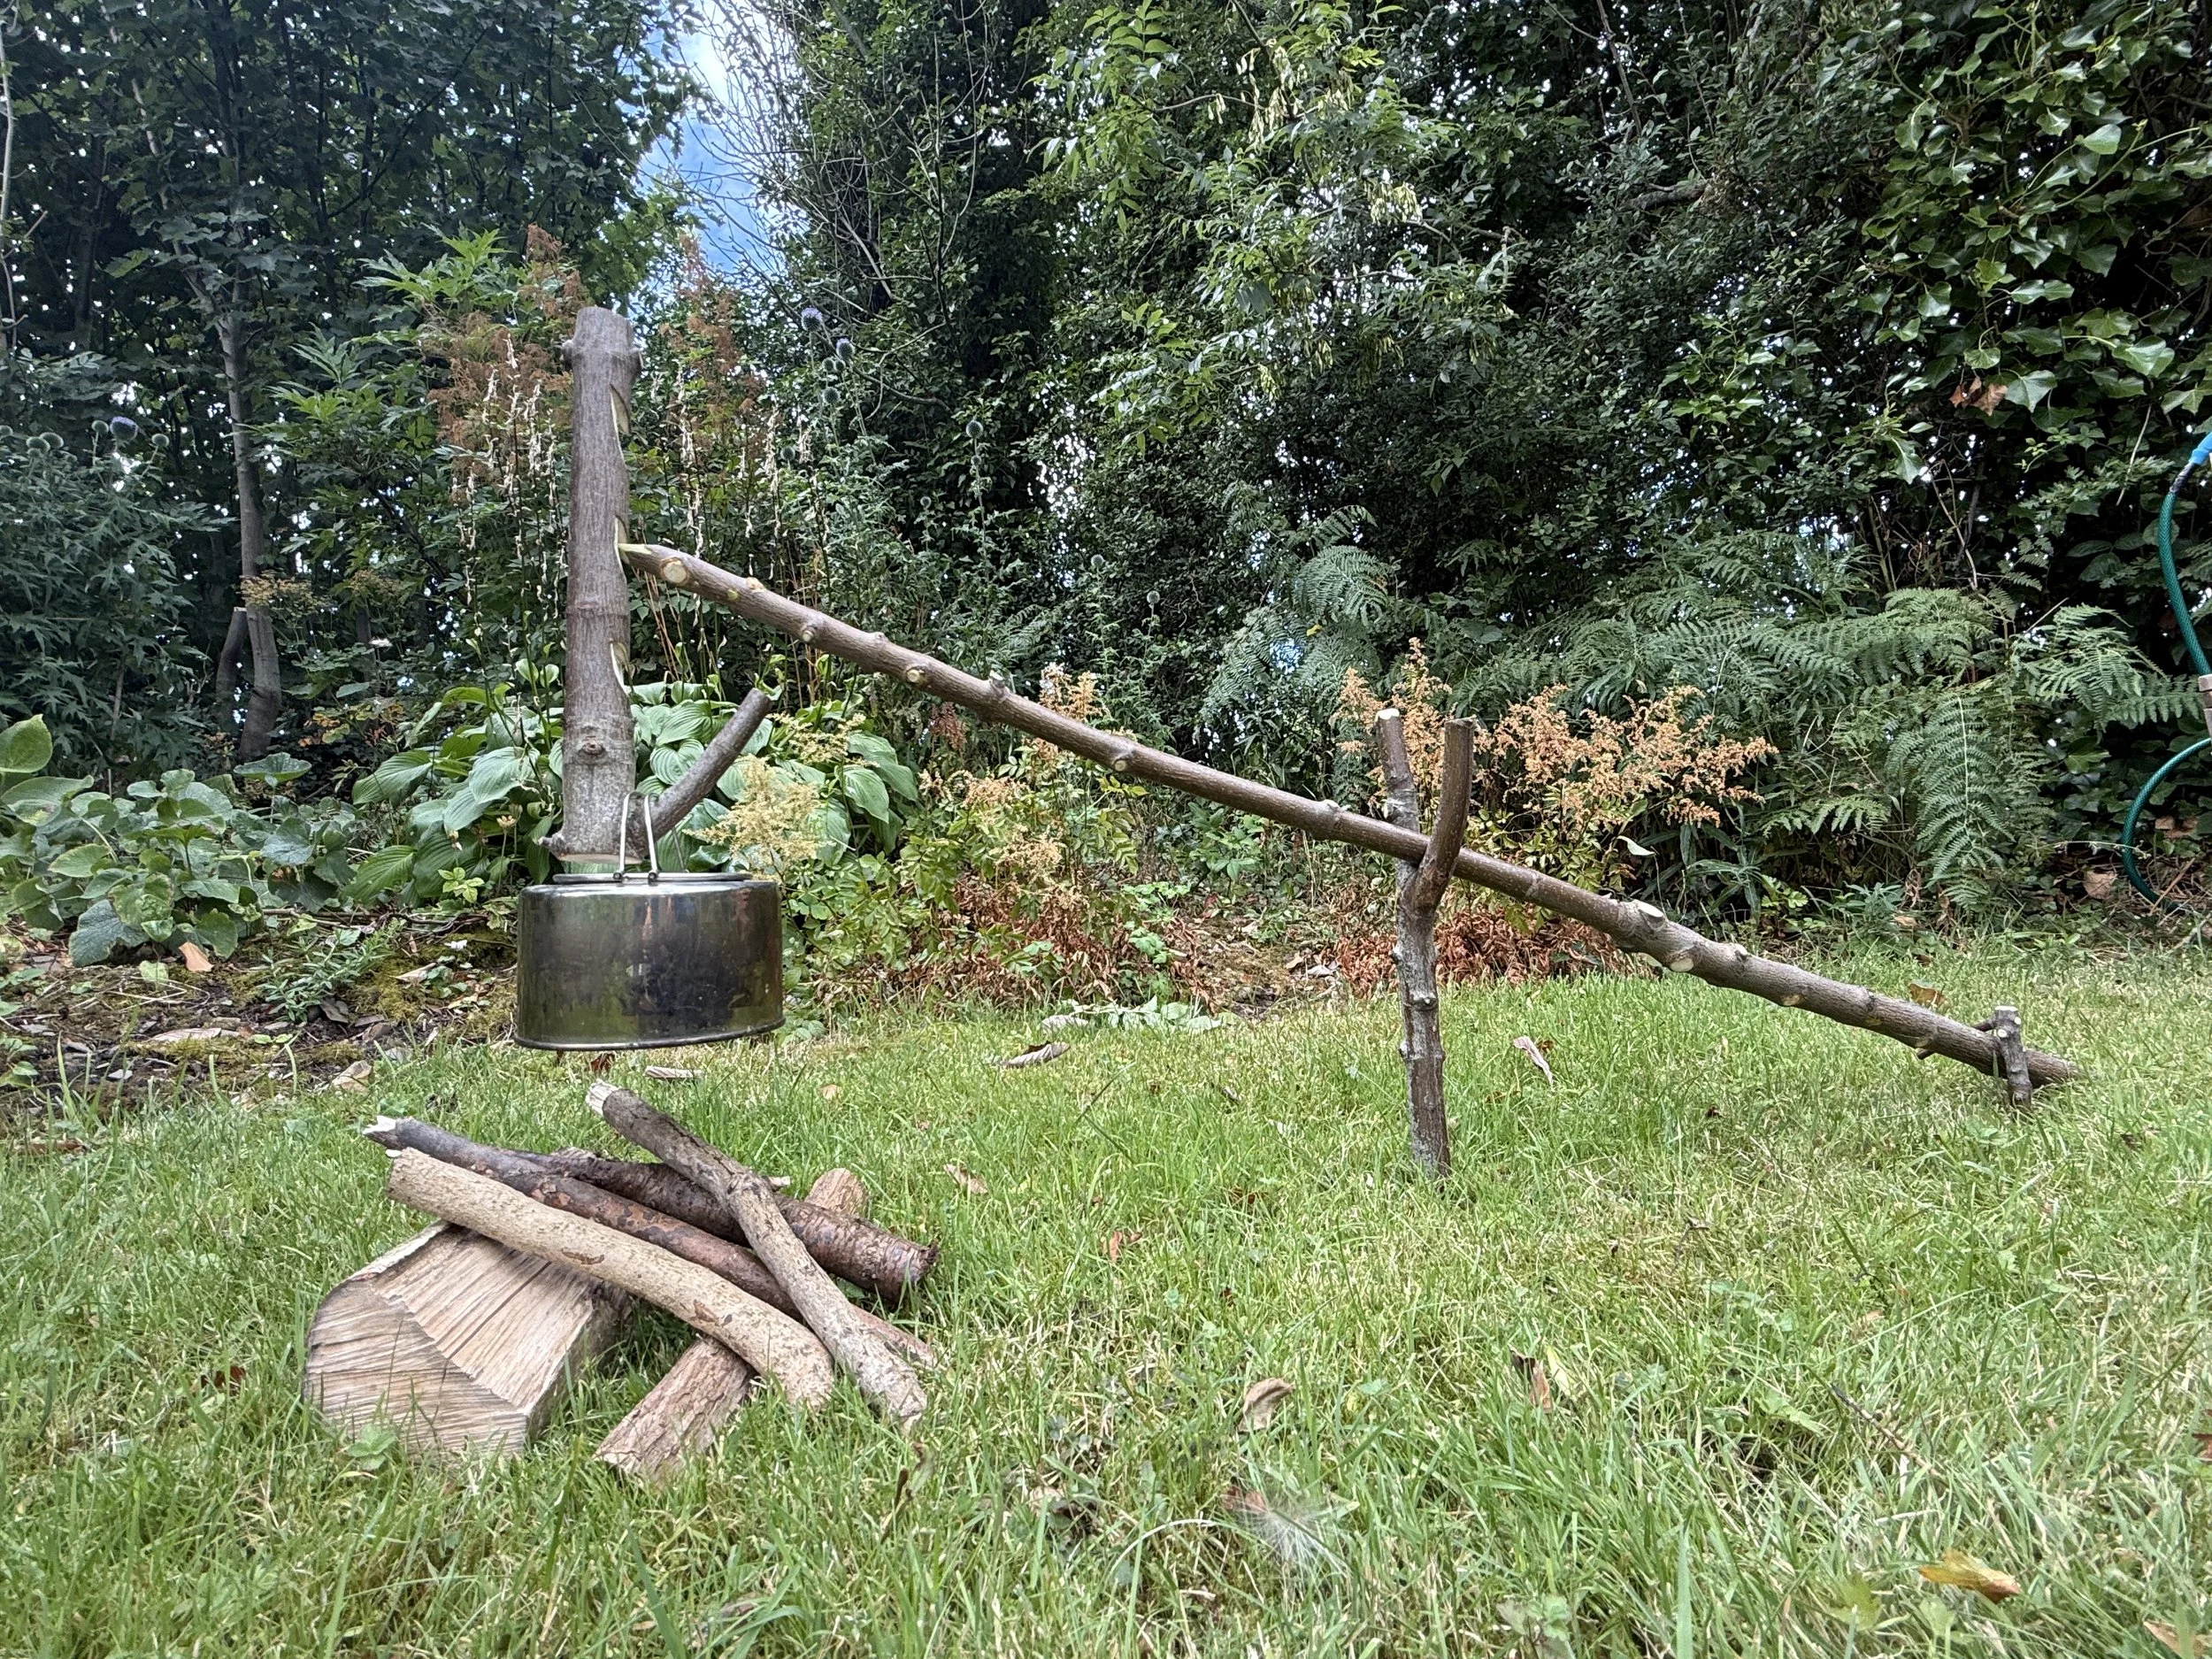
Cantilever pot hanger profile view
Components from right to left: Peg, Rod, Fulcrum, Hanger.
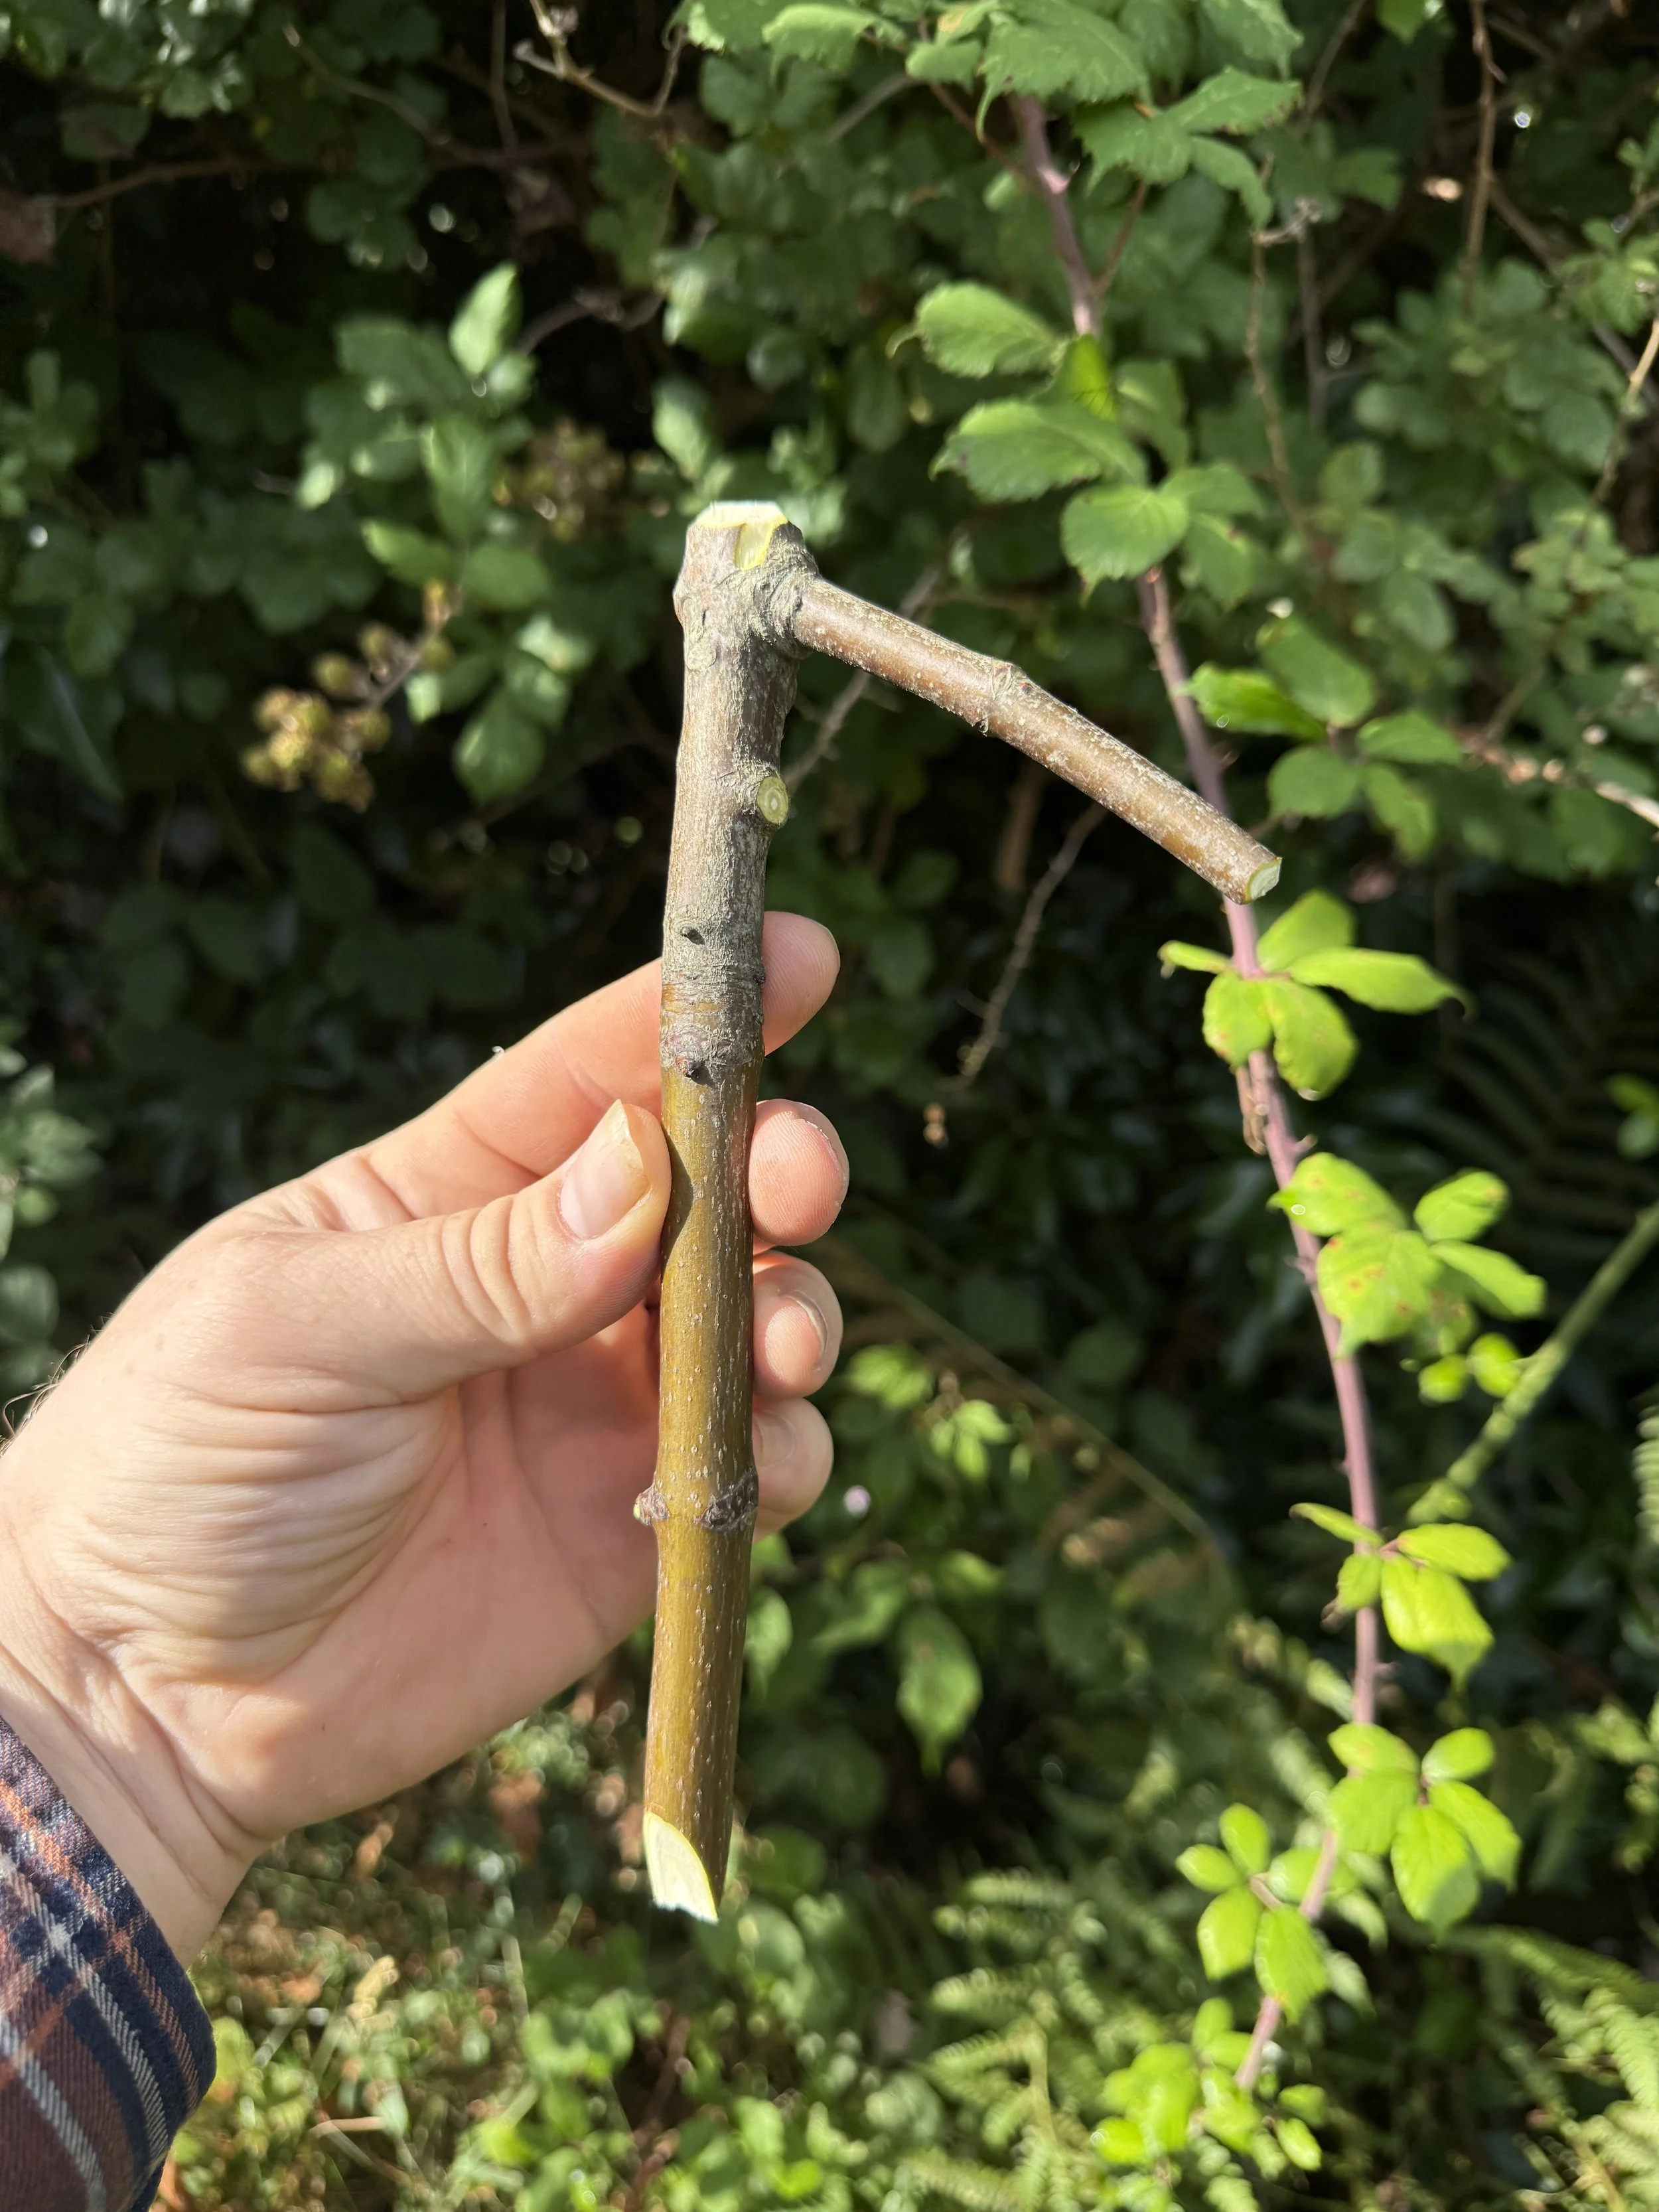
Cantilever pot hanger component: Peg
The peg’s job is simple. Pin down the bottom of the rod when pressure is applied on the hanger. Depending on the weight being exerted, you can get away with a fairly small peg but you do not want it failing as it will wreck the whole contraption. The bottom has been wedge cut to allow driving into the ground (always have the flat edge of a wedge cut perpendicular to the direction of force) and the top has been chamfered to lower the risk of splitting/fraying when malleting.
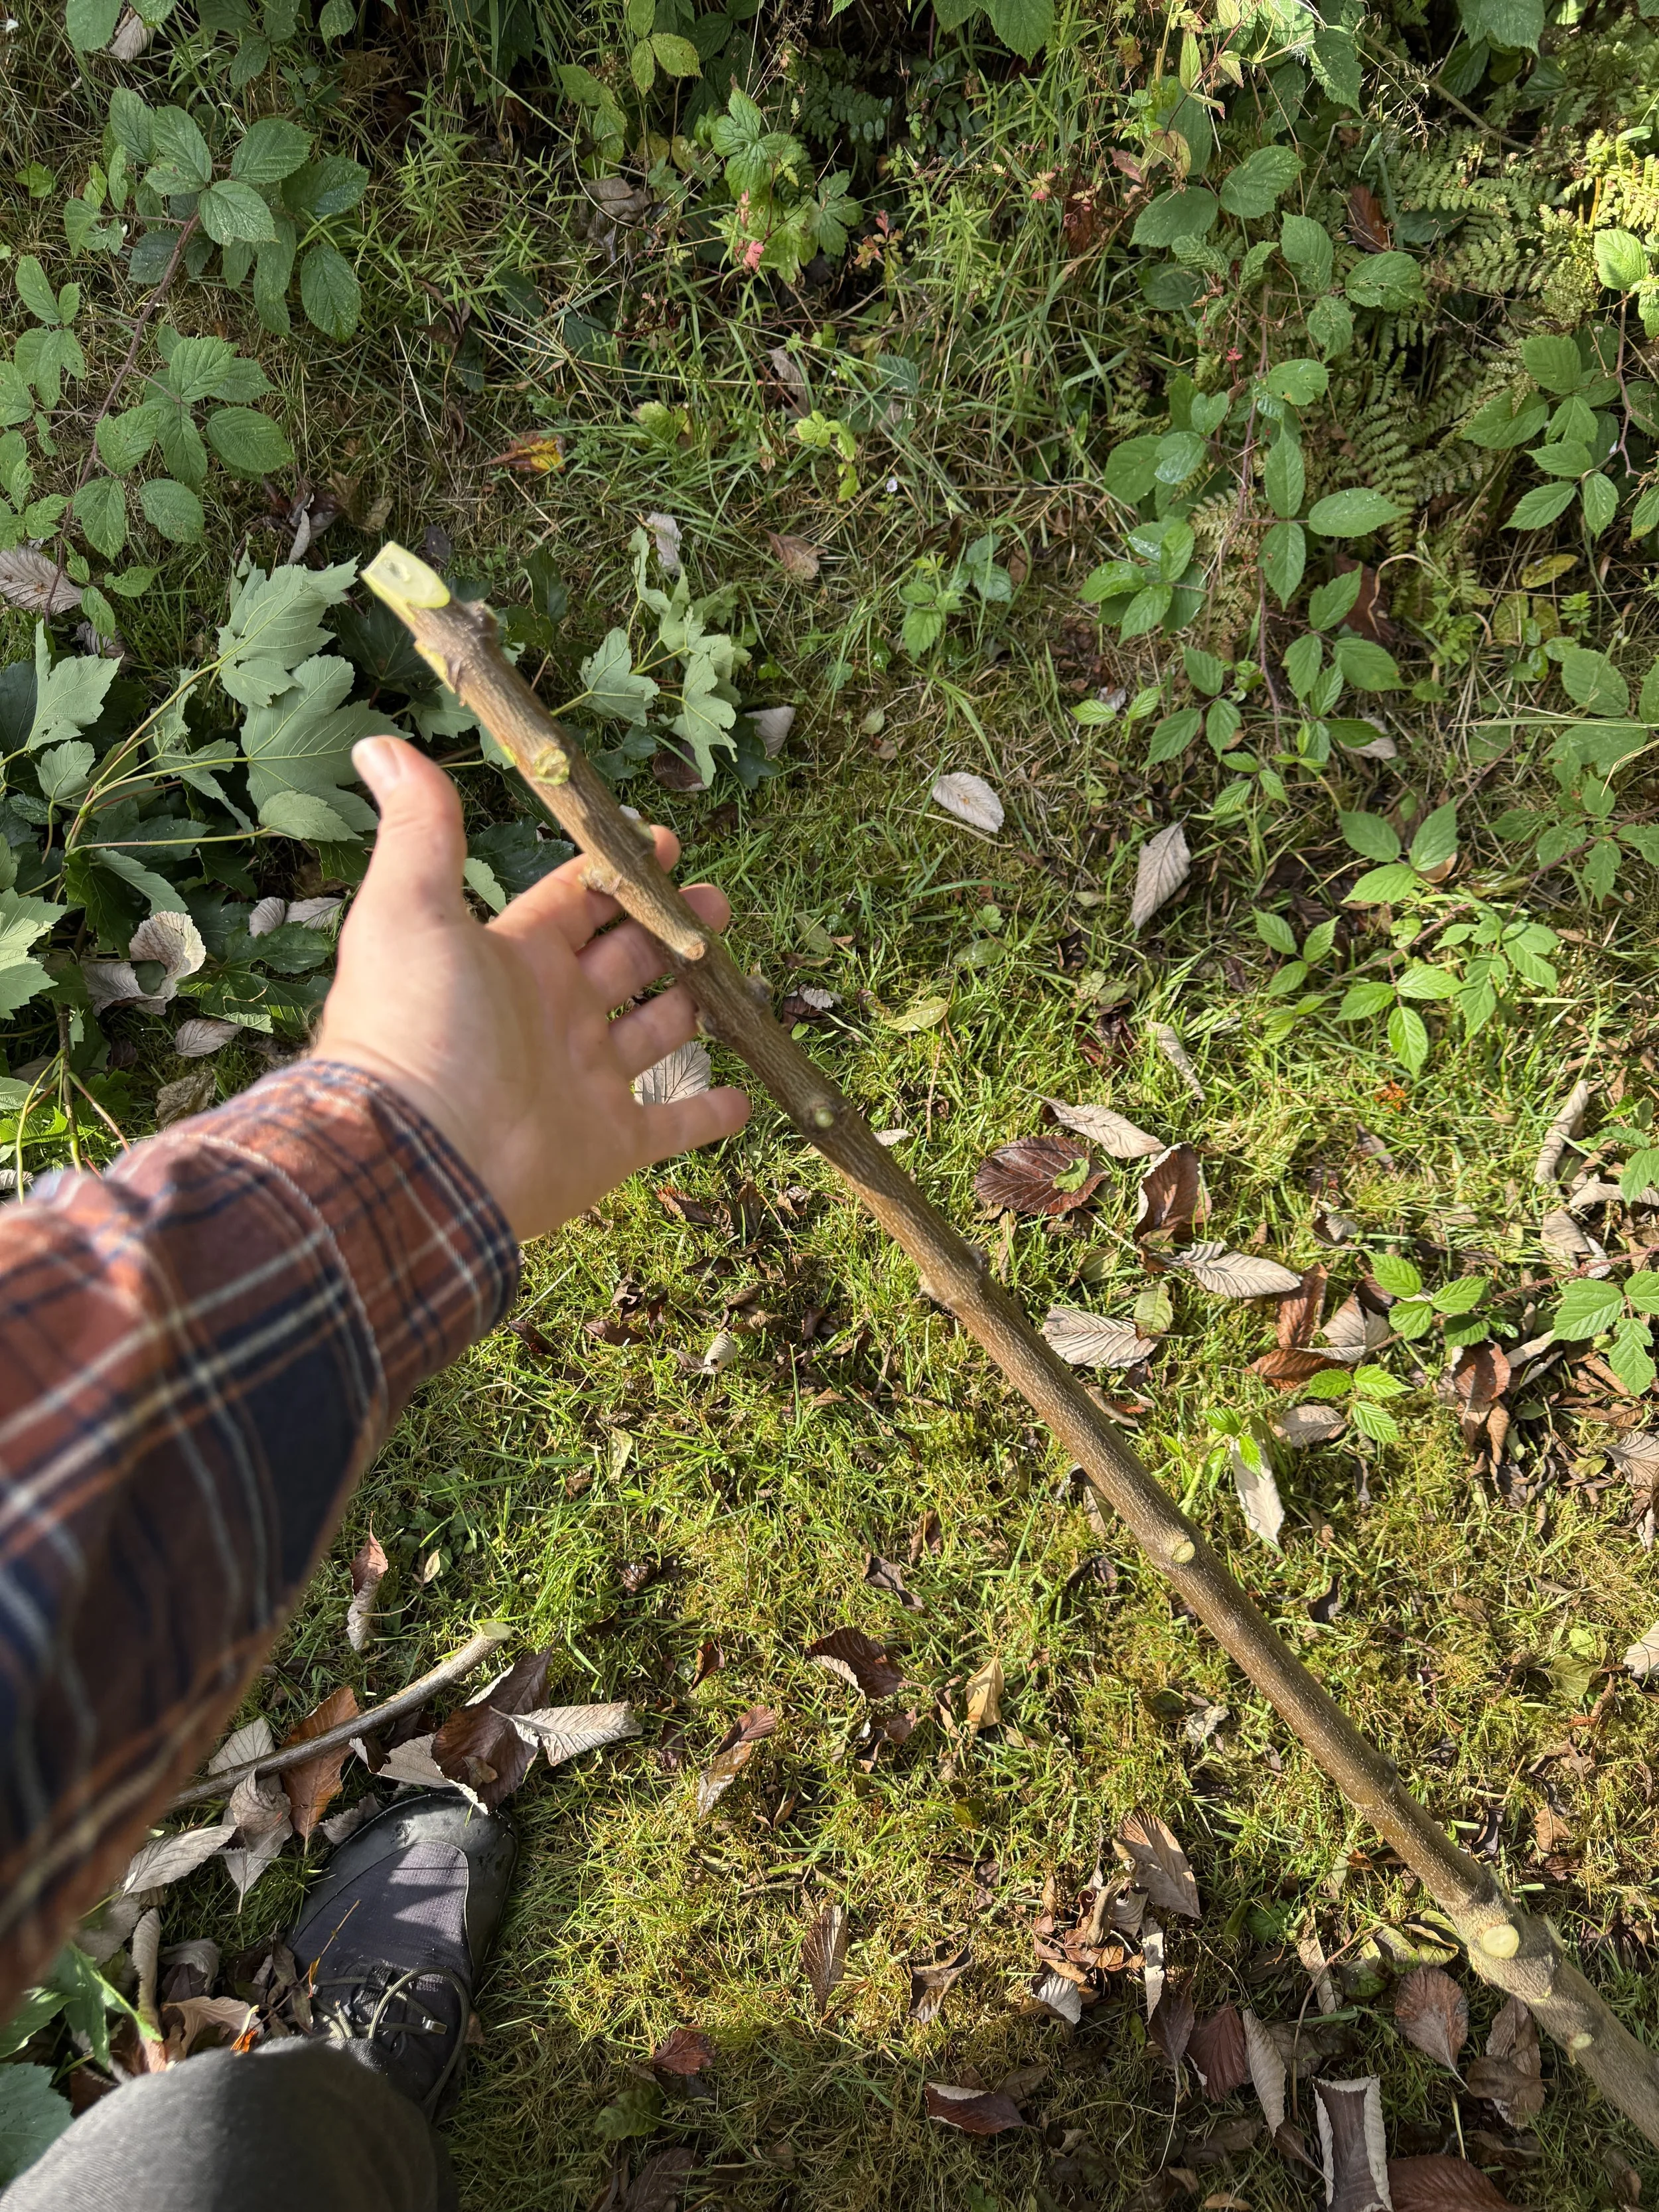
Cantilever pot hanger component - Rod
The rod provides structure for the hanger to hold on to. It has a wedge cut on the balancing end with a small carved divot from the tip of a knife. This recess provides a housing for the beak notch to sit in on the hanger. Before carving the wedge, gently hold the rod at approximately the same angle it will be used at. Allow it to find its centre of gravity (all sticks will roll until stable - don’t force it into a position it is unbalanced) and when it has settled, carve the wedge cut parallel to the ground.
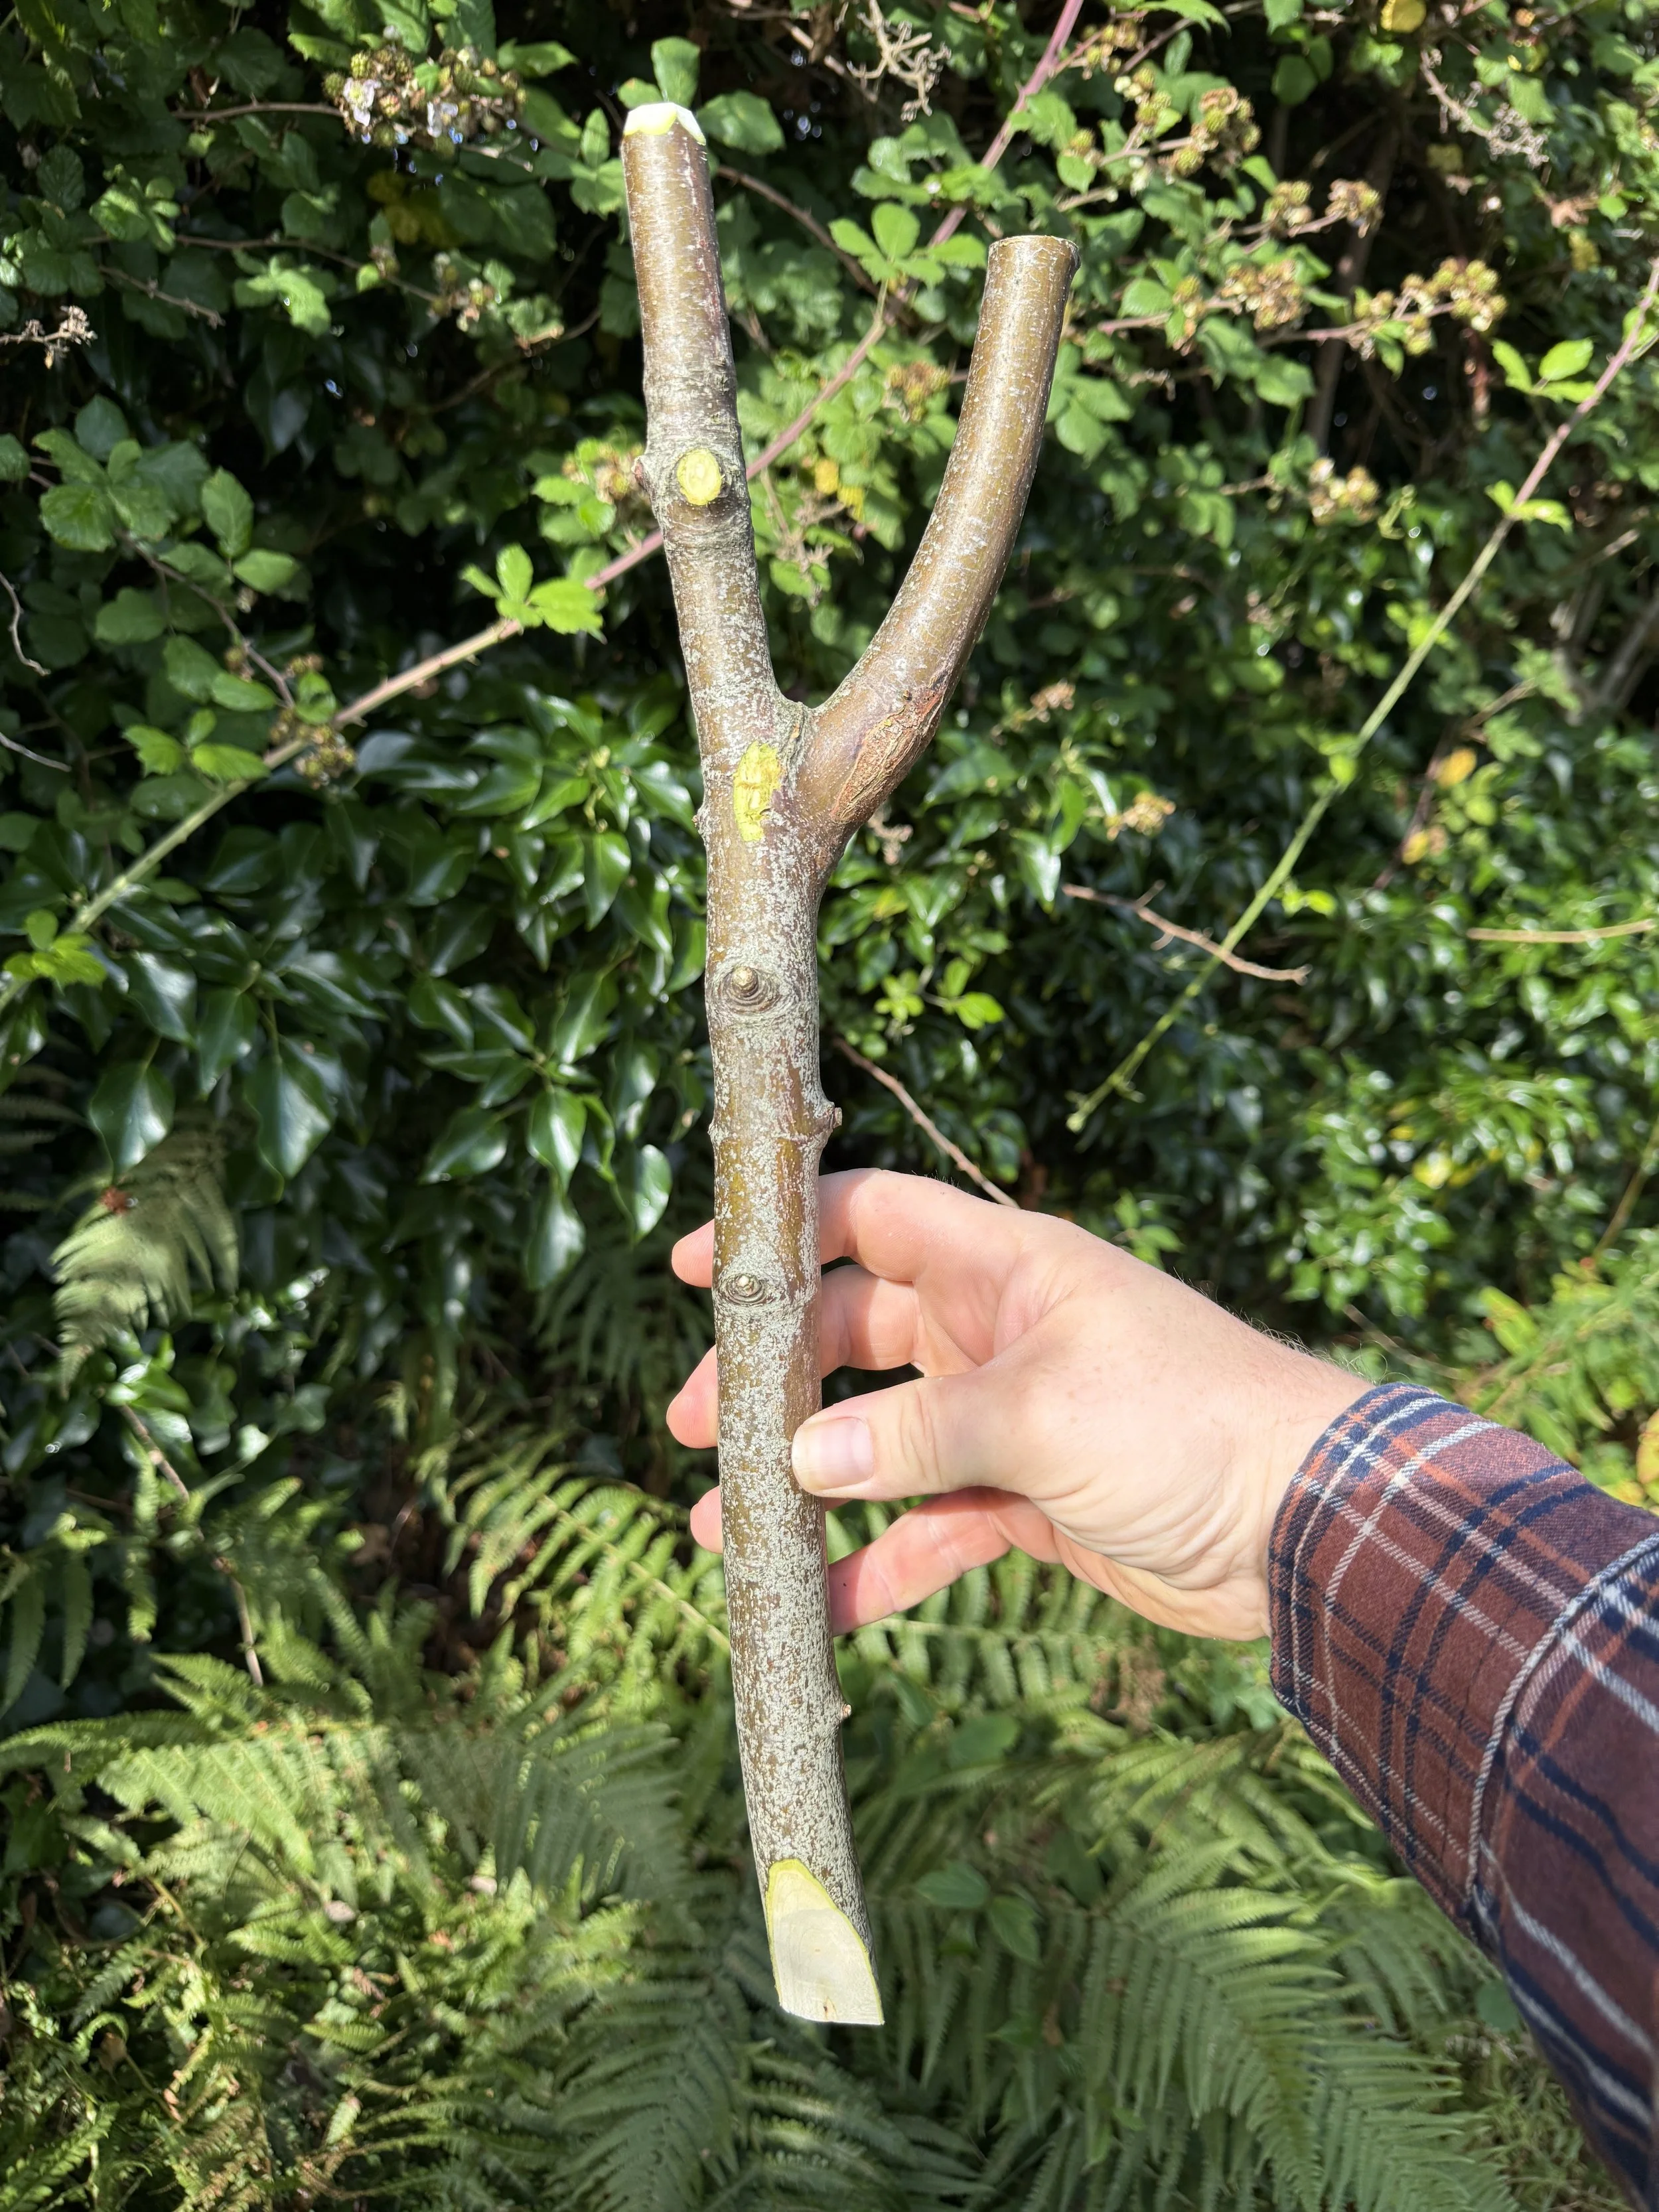
Cantilever pot hanger component - Fulcrum
The fulcrum lifts the rod to a desired height. Similar to a see-saw but without the movement due to one end being fixed down. Wedge cut the bottom, again perpendicular to the angle of force, and chamfer the top where it will be hit.
A little extra knowledge - all sorts of things can be used as the fulcrum including rocks, logs etc. Obviously, if it is a static object you have less options for where you can have your fire. Round logs on their side are fantastic as you can actually roll them back and forth underneath the rod to have more or less elevation on the fly but these are not often found in the wild.
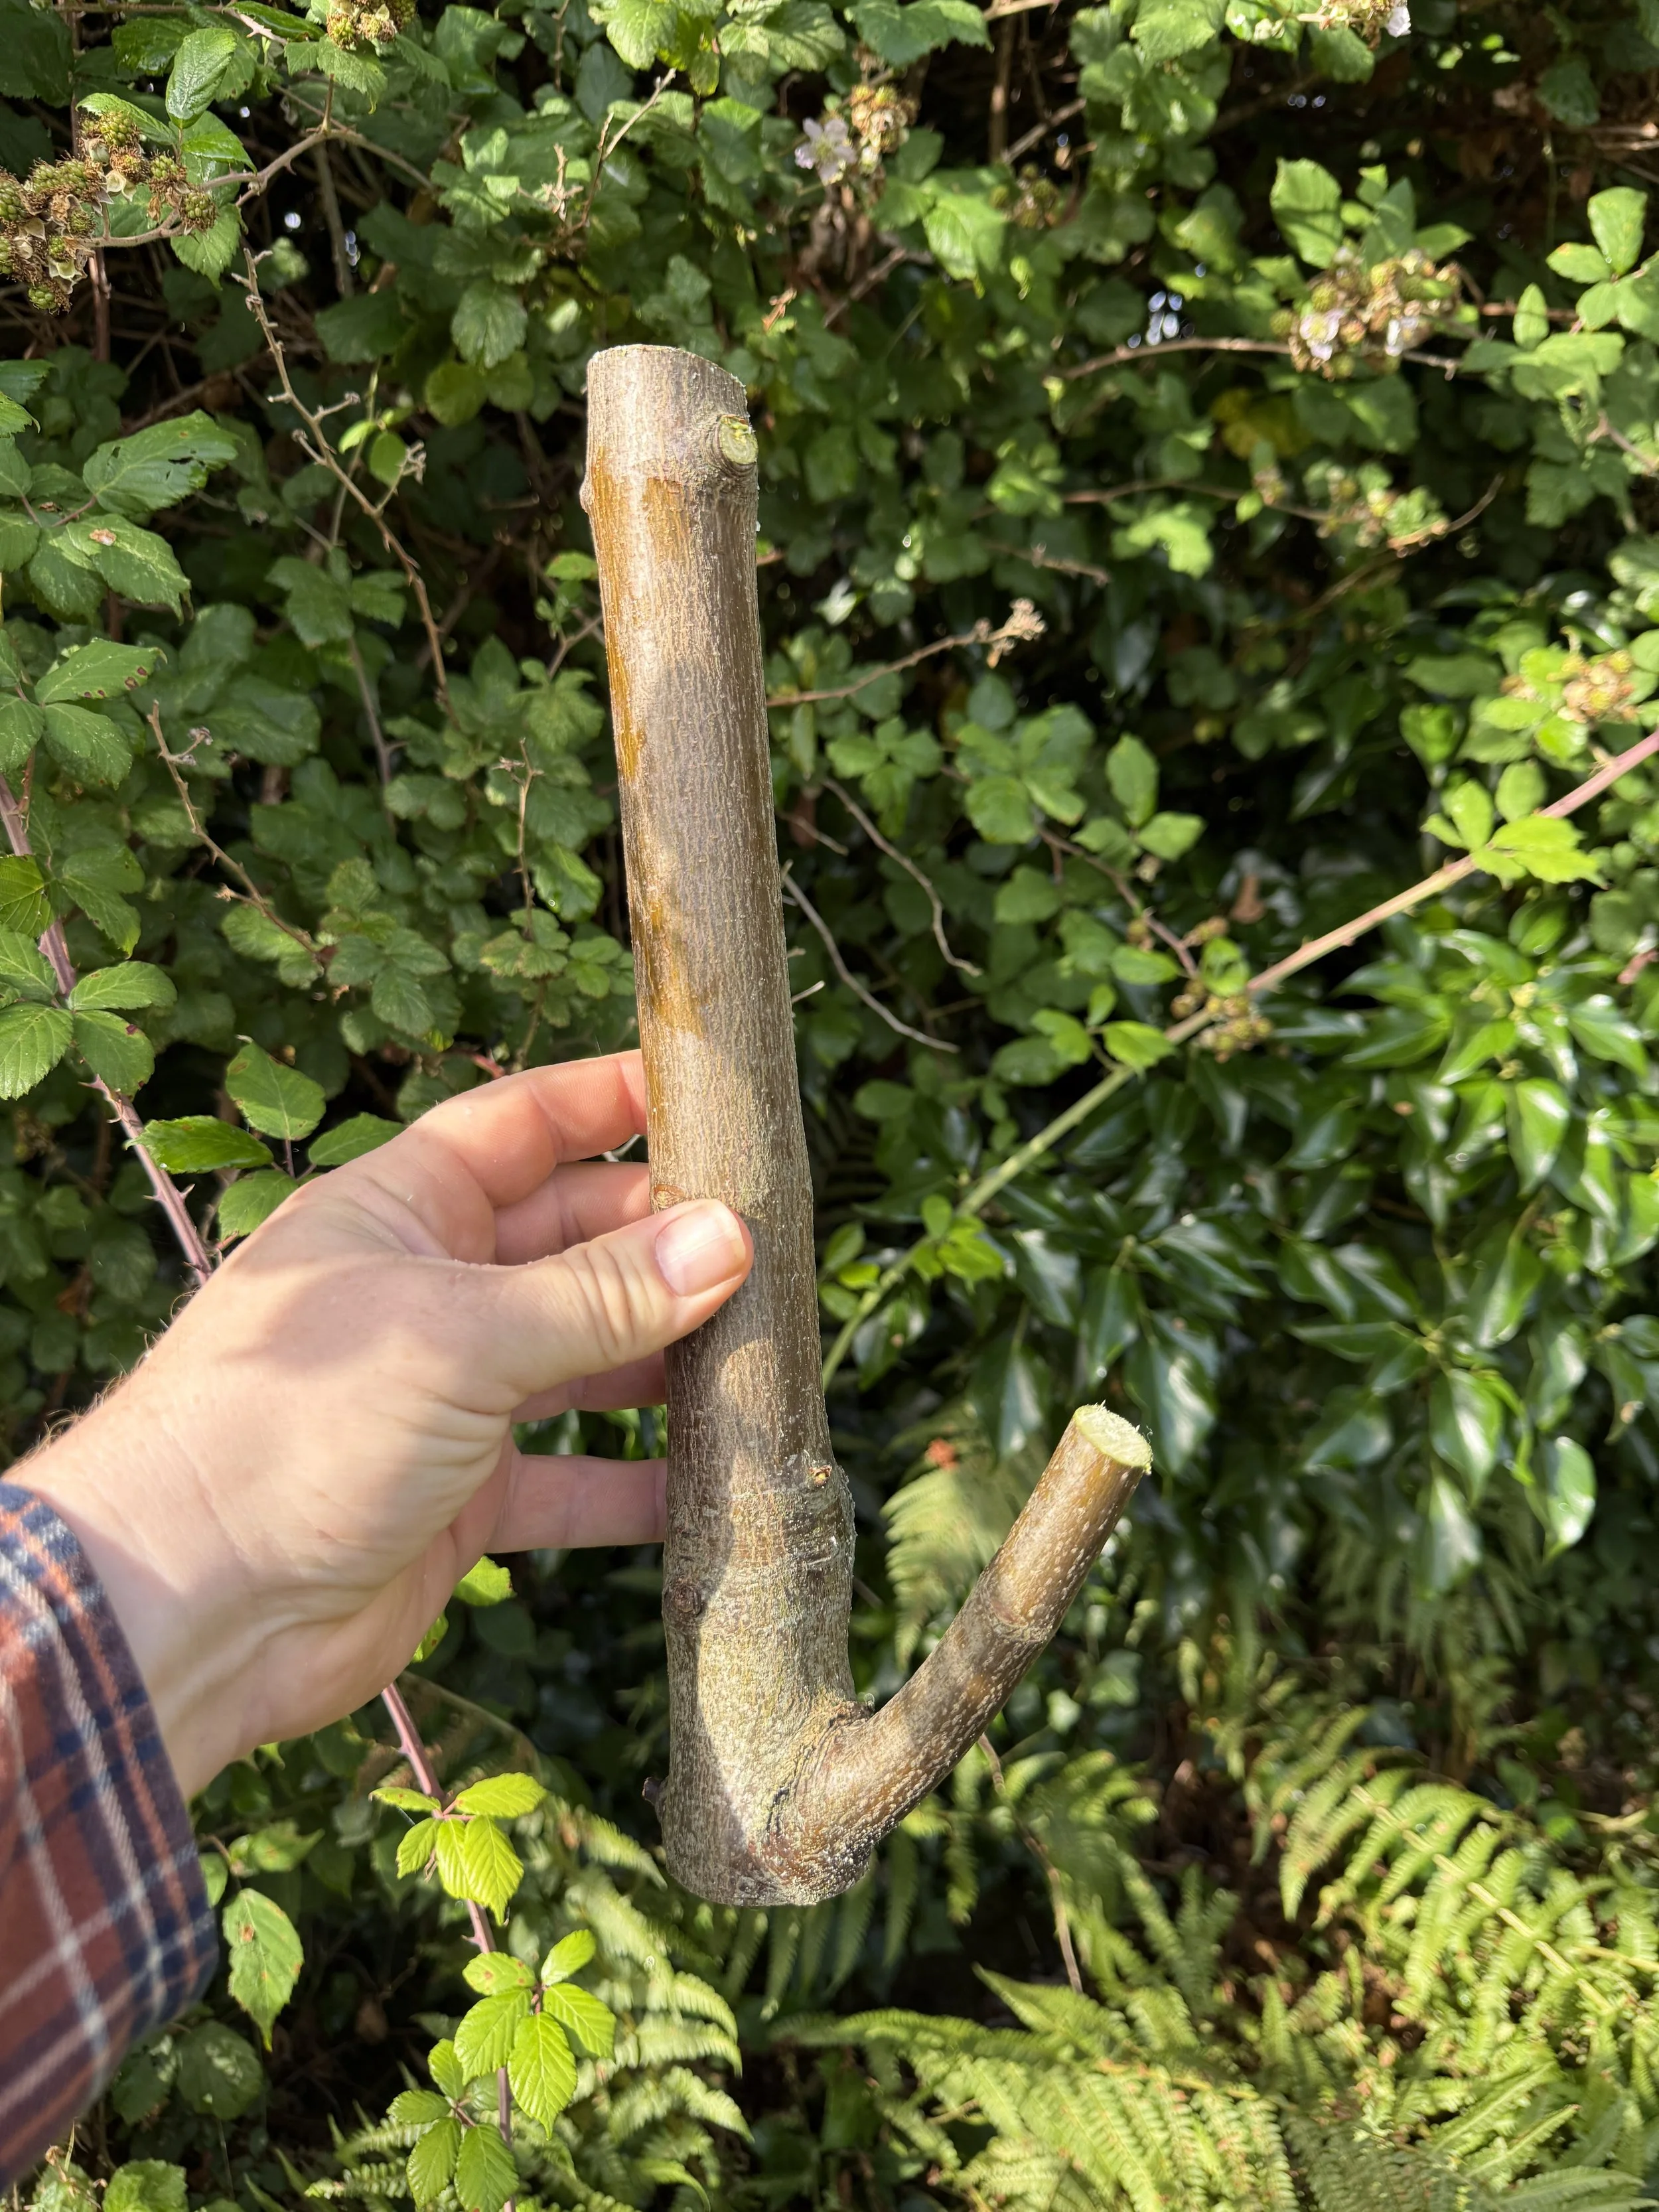
Cantilever pot hanger component - Hanger
I have saved this one until last as it is the piece that requires the most work. Hangers like this can be used in all sorts of contexts so it is worth familiarising yourself with how to make them. A beautifully simple process turns this simple stick into a stick with functionality and versatility. Adding multiple beaked notches allows the hanger to sit at different levels and therefore raise or lower the height of the cookware, maximising the heat input as the fire burns down.
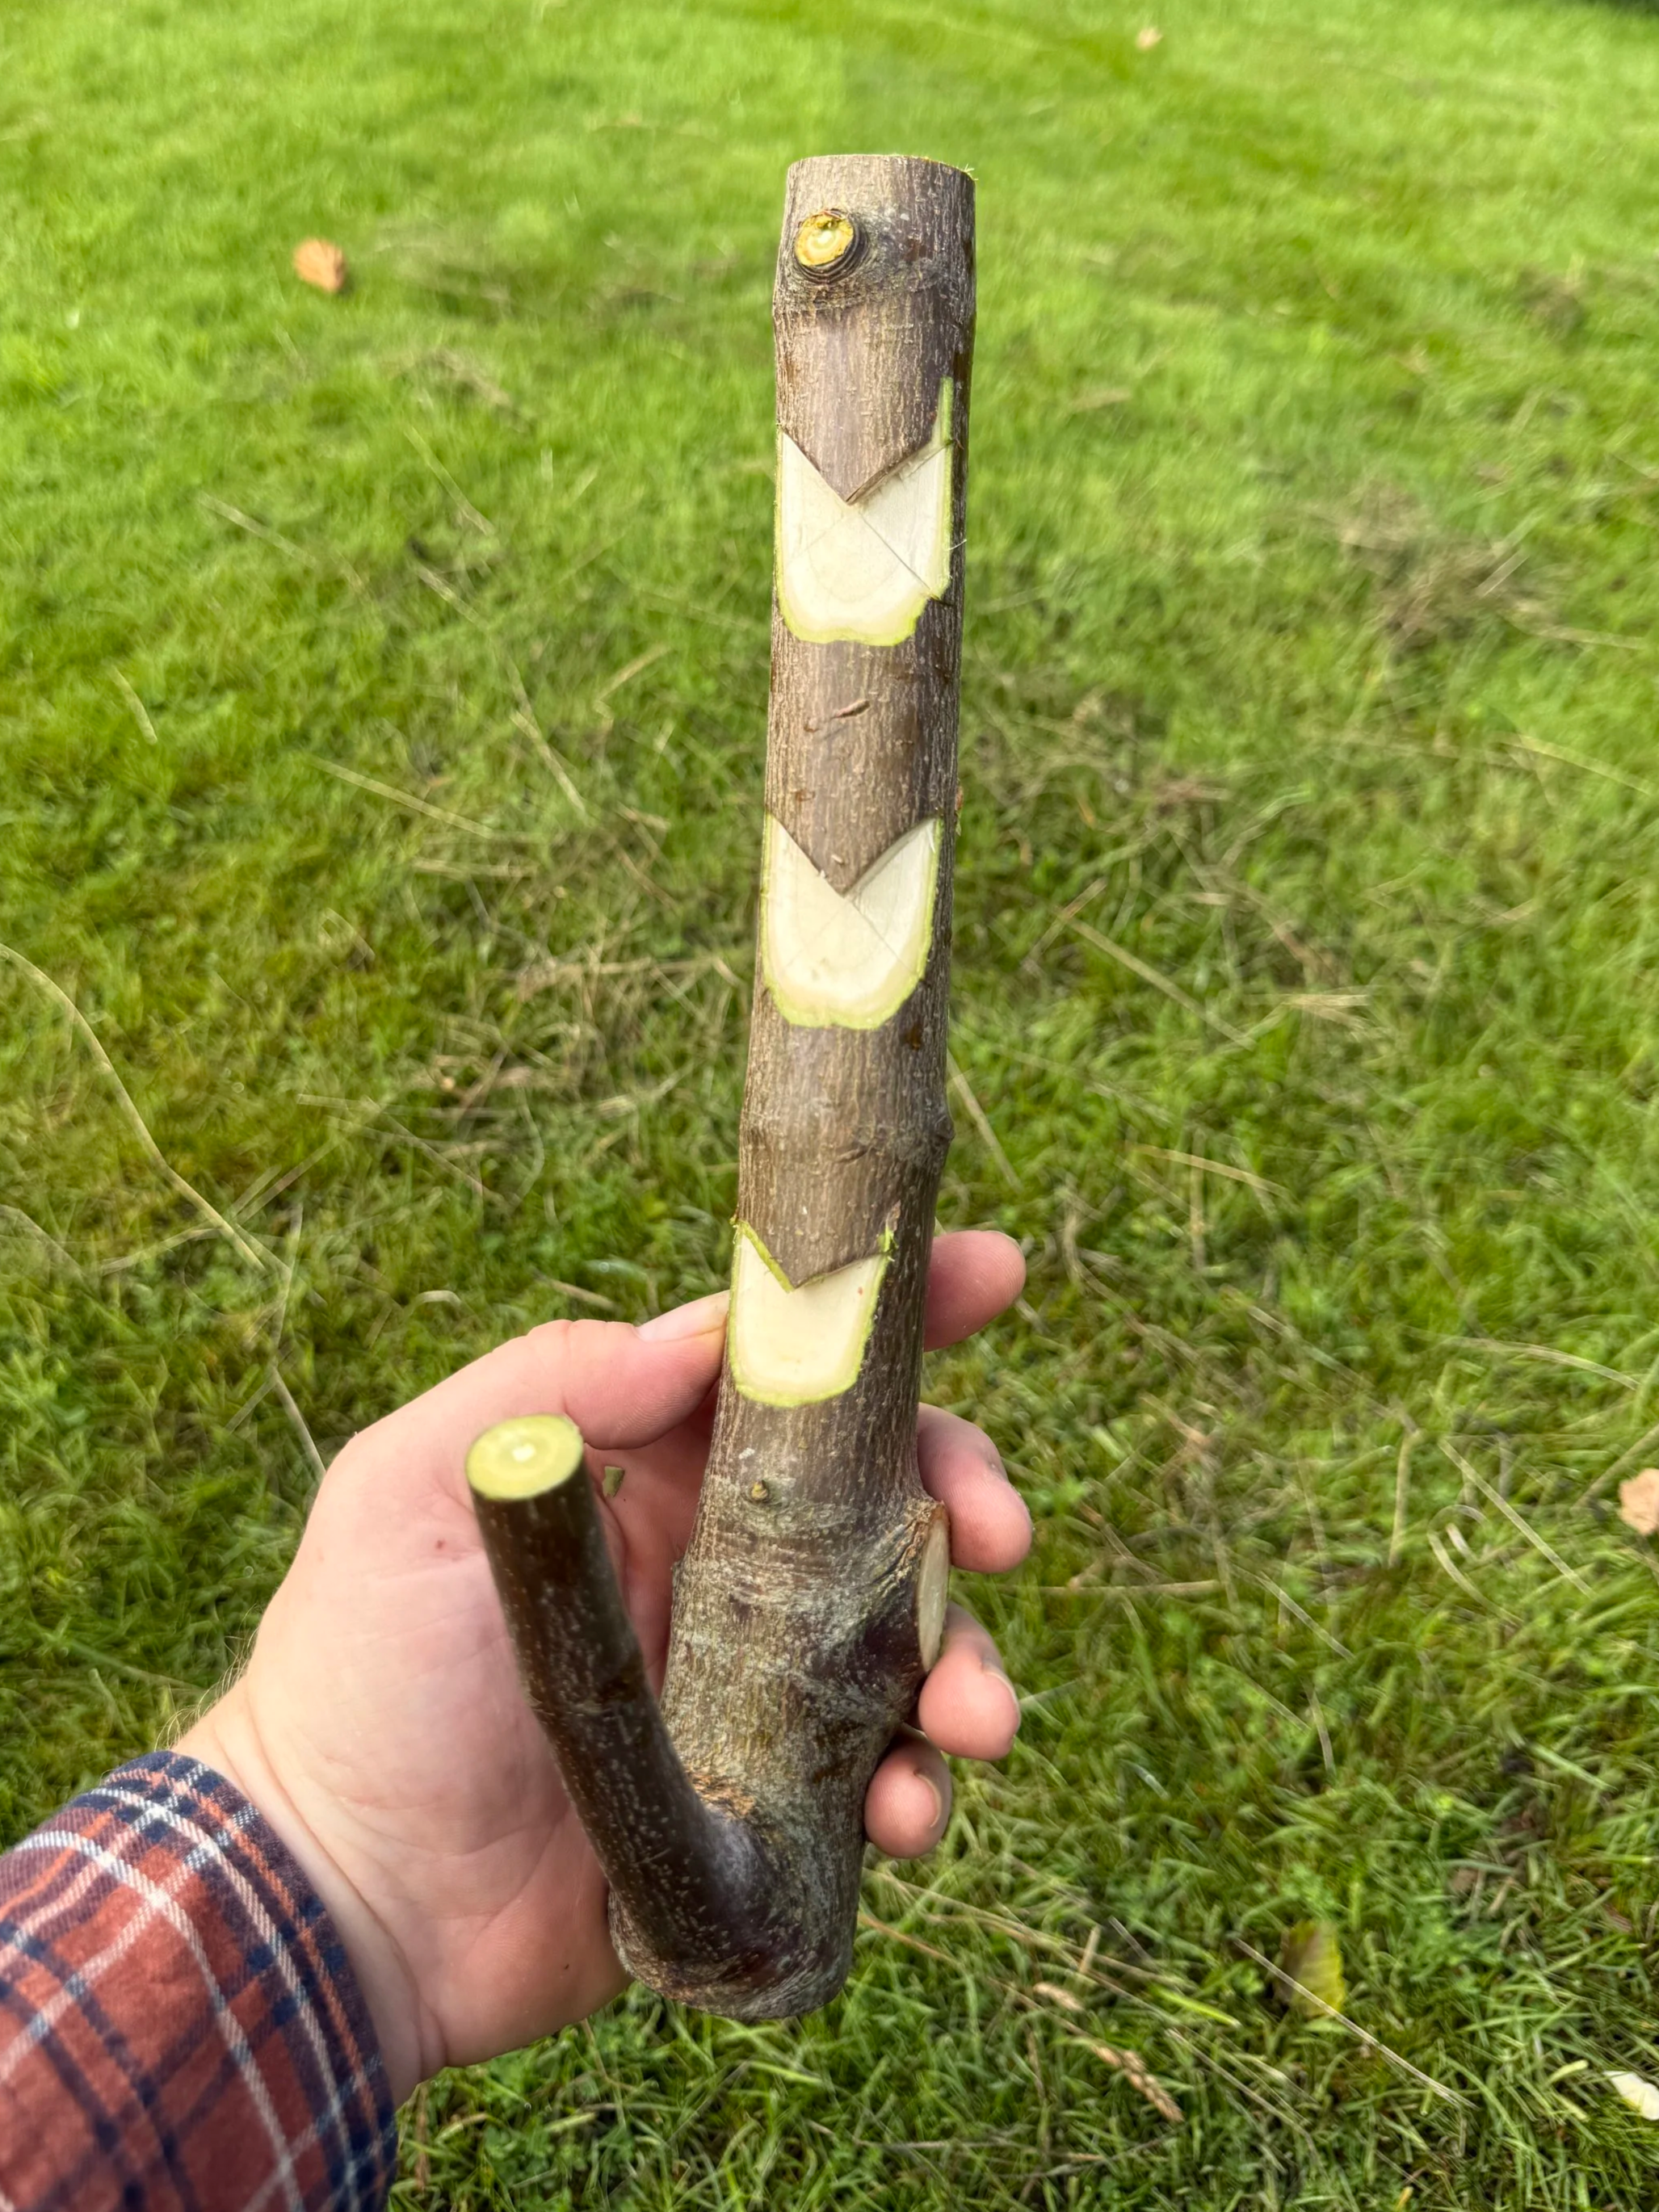
Hanger with beaked notches
To make a beaked notch, stop cuts are added in a cross form and then ¾ of the segments are removed, leaving a single triangle at the top. This then has material removed from behind leaving a pointed tip. Make sure that all of these notches are on the same side as the protruding stick that the pot will hang from so that the weight from the pot pulls everything in the right direction and locks in.
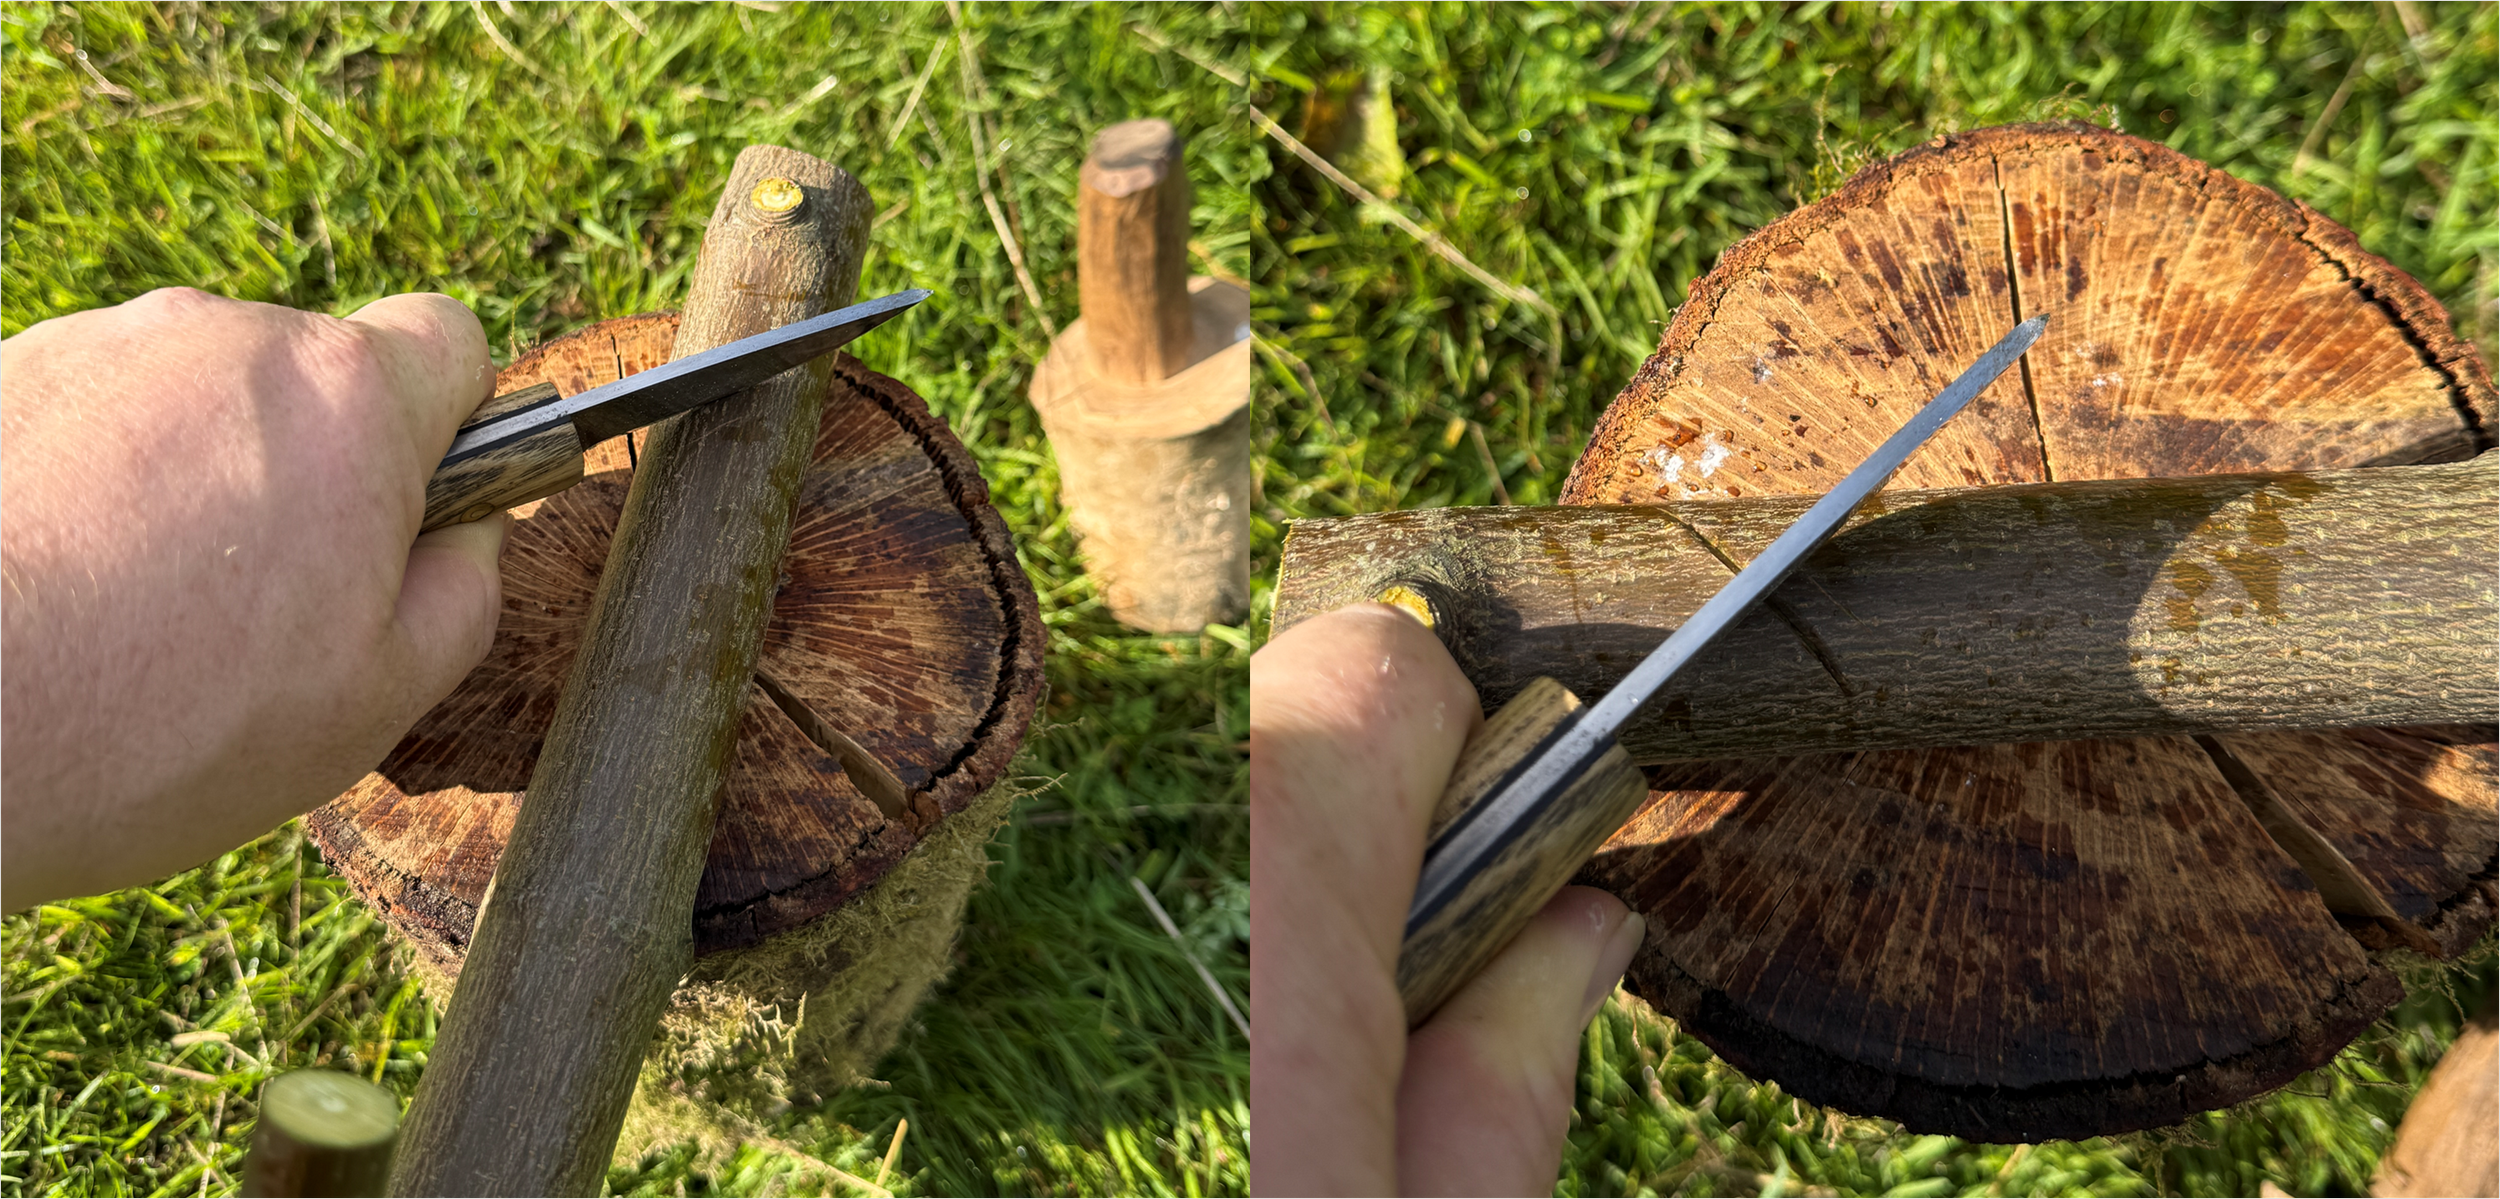
Beaked notch step 1 - mallet stop cuts in the shape of an X
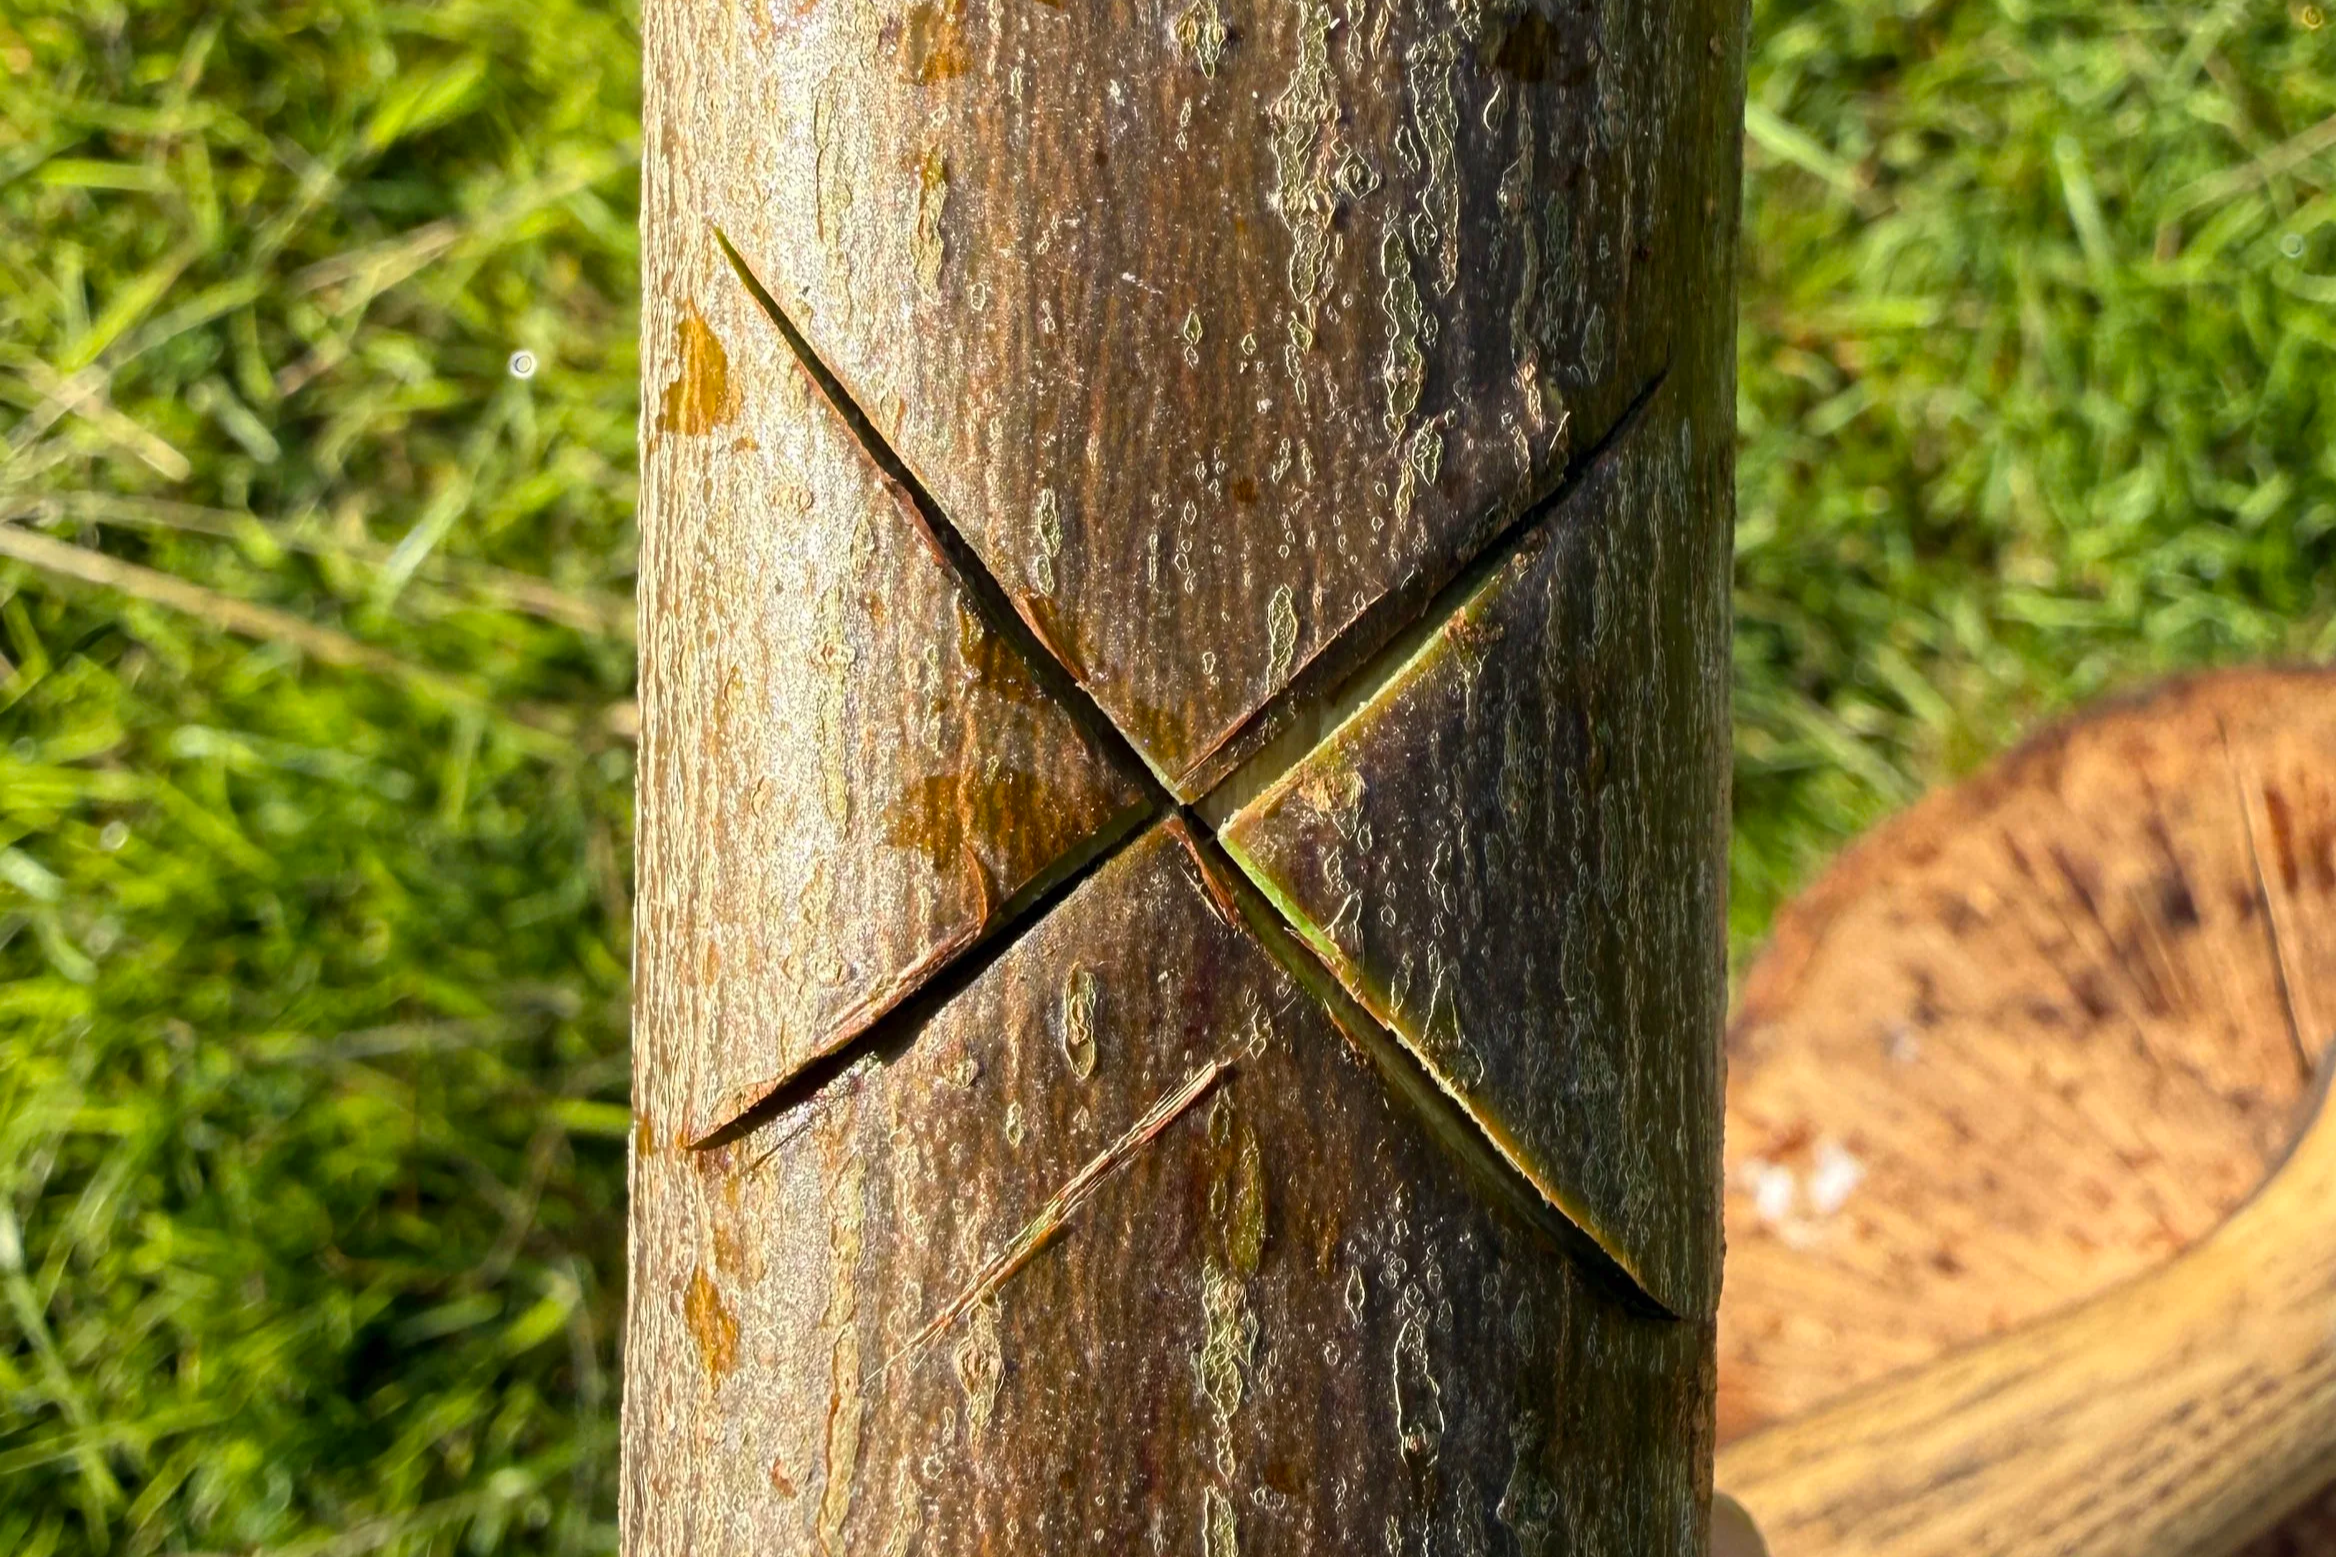
Beaked notch step 2 - remove right, bottom and left triangles
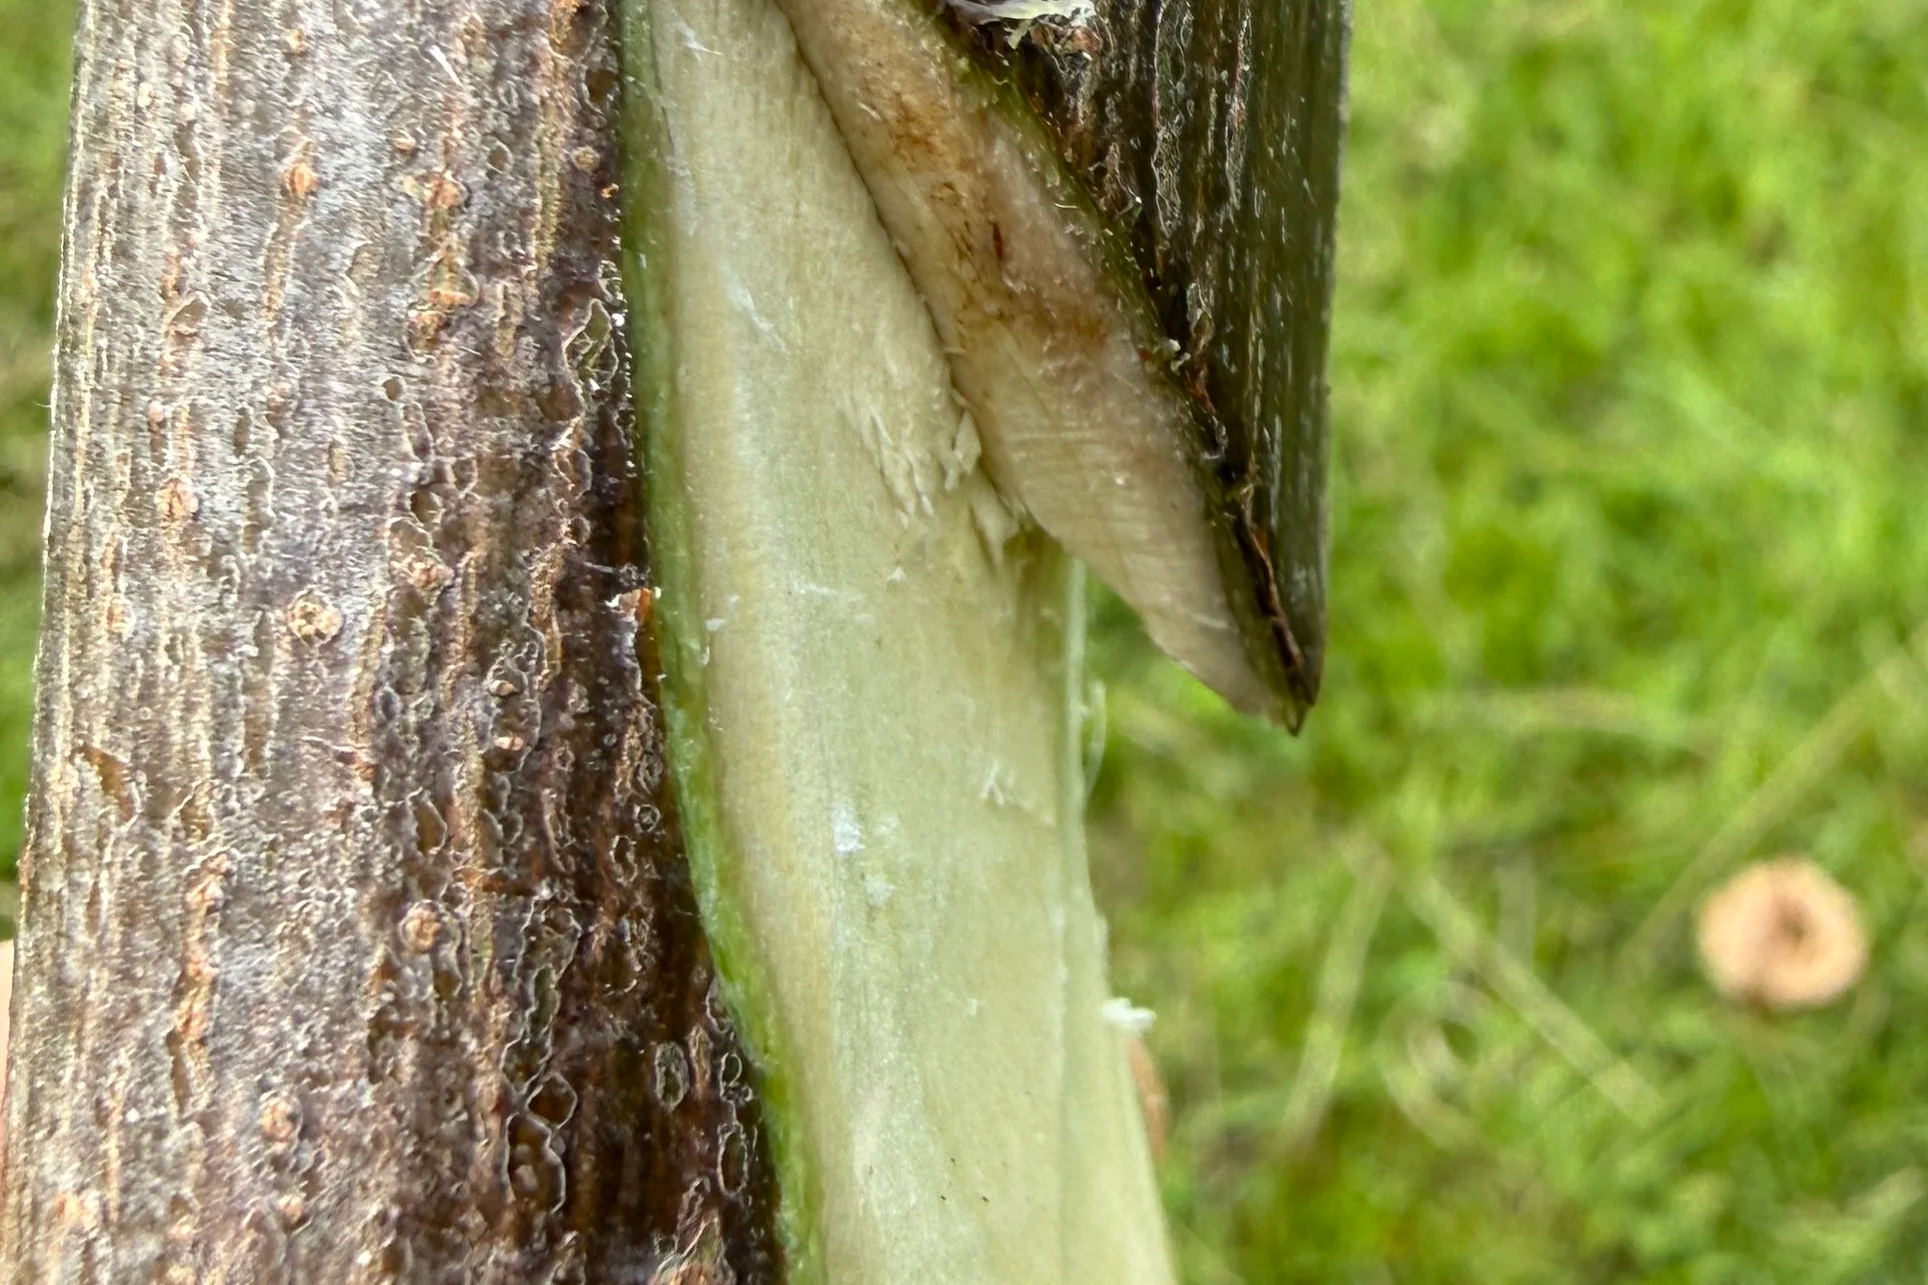
Beaked notch step 3 - undercut the point
Now you have all of your components prepared it is time to assemble. Make sure, as with all fire preparation, you have cleared your site of debris and checked for any potential hazards. As I am doing this straight onto grassy ground I have also cut and removed the top layer of turf to add back in when everything has been adequately cooled.
Arrange the hanger before lighting your fire. It is much easier to relocate an unlit fire lay underneath the hanger than it is to reposition the hanger over a lit fire.
Also consider the wind direction. Short fires shouldn’t be an issue but if you are heating up a larger amount of liquid or have a larger than necessary fire and are using dryer components, the wind could blow the fire into the rod and set fire to it.
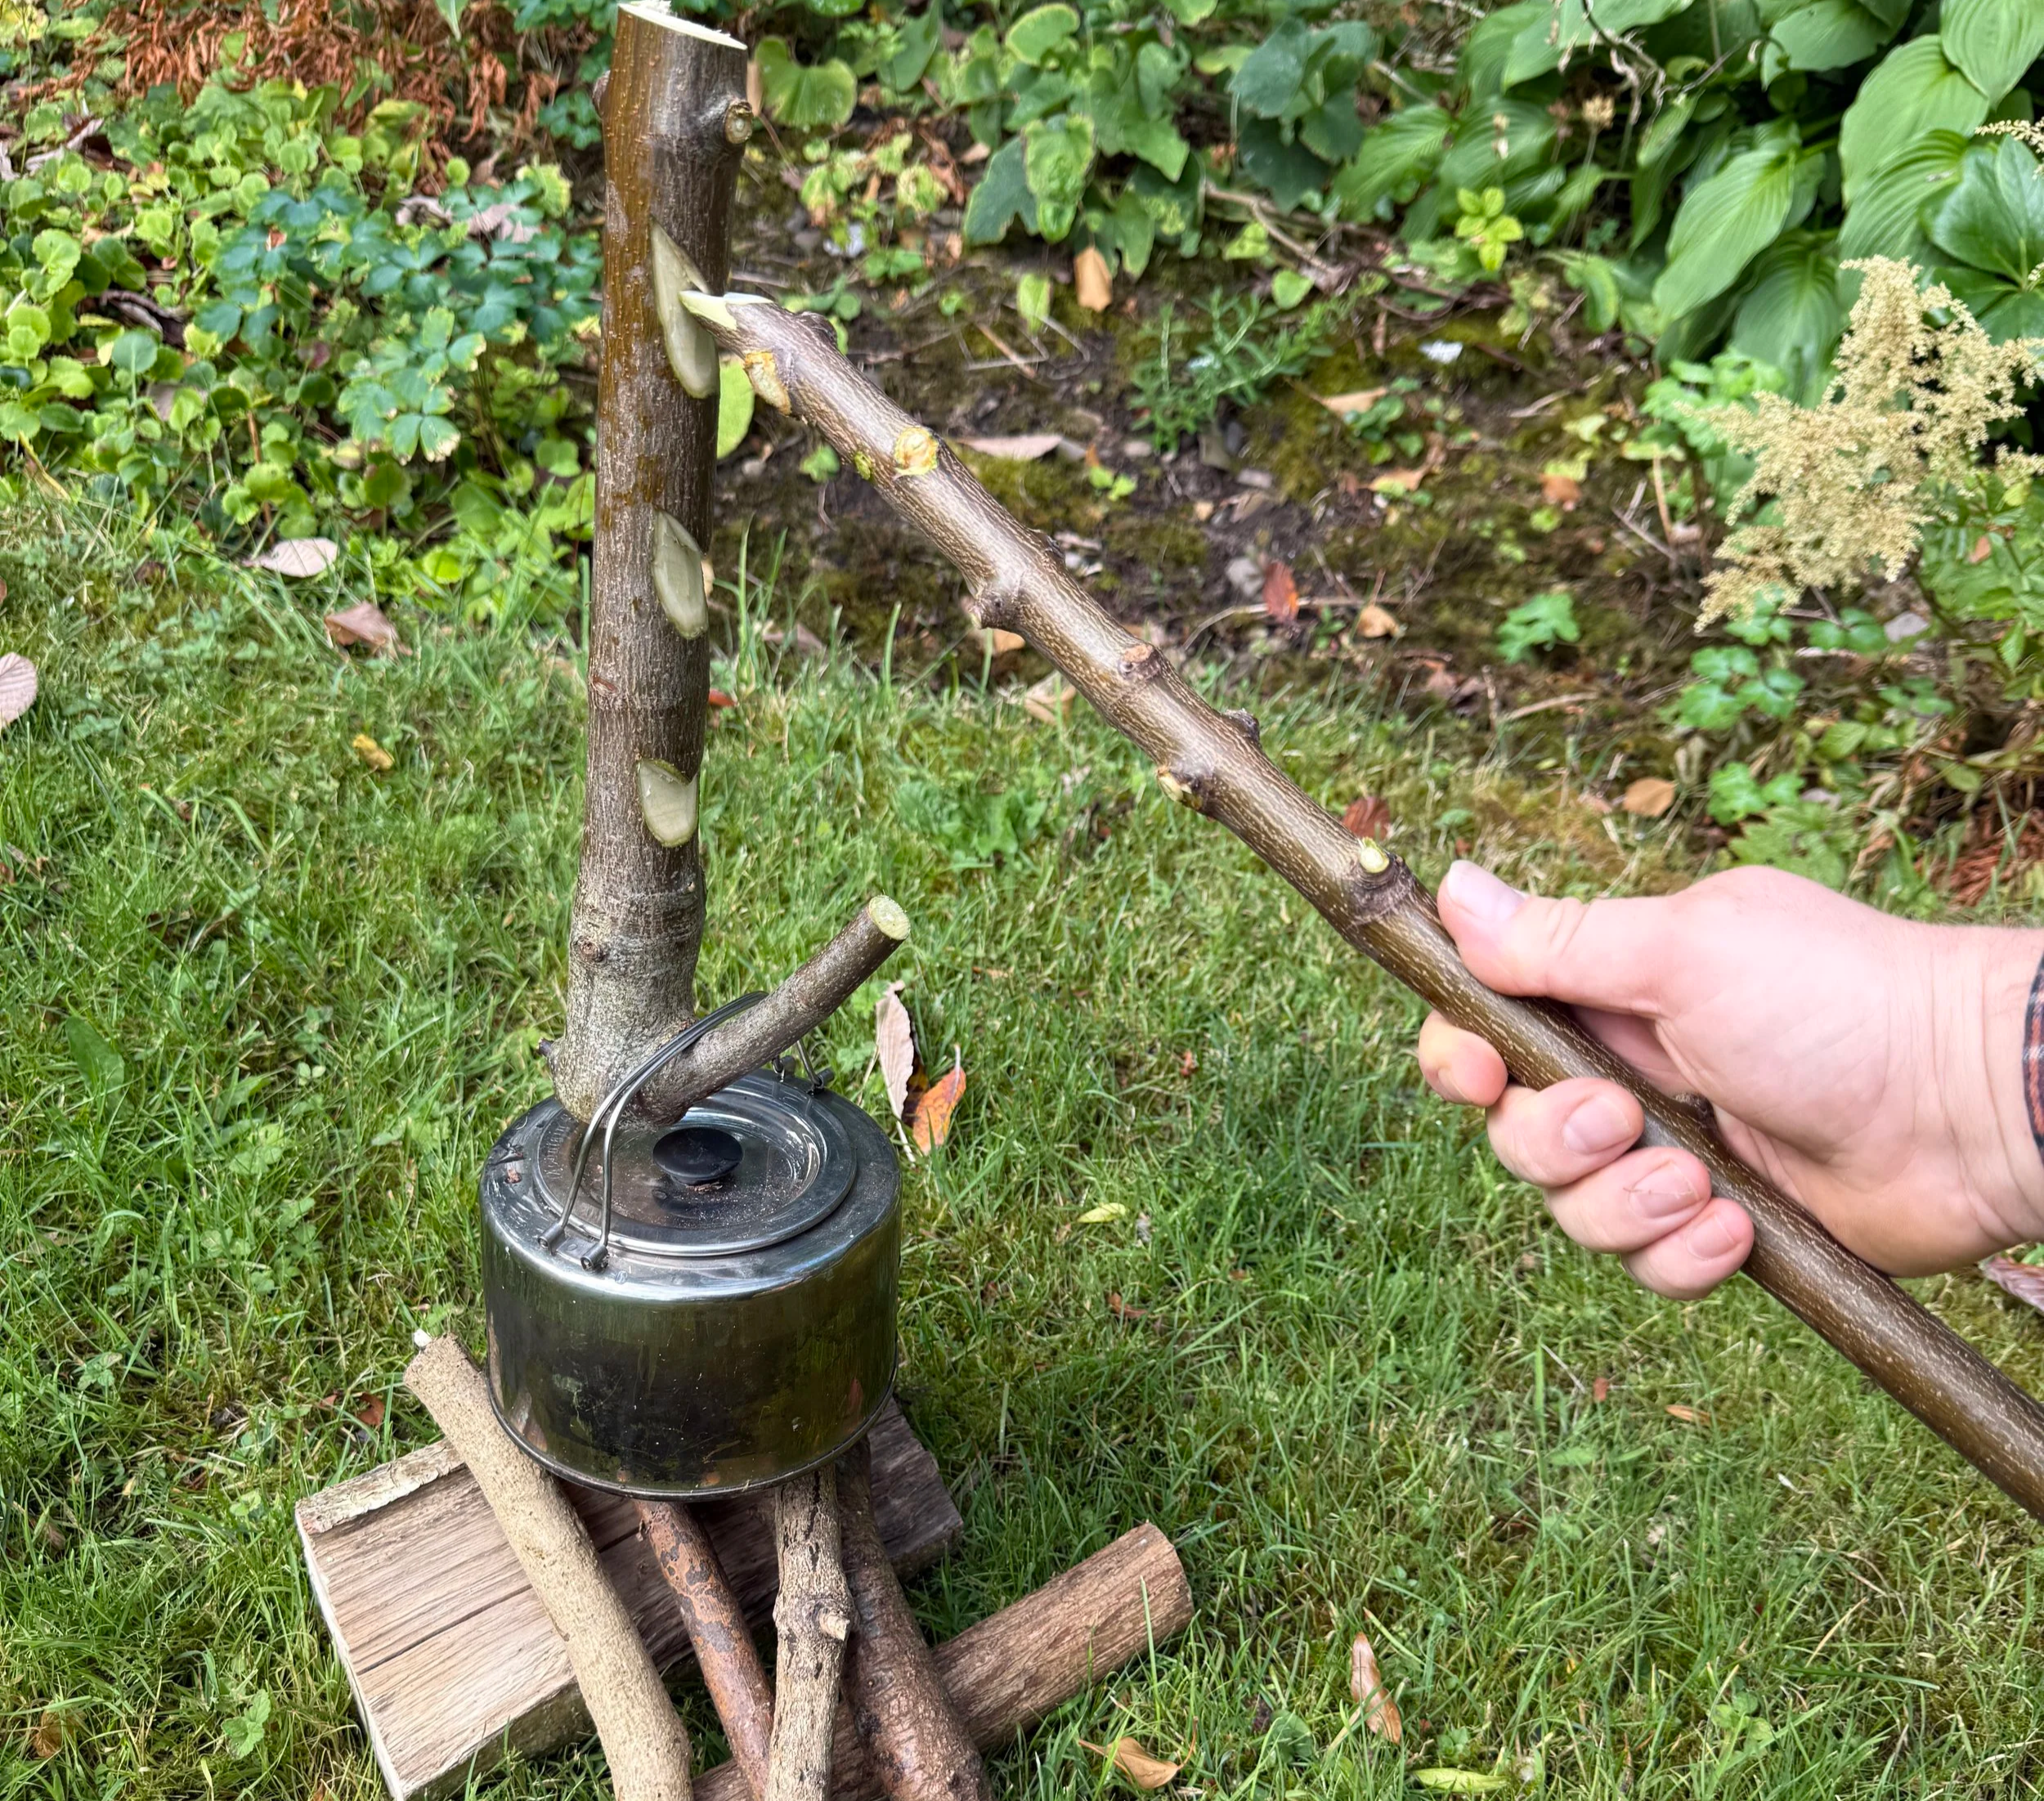
Assembly step 1 - Work out the rod angle
Hold the rod with hanger and kettle on and work out the angle with the back end of the rod on the ground. Do this with your hanger on the lowest setting and make sure it is the absolute lowest you would want your kettle to go.
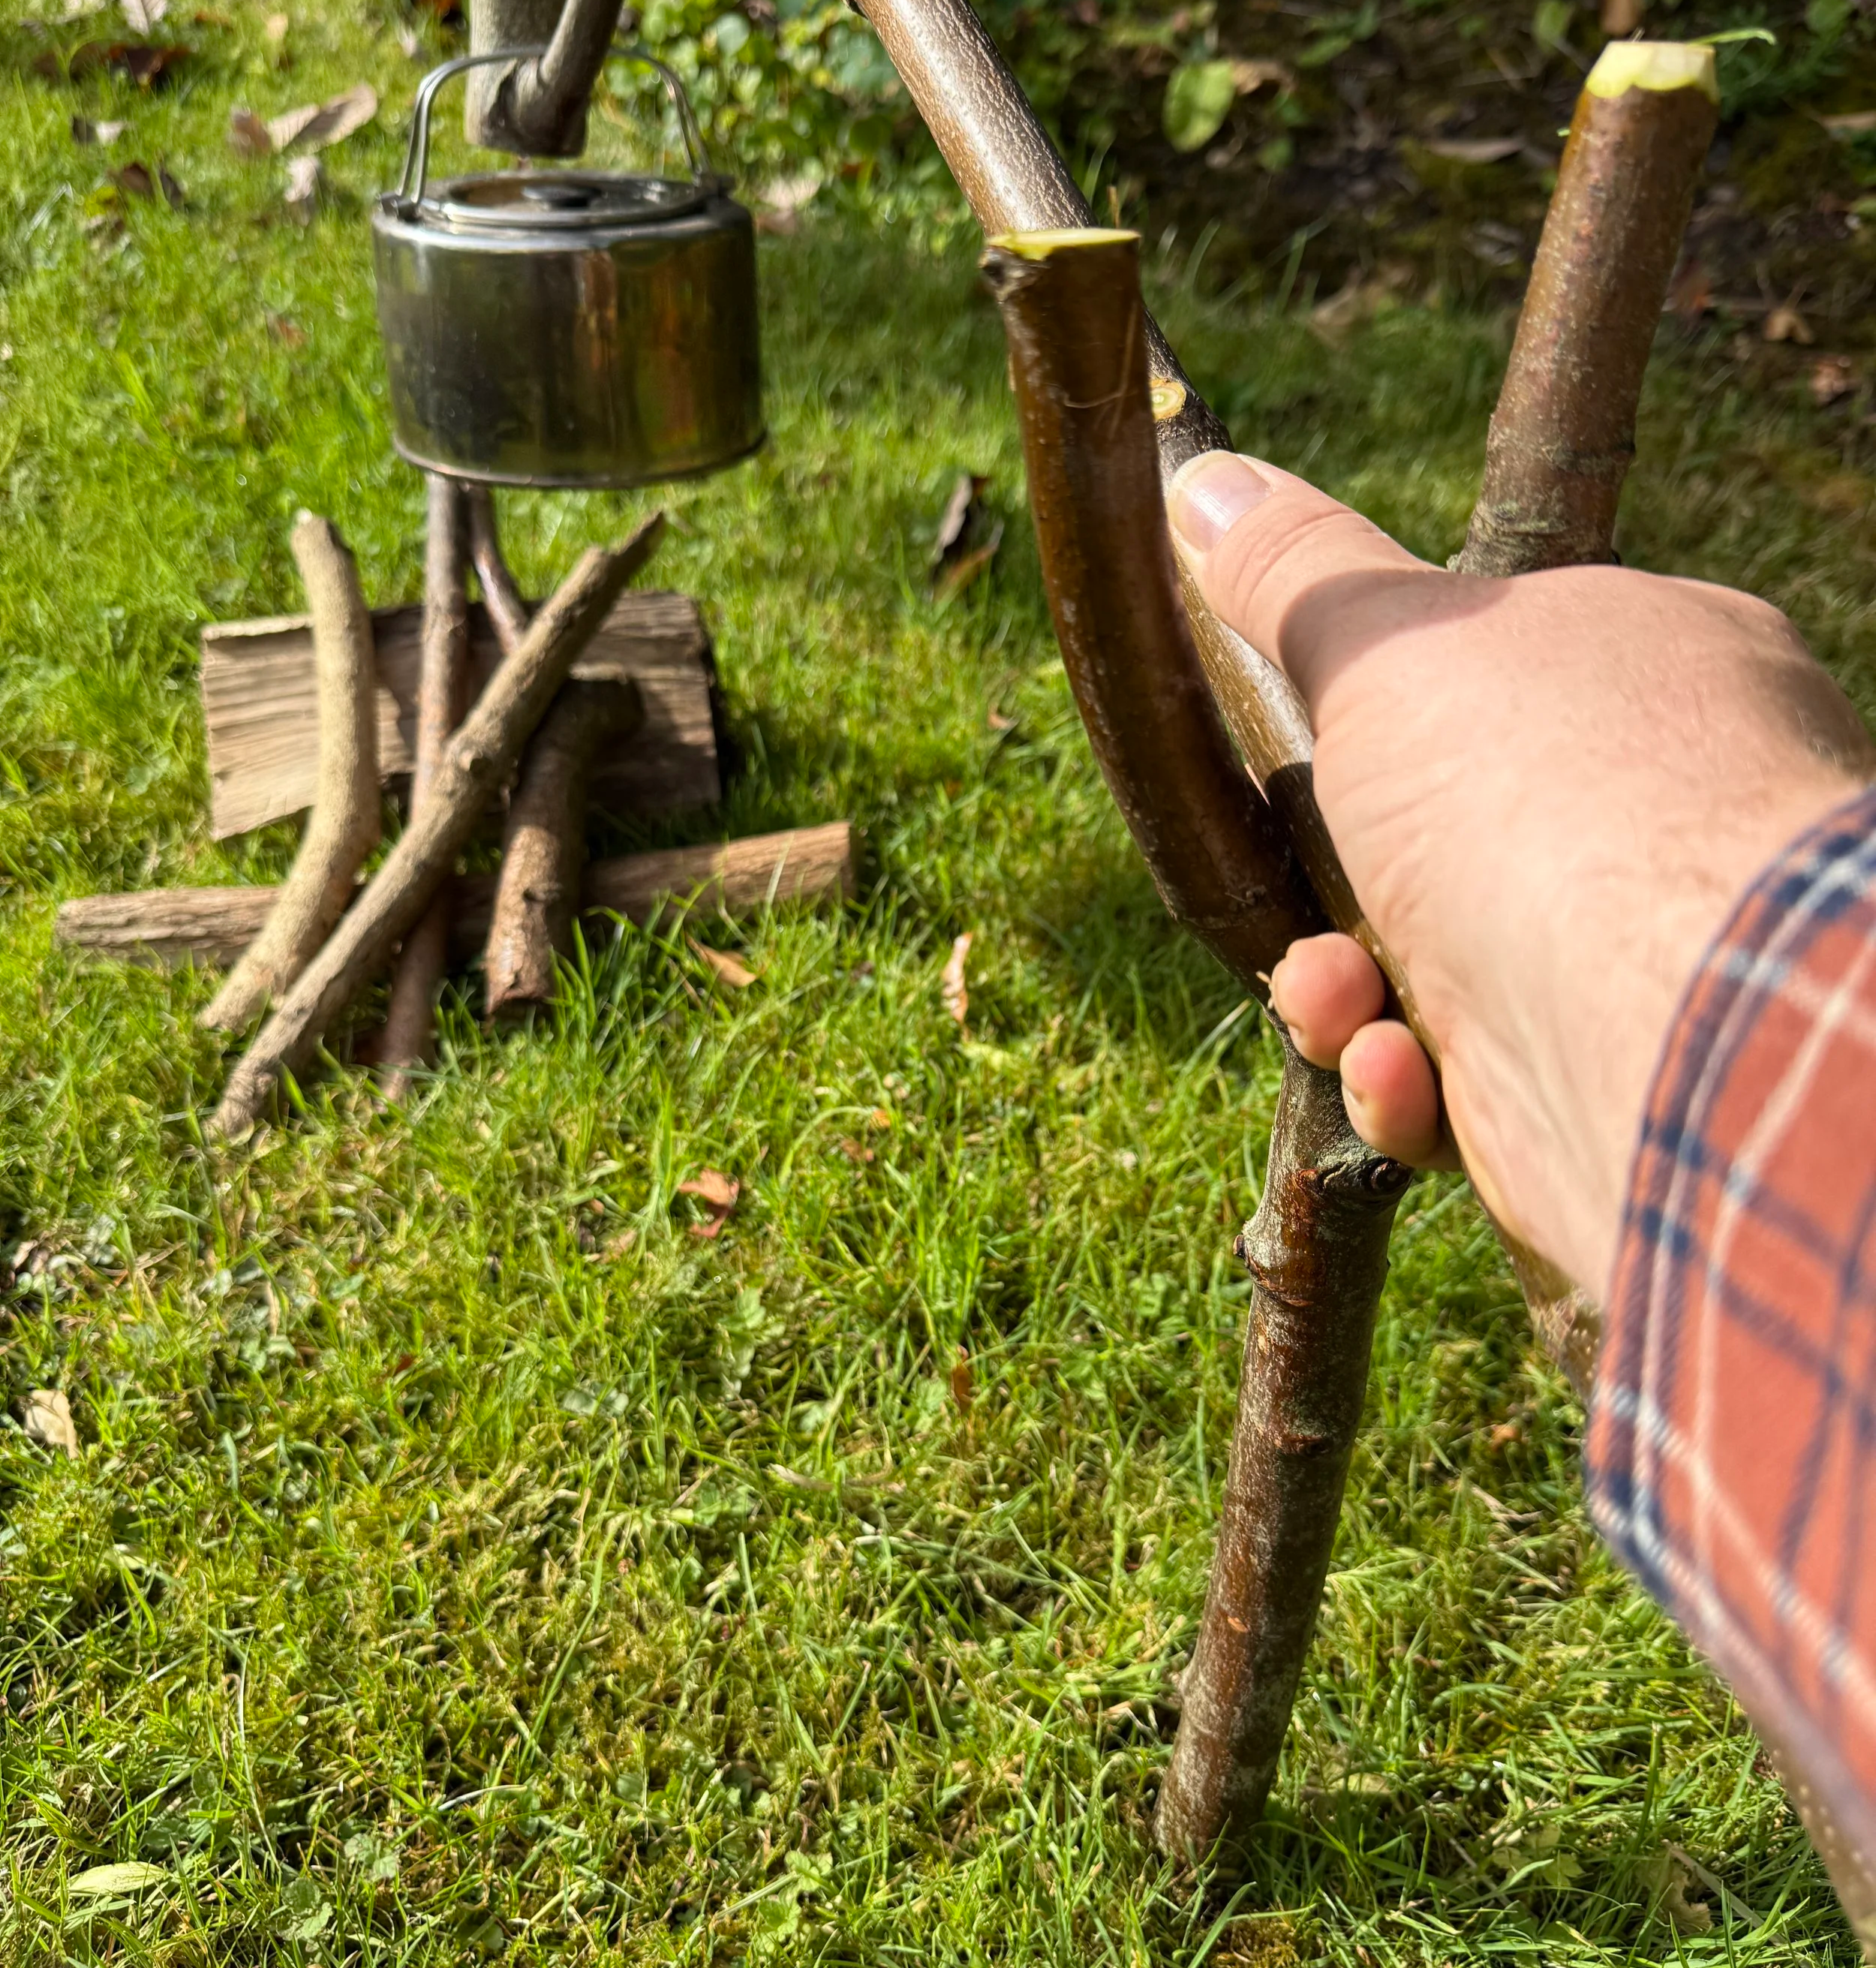
Assembly step 2 - Locate the fulcrum
Slide the fulcrum along the rod until the angle is correct. Bare in mind that the fulcrum will go a couple of inches into the ground and will therefore be lower. Remove the rod and mallet into the ground until fairly sturdy.
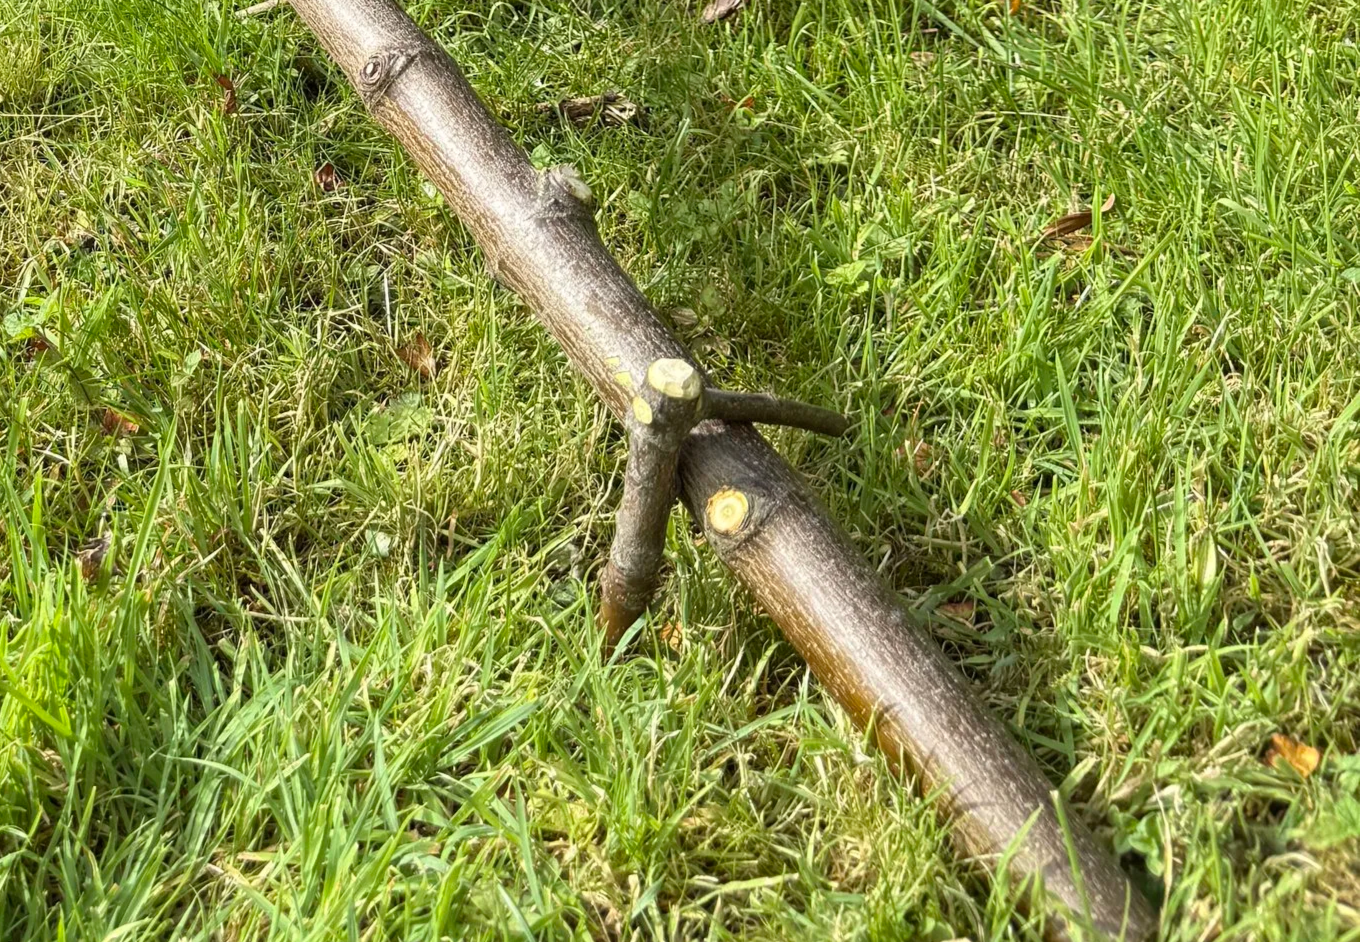
Assembly step 3 - Clamp with the peg
Finally, add an unweighted rod back on to the fulcrum in the right position and drive the peg down over the back end of the rod. Do this where the peg sits a few inches higher than the rod so that it has plenty of descent into the ground before engaging with the rod, securing it in place.
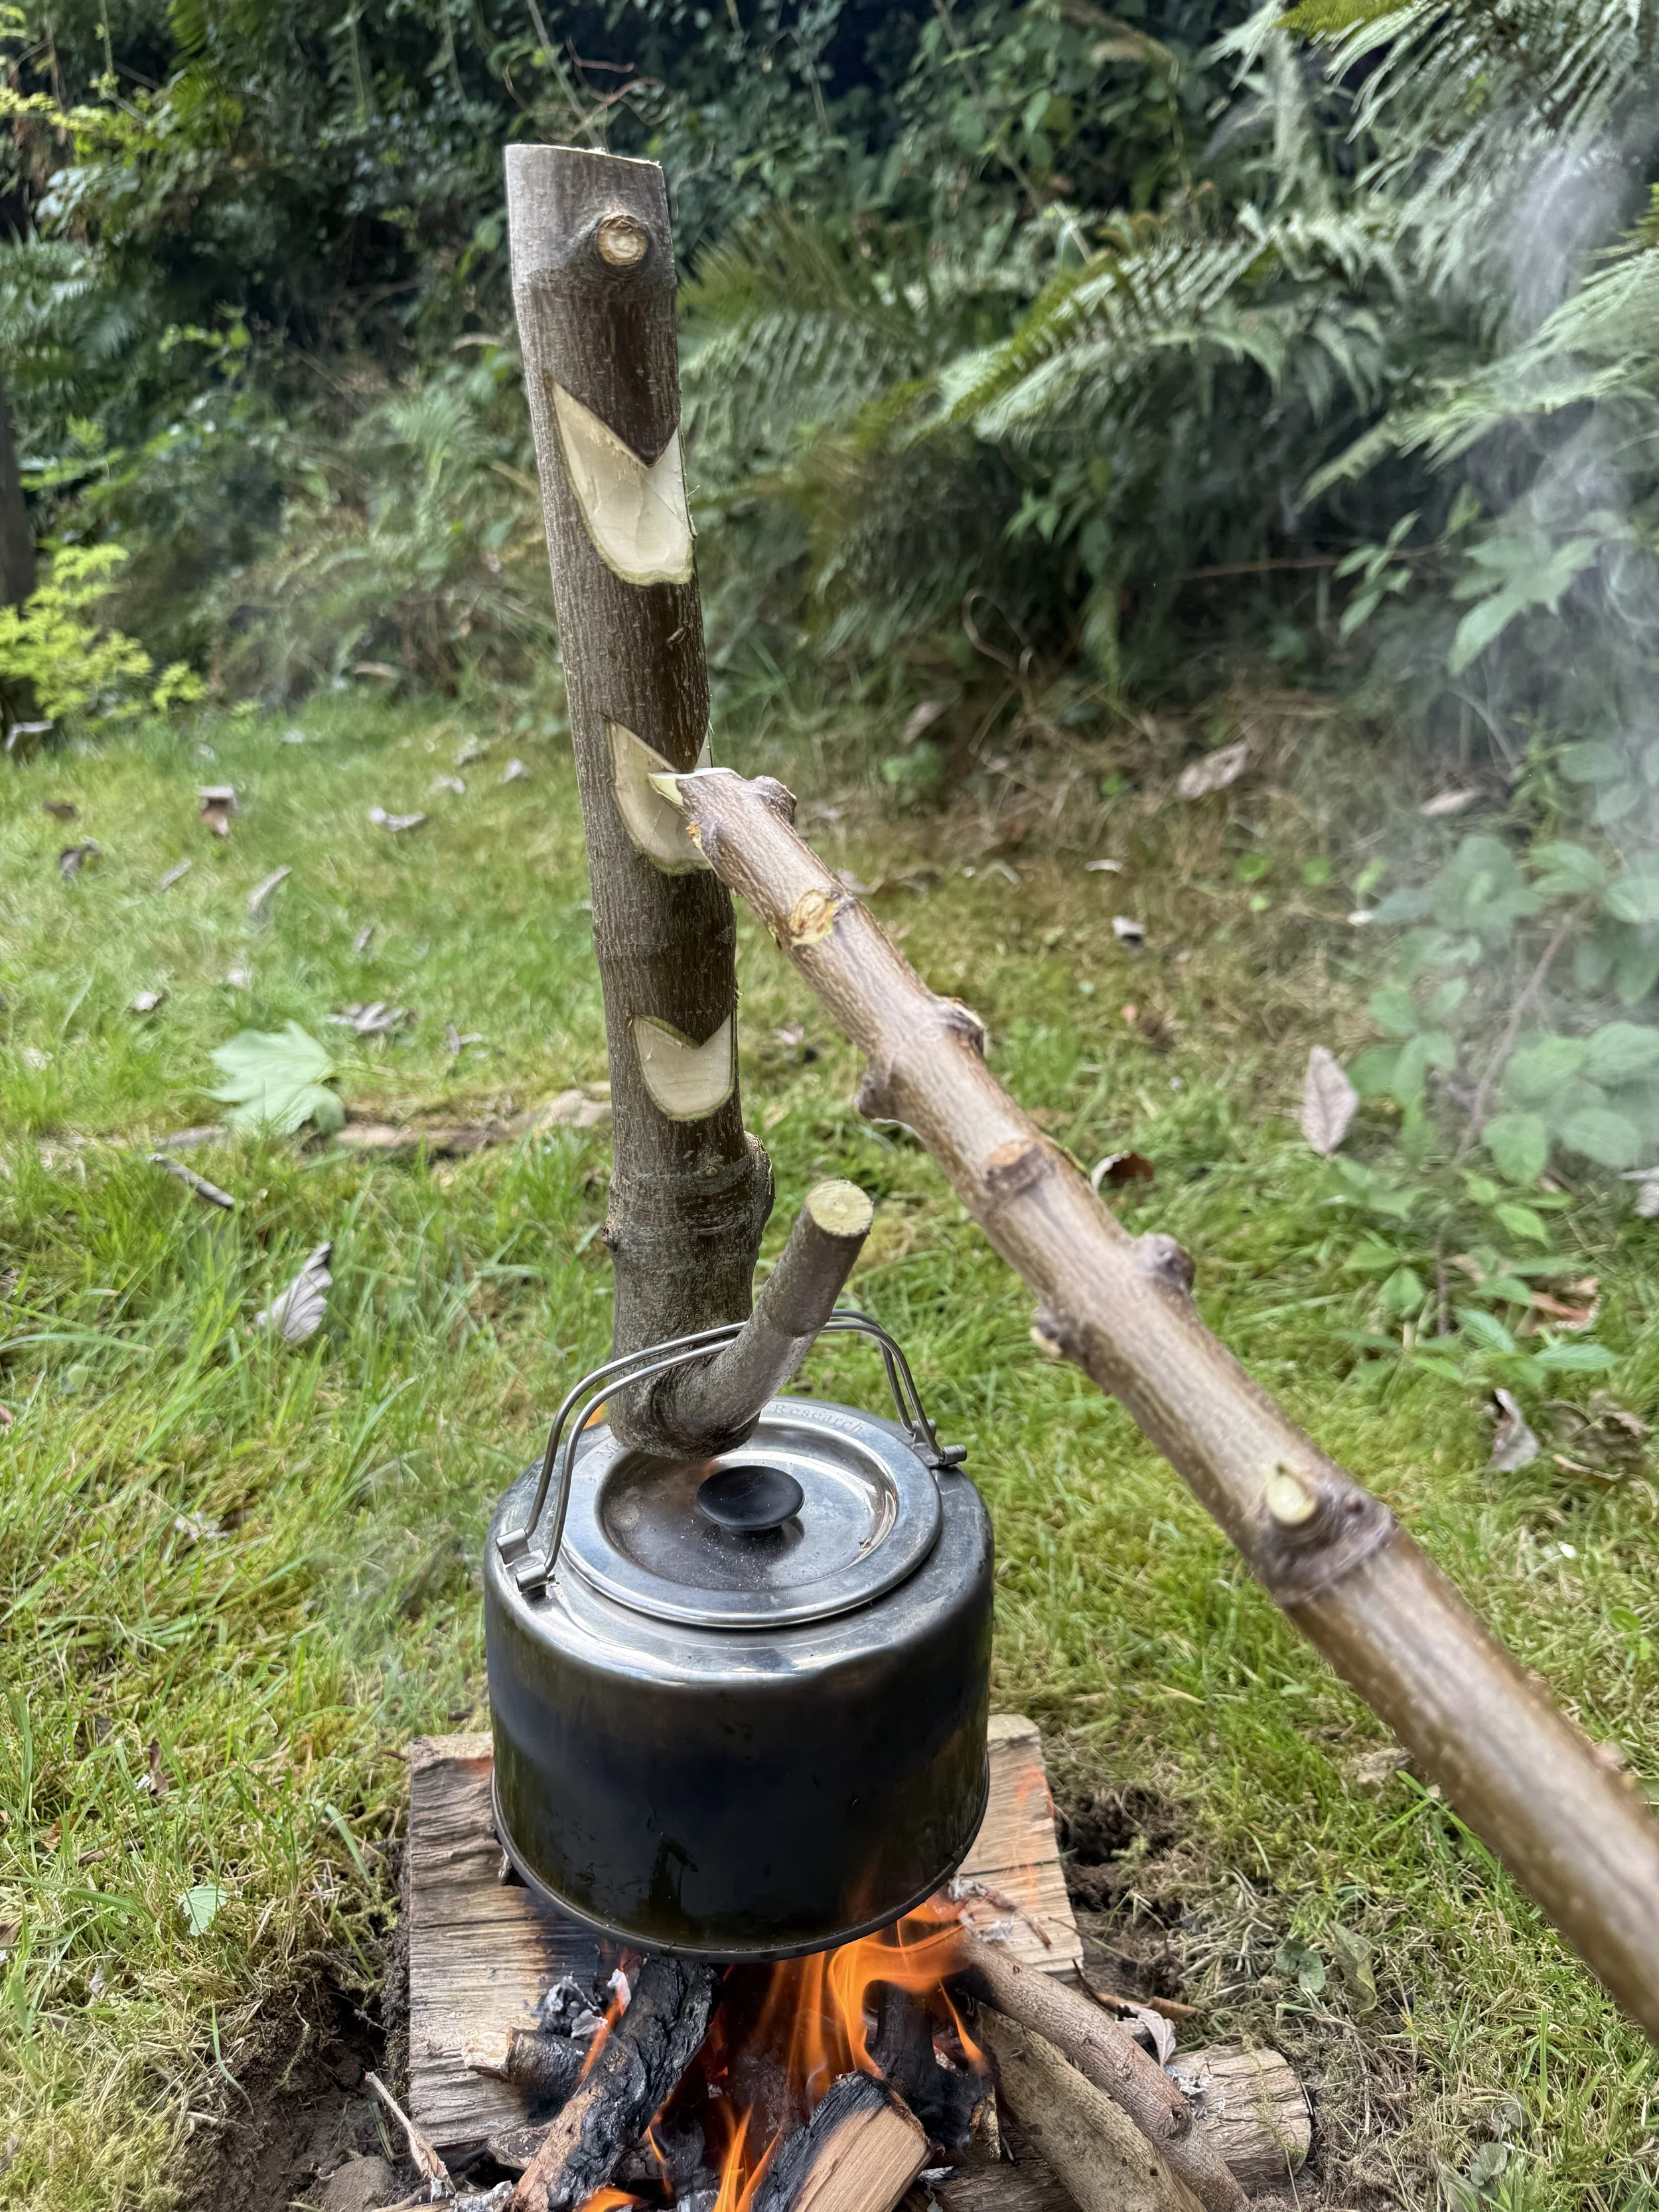
Adjustable cantilever pot hanger ready for use
You can now light your fire and add your hanger. The weight of the water/kettle provides ballast to the structure which locks the beak to the depression on the rod resulting in a surprisingly secure attachment. I have left these after delivering sessions only to find them a week or two later still attached despite enduring windy weather.
I hope you have found this crafting guide useful. It is a great project for practising different skills and although on the outset it is seemingly complicated, the principles behind it are actually very simple and after doing it once or twice, it becomes an increasingly fast technique to use when out and about.
Interested in learning more crafts to enhance and develop your skillset? Consider booking a session with us where we can tailor the learning to your needs. Click here to look at some of the learning module options or click here to get in touch with us to find out more.